ViewPro Gimbals
ArduPilot 4.5 (and higher) support the ViewPro gimbals using ViewPro’s custom serial protocol.
Connection and Configuration
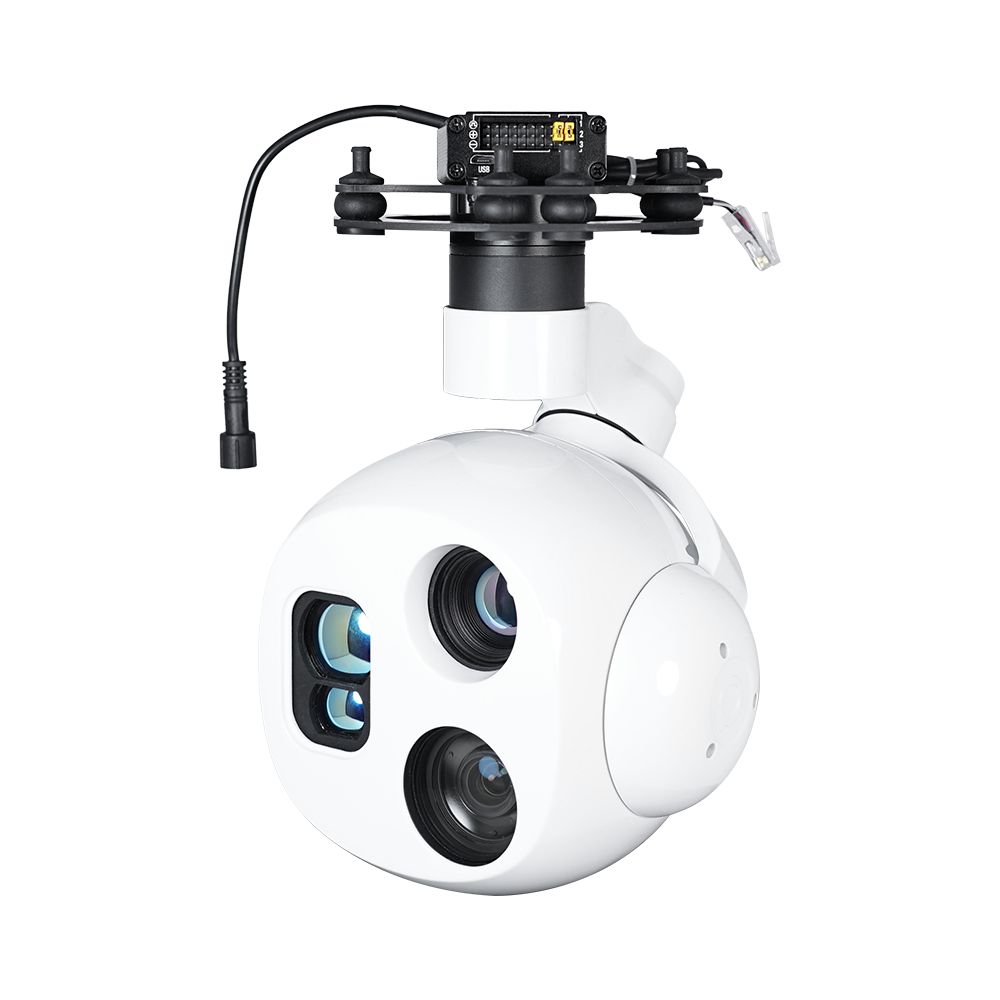
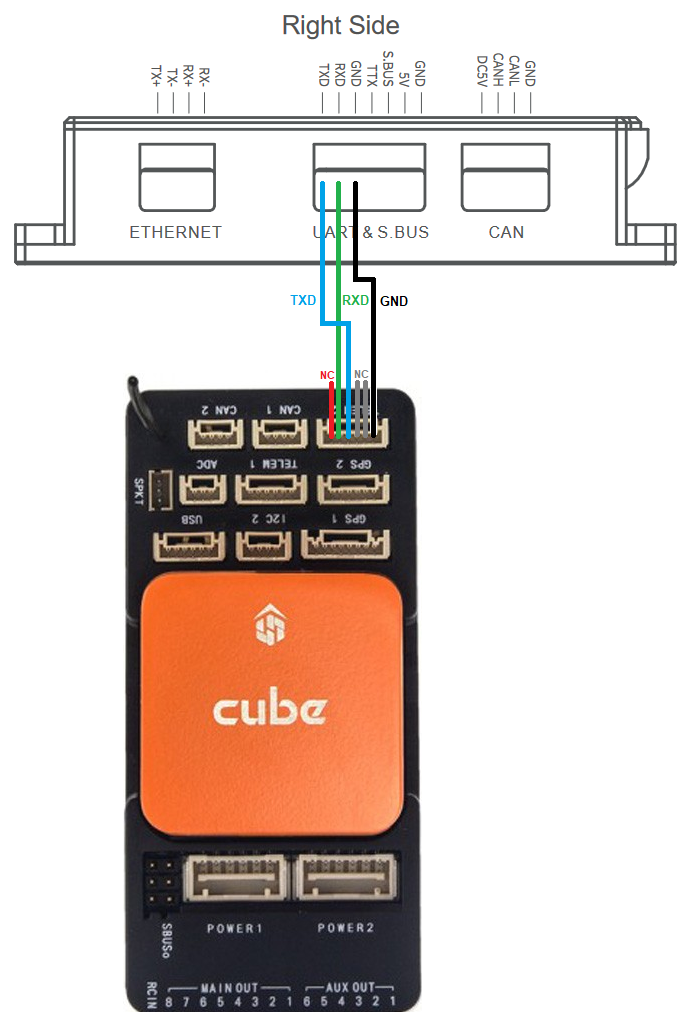
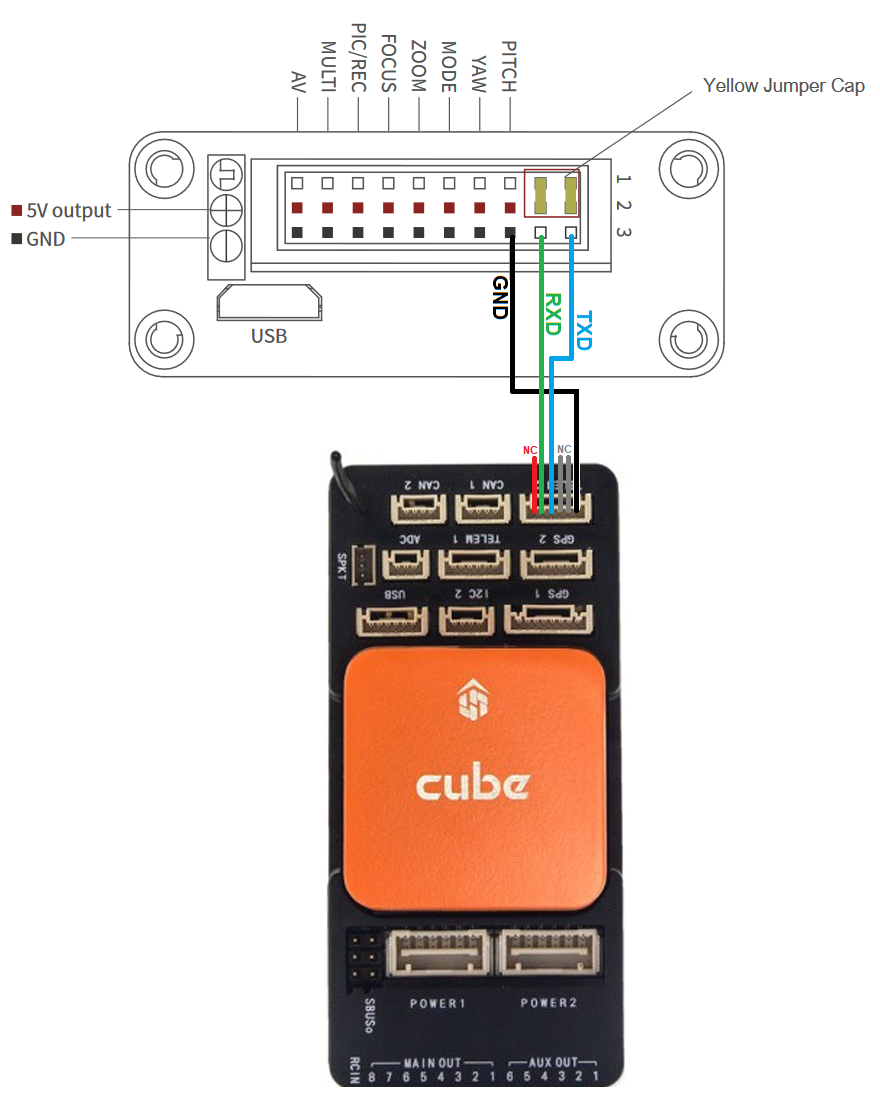
Connect one of the autopilot’s serial ports to the gimbal as shown below. The first image if for users with a “viewport” connection.
Using 4.5.x (or higher):
Set SERIAL2_PROTOCOL = 8 (Gimbal). This assumes the gimbal is attached to the autopilot’s Serial2 port but any serial port can be used.
Set SERIAL2_BAUD = 115
Set MNT1_TYPE = 11 (Viewpro)
Set CAM1_TYPE = 4 (Mount) to enable the camera control using the mount driver
RC6_OPTION = 213 (“Mount Pitch”) to control the gimbal’s pitch angle with RC channel 6
RC7_OPTION = 214 (“Mount Yaw”) to control the gimbal’s yaw angle with RC channel 7
Optionally these auxiliary functions are also available
RC9_OPTION = 166 (“Camera Record Video”) to start/stop recording of video
RC9_OPTION = 168 (“Camera Manual Focus”) to adjust focus in and out
RC9_OPTION = 169 (“Camera Auto Focus”) to trigger auto focus
RC9_OPTION = 174 (“Camera Image Tracking”) to track what is in the center of the image
RC9_OPTION = 175 (“Camera Lens”) to select which video stream is sent to the GCS
Control and Testing
See Gimbal / Mount Controls and Camera Controls for details on how to control the gimbal using RC, GCS or Auto mode mission commands
Rangerfinder Control
Some versions of the ViewPro Gimbals have a rangefinder that displays range in the OSD. This continuous ranging updating can be disabled using an RC switch whose RCx_OPTIONS is set to “177”.
Testing Video Streaming
To test video streaming works using a Windows PC, connect the camera’s ethernet cable to your local router.
Download and install VLC media player
On the PC, open Settings, Network & Internet, Ethernet
Find the “IP assignment” section, click the “Edit” button and select “Manual”
Move the IPv4 slider to On
IP address: 192.168.2.118
Subnet mask: 255.255.255.0
Gateway: 192.168.2.1
Preferred DNS: 10.10.0.101
Press “Save” (note you will likely lose your internet connection)
Open VLC media player, Select Media, Open Network Stream, Network and enter “rtsp://192.168.2.119:554”
Once completed testing, restore your internet by reverting the PC’s “IP assignment” to “Automatic (DHCP)”
Video can also be streamed to QGroundControl
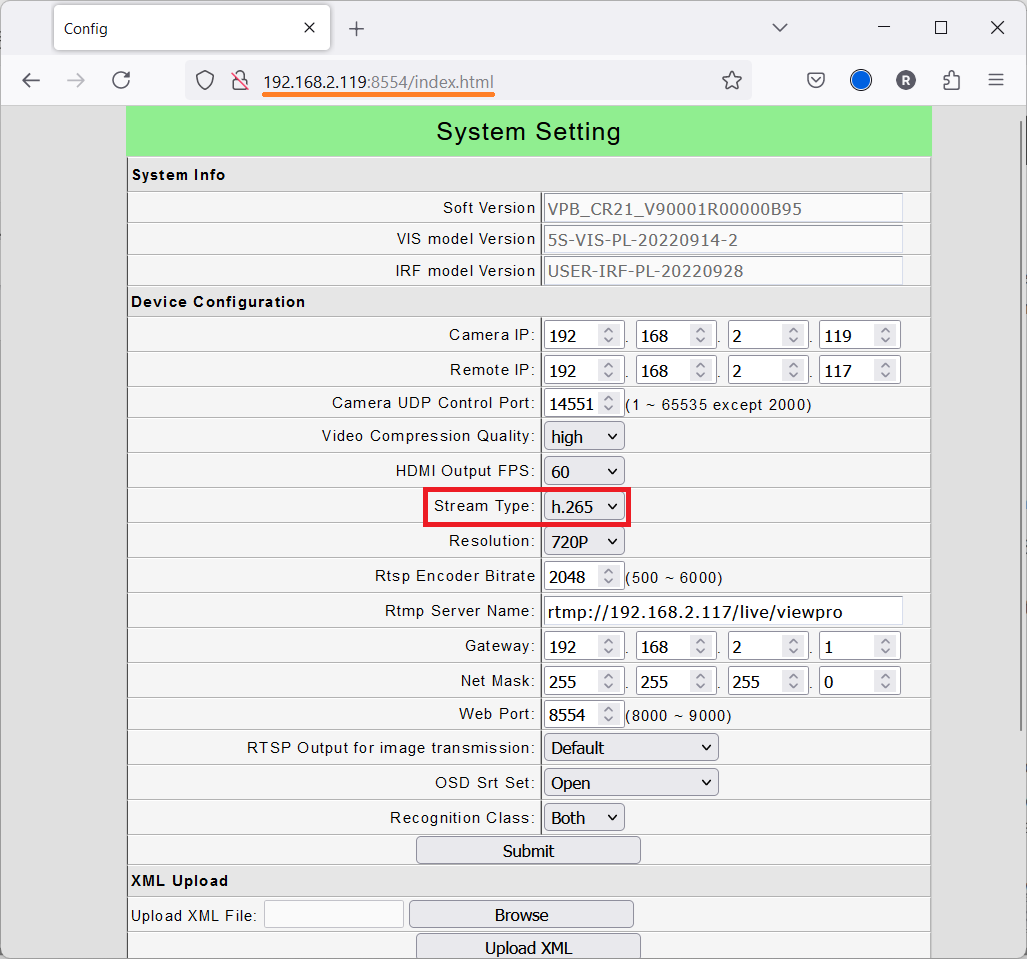
Open a web browser and enter the URL, “http://192.168.2.119:8554/index.html” to open the Viewpro System settings
Change the “Stream Type” to “h.265” as shown below
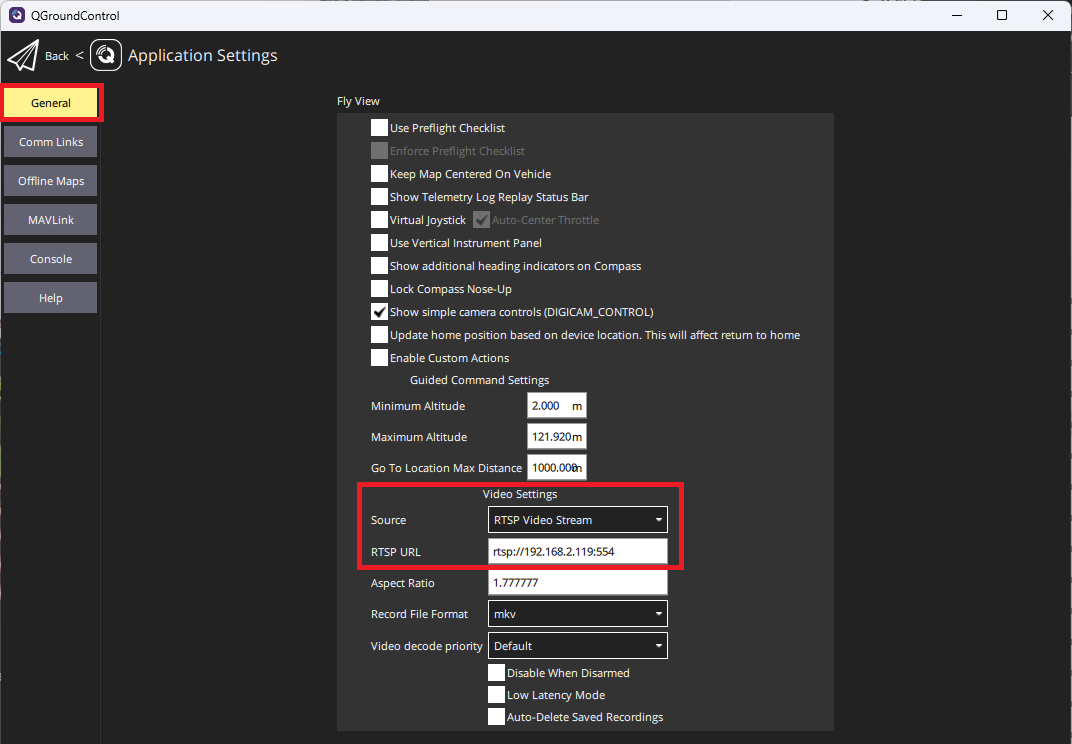
Open QGC’s Application Settings, General, and set Video Settings, Source to RTSP Video Stream
Set RTSP URL to “rtsp://192.168.2.119:554” as shown below
If using Mission Planner, the live video can be displayed on the Data screen by following these instructions
Downloading Images and Videos
If the gimbal is connected using Ethernet, images and videos stored on the SD card may be downloaded manually using the built-in webserver. Using your favourite browser open http://192.168.2.119:8554/download (assuming the gimbal is using the default IP address).
wget can also be used to download all images and videos with a single command
On Windows,
wget.exe -r -l 10 --convert-links http://192.168.2.119:8554/download/On Linux/Ubuntu
wget -r -l 10 --convert-links http://192.168.2.119:8554/download/