Gremsy Mio, Pixy, S1, T3, T7, and ZIO 3-Axis Gimbals
Gremsy Mio, Pixy F, Pixy U, Pixy WP, S1, T3, T7 and ZIO 3-axis gimbals can communicate with the autopilot using the MAVLink protocol and are compatible with a range of cameras for real-time video or mapping purposes.

Warning
MIO gimbals are unable to communication with ArduPilot. We hope for a fix with Gremsy software version 7.7.3.
T3V3 gimbals must be running 7.7.3-Preview (or higher).
PixyU gimbals must be running 7.7.1 or 7.7.2. 7.7.3 does not work correctly. We hope for a fix with Gremsy version 7.7.4 (or higher).
PixyWE gimbals are not supported.
ZIO gimbals cannot be used as a secondary mount (e.g. “Connecting Two Gimbals” below does not work with the ZIO)
Where to Buy
These gimbals can be purchased from the Gremsy store
Connecting to the Autopilot
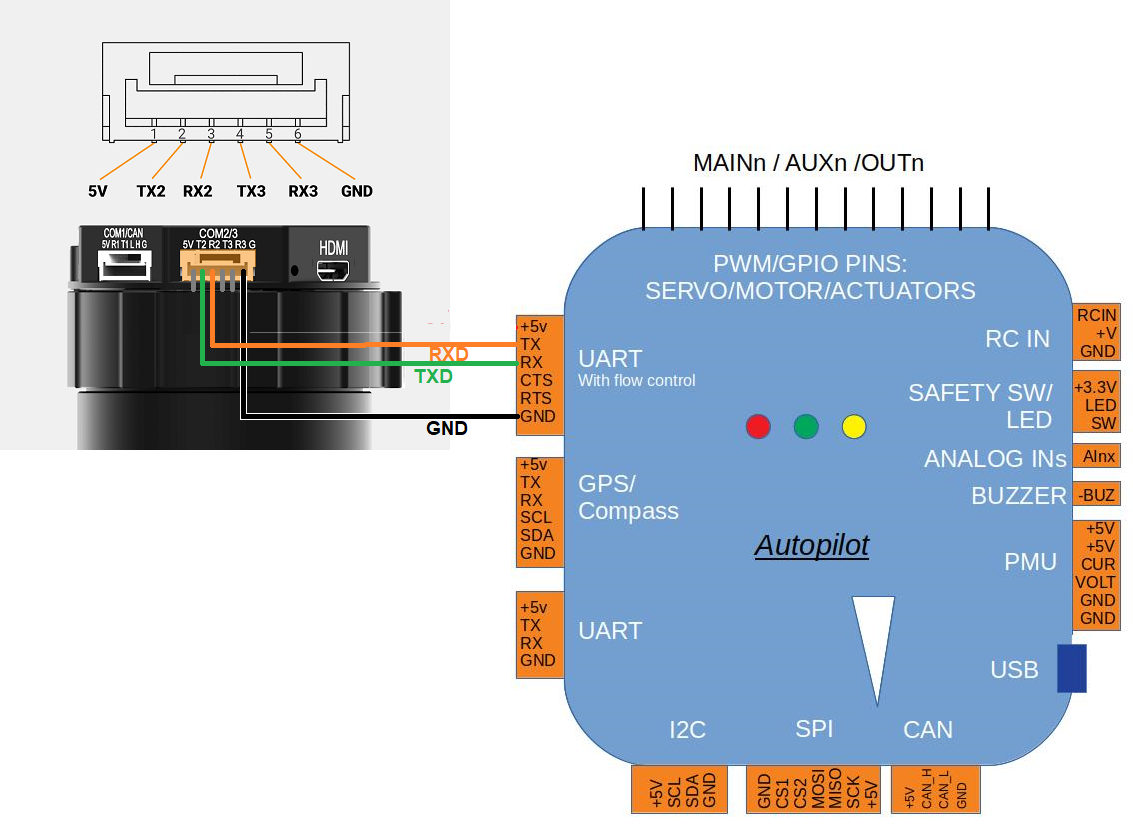
Connect the gimbals’s COM2 port to one of the autopilot’s Serial/Telemetry ports like Telem2 as shown above.
Connect to the autopilot with a ground station and set the following parameters, if using the first mount:
MNT1_TYPE to “6” for “MAVLink” and reboot the autopilot
If using a ZIO with ArduPilot-4.5.0 (or higher) set CAM1_TYPE to “6” (MAVLink..Gimbal V2 compatible) and reboot the autopilot
SERIAL2_BAUD to “115” for 115200 bps. “SERIAL2” can be replaced with another serial port (i.e. SERIAL1) depending upon the physical connection
SERIAL2_PROTOCOL to 2 for “MAVLink2”
SERIAL2_OPTIONS to 1024 for “Don’t forward mavlink to/from”
See the “Control with an RC transmitter” section of this page for details on parameter changes required to control the gimbal through an RC Transmitter (aka “RC Targeting”)
When the autopilot has successfully connected to the gimbal, “Mount: GREMSY PixyU fw:7.7.1.0” (or similar) will be sent to the ground station. Looking for this message may be useful in determining if the autopilot and gimbal are communicating successfully.
Configuring the Gimbal
Download and install gTune Desktop
Connect the gimbal to your Desktop PC using a USB cable and power on the gimbal
Use gTune Desktop to check the gimbal firmware version
Open gTune Desktop application, “Found your device” should be displayed
Select “CONNECT”
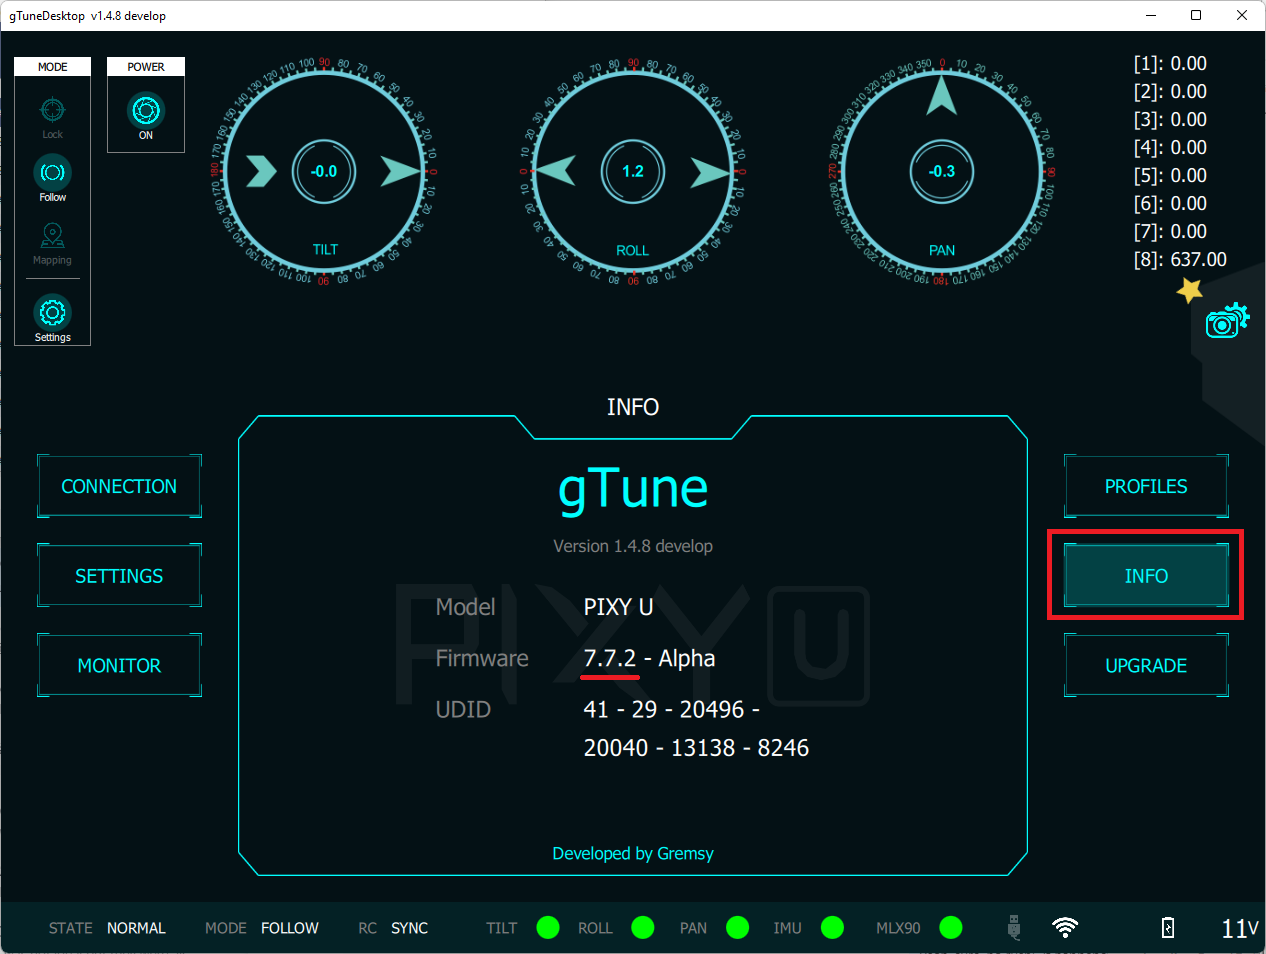
Select “INFO” and confirm the gimbal is running Firmware “7.7.1” or higher
If the gimbal firmware is older than 7.7.1 download the latest .hex for Mio, Pixy F, Pixy U, Pixy WP, S1, T3, T7 or ZIO
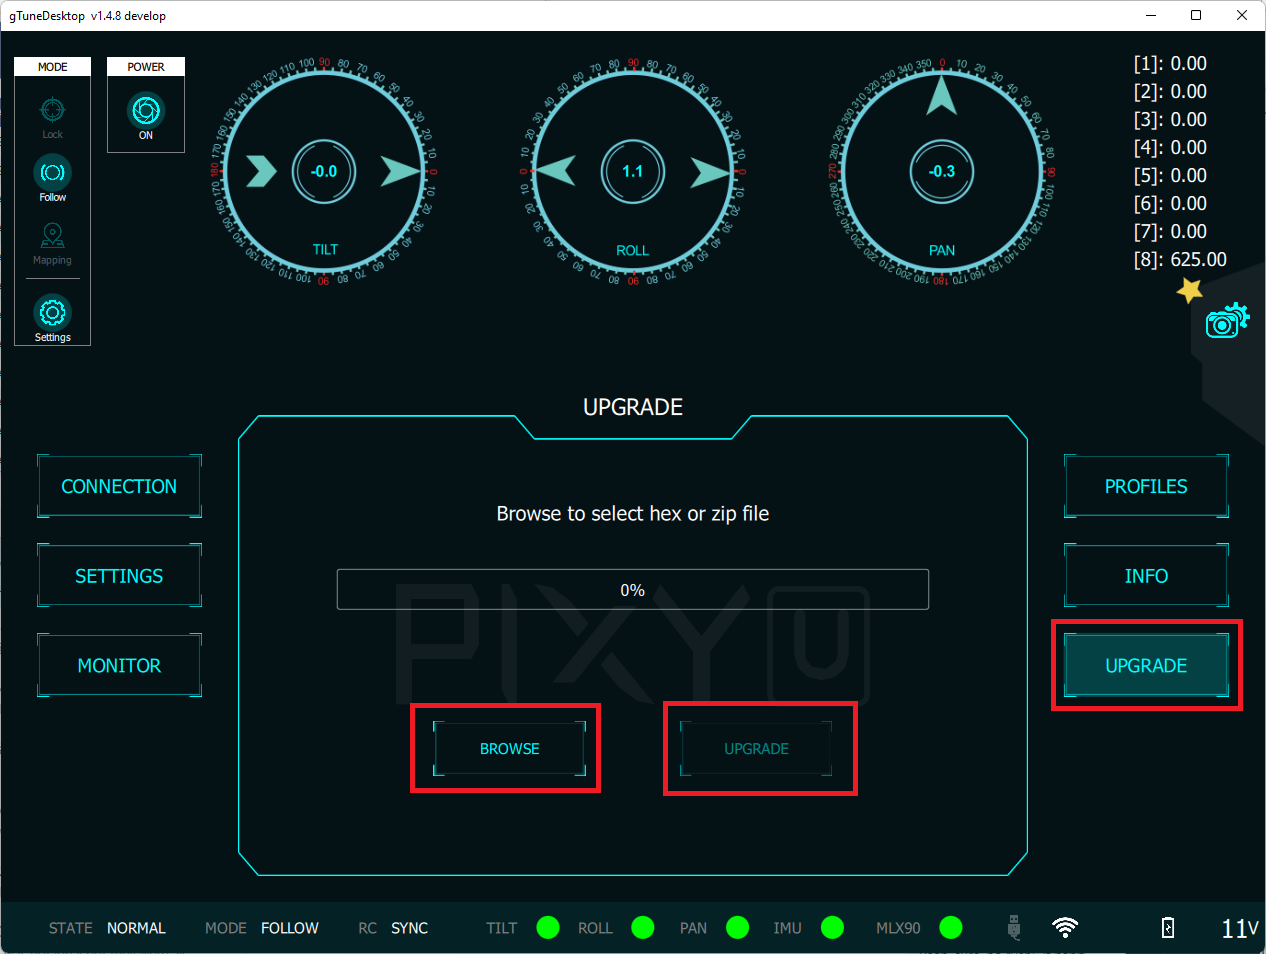
Select “UPGRADE”, “BROWSE” and select the file downloaded above
Press the other “UPGRADE” button and the upgrade should complete within 30 seconds
Use gTune Desktop to configure the gimbal
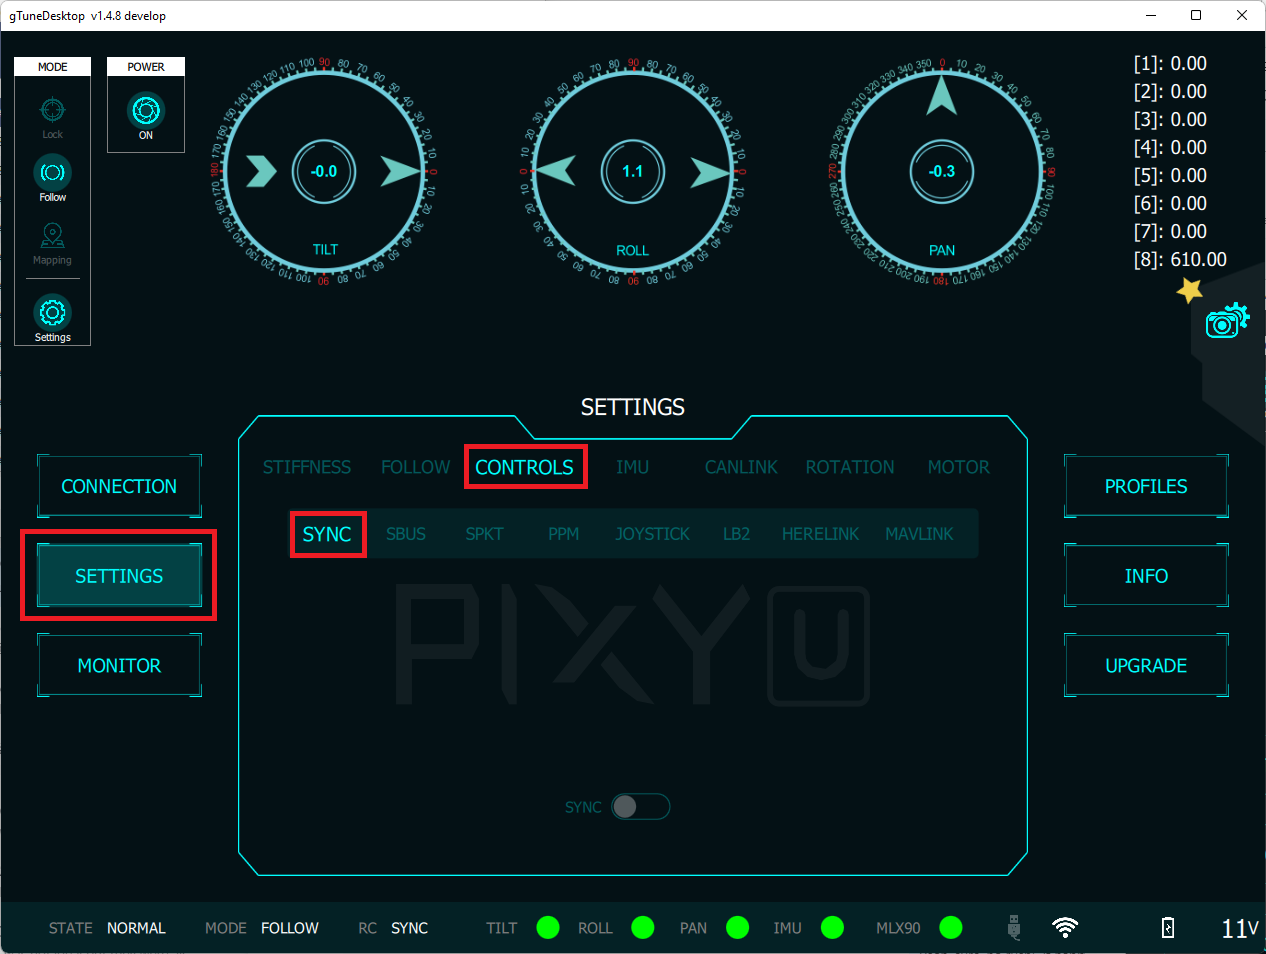
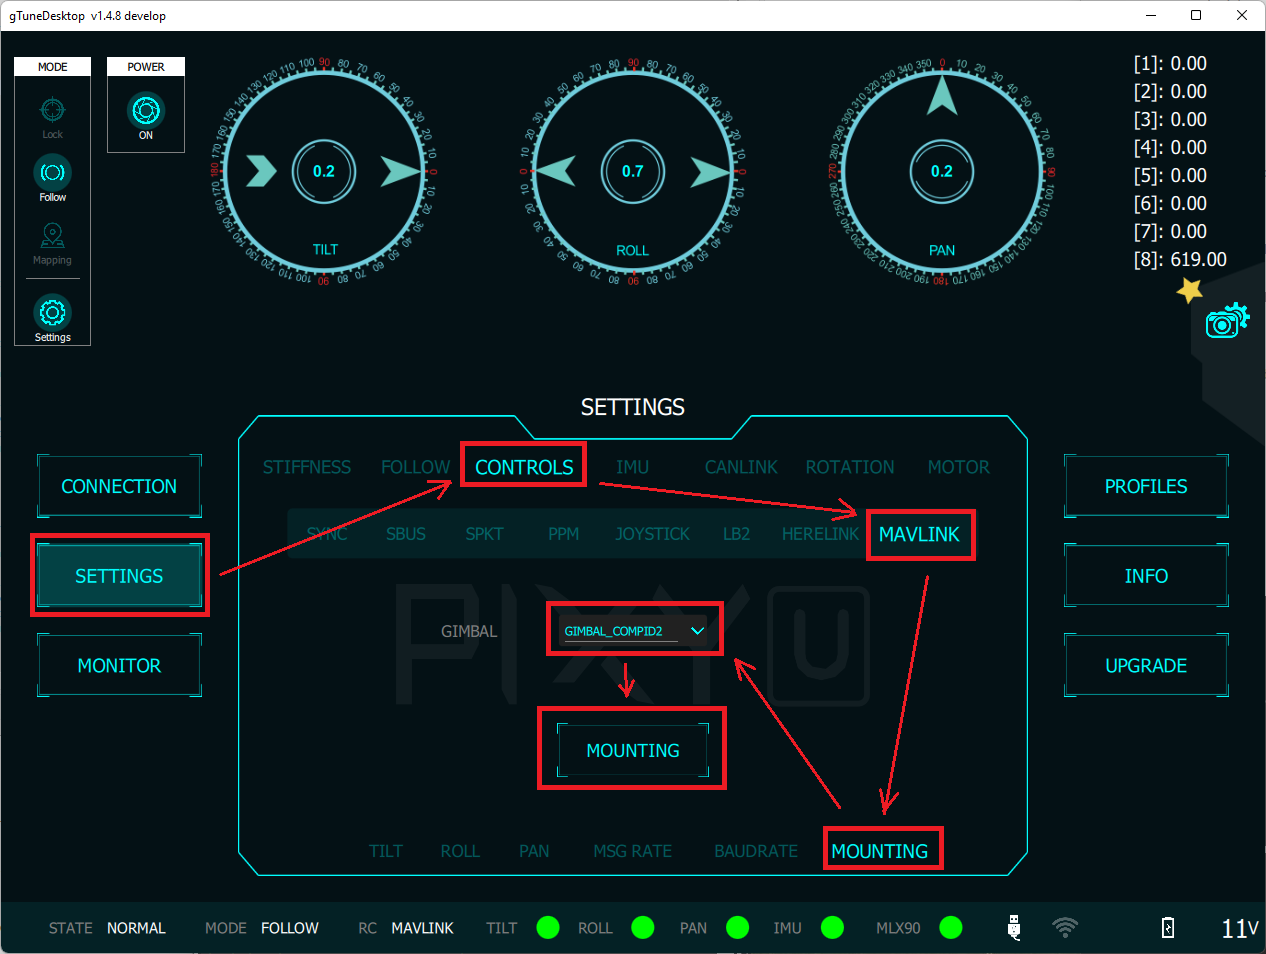
Select “SETTINGS”, “CONTROLS” and ensure “SYNC” is selected so the gimbal communicates with the autopilot using MAVLink
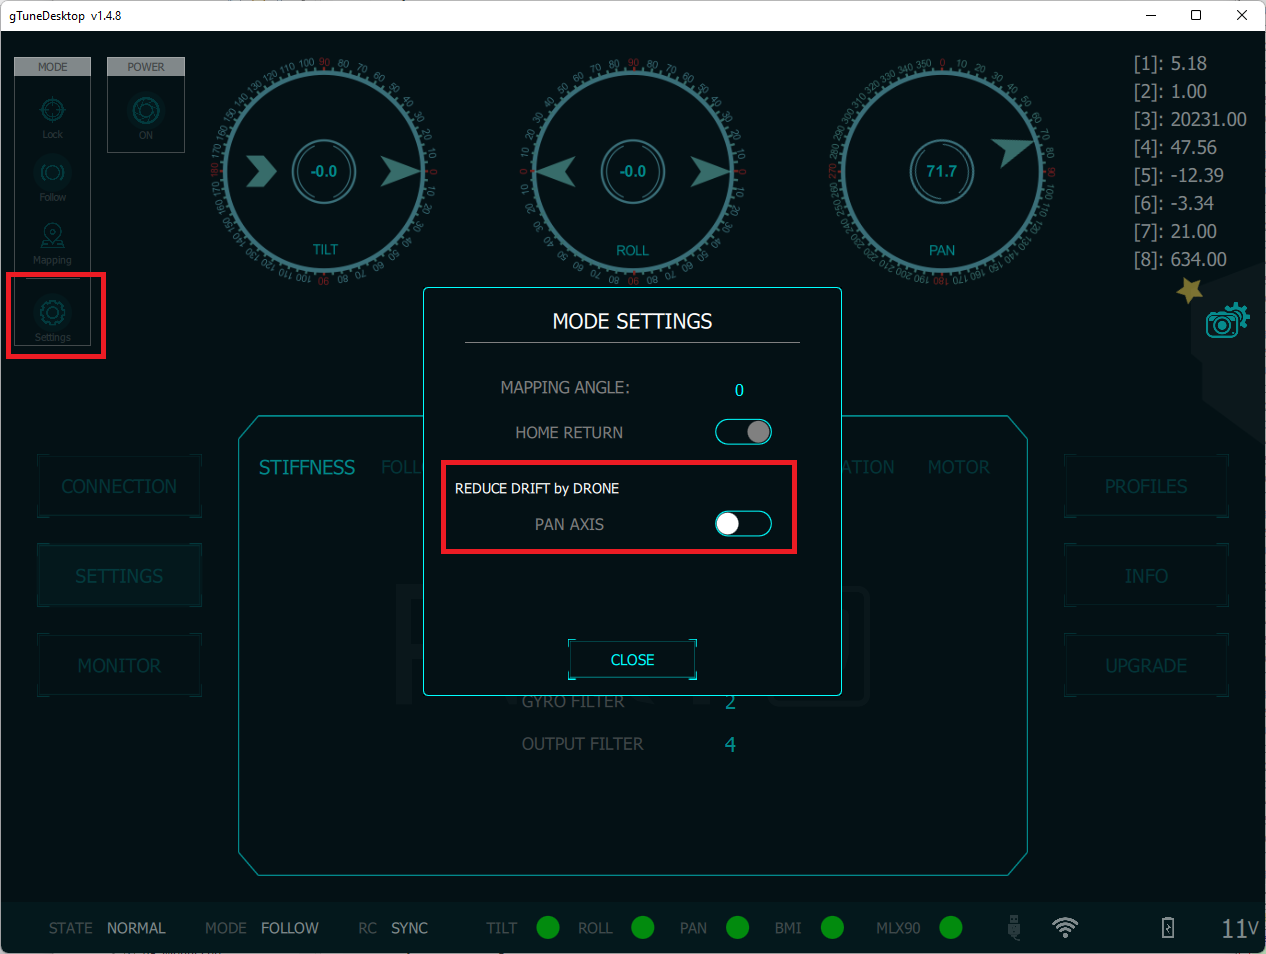
Select “Settings”, “REDUCE DIRFT by DRONE”
Select the “STIFFNESS” tab and adjust the Tilt, Roll, and Pan gains so that the gimbal holds the camera in position without shaking
Control and Testing
See Gimbal / Mount Controls for details on how to control the gimbal using RC, GCS or Auto mode mission commands
Connecting Two Gimbals
If two Gremsy gimbals are used, each gimbal can be directly connected to one of the autopilot’s serial ports or they can can be daisy-chained together with only one connected to one of the autopilot’s serial ports.
Use the gTune desktop application set the second gimbal’s MAVLink component id to “GIMBAL_COMPID2”
Connect a GCS to your autopilot and set
MNT2_TYPE to “6” for “Gremsy” and reboot the autopilot
set the appropriate SERIALx_BAUD, SERIALx_PROTOCOL and SERIALx_OPTIONS parameters as described above
Pilot Control
To control the gimbal’s lean angles from a transmitter set the RC controls for roll, pitch, or yaw using RCx_OPTION 212 (Mount1 Roll), 213 (Mount1 Pitch), 214 (Mount1 Yaw) for the first mount, or 215-217 for the second mount, respectively.
Gremsy’s instructions can be found below: