ADTi Cameras and Gimbals
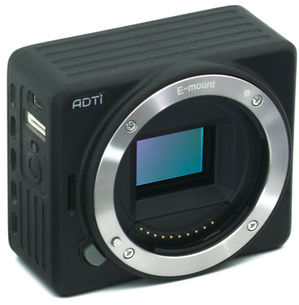
The ADTi manufactures and sells a range of high resolution cameras which are most often paired with Gremsy gimbals

Where to Buy
These gimbals can be purchased directly from ADTi
Connecting to the Autopilot
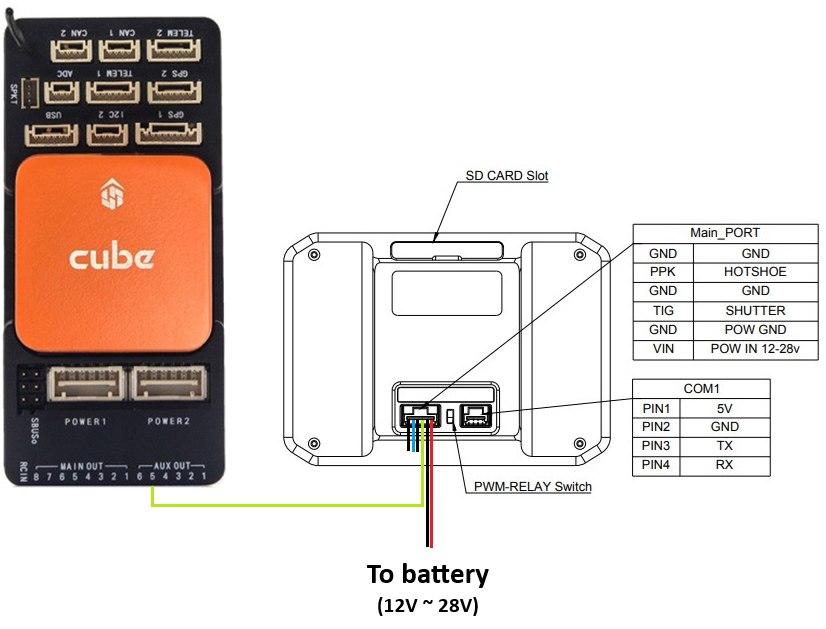
Connect the camera’s SHUTTER pin to one of the autopilot’s PWM outputs (e.g. AUXOUT 5). Below is the wiring for a ADTi 24sv3 but the port location may be different for each camera type. Please open the ADTi support site, select your camera type and refer to the “Camera Engineer Drawings” to find the SHUTTER pin location for your camera

To control the camera shutter using PWM set the following parameters. These parameters assume the autopilot’s AUXOUT 5 is connected to the camera’s shutter trigger
CAM1_TYPE = 1 (Servo)
CAM1_DURATION = 0.4 seconds
CAM1_SERVO_OFF = 1250
CAM1_SERVO_ON = 1850
SERVO13_FUNCTION = 10 (CameraTrigger)
To control the camera shutter using a Relay set the following parameters. These parameters assume the autopilot’s AUXOUT 5 is connected to the camera’s shutter trigger
CAM1_TYPE = 2 (Relay)
CAM1_DURATION = 0.4 seconds
CAM1_RELAY_ON = 0 (Low)
RELAY1_PIN = 54 (AUXOUT5)
SERVO13_FUNCTION = -1 (GPIO)
Optionally the camera shutter can be triggered from a transmitter auxiliary switch. The parameter below assumes the pilot wishes to use RC channel 9
RC9_OPTION = 9 (“Camera Trigger”) to take a picture
Configuring the Gimbal
Please refer to the Gremsy gimbal setup instructions for details on how to configure the gimbal
Control and Testing
See Gimbal / Mount Controls and Camera Controls for details on how to control the camera and gimbal using RC, GCS or Auto mode mission commands