Wheel Encoders
Rover supports up to two “AB” wheel encoders like those in this Pololu motor which can be used to improve position estimation especially when no GPS is used.
Connection and Setup
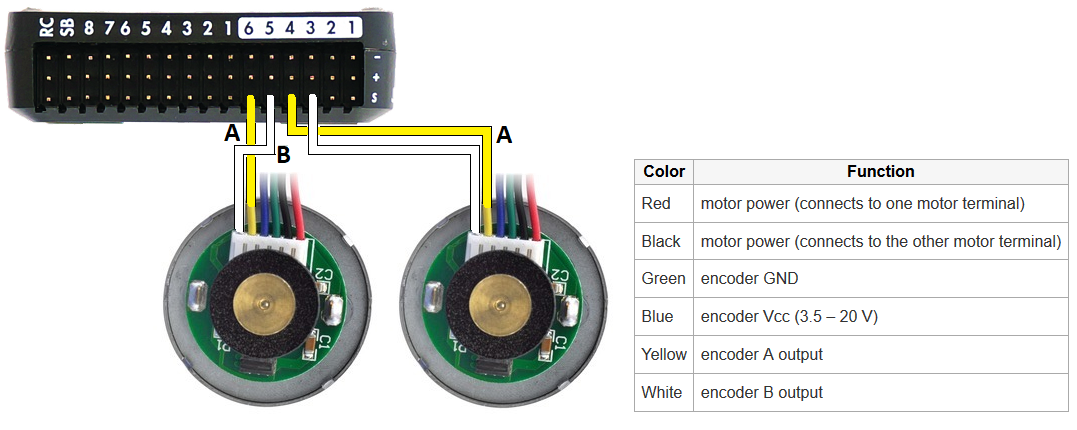
connect motor encoder’s A and B outputs to the autopilot (A Pixhawk using AUX OUT 3,4,5 and 6 pins is shown for example above).
set those output’s
SERVOx_FUNCTIONto -1 to allow them to be used as GPIO inputs. See GPIOs for more information. For the example above, set SERVO11_FUNCTION, SERVO12_FUNCTION, SERVO13_FUNCTION, and SERVO14_FUNCTION to “-1”.set WENC_TYPE and WENC2_TYPE to 1 to enable reading from two wheel encoders
set WENC_CPR and WENC2_CPR to the counts-per-revolution of the encoder. This is the number of “pings” the encoder will produce for each full revolution of the wheel
set WENC_RADIUS and WENC2_RADIUS to the radius (in meters) of each wheel (i.e. 5cm radius would be 0.05)
set WENC_POS_X and WENC_POS_Y to define the first wheel’s distance from the autopilot or COG (i.e. WENC_POS_X = 0.10, WENC_POS_Y = -0.05 means the wheel is 10cm ahead and 5cm left of the autopilot)
set WENC2_POS_X and WENC2_POS_Y to define the second wheel’s distance from the autopilot or COG
disable relays by setting RELAY1_PIN and RELAY2_PIN to -1
To enable position estimation using the wheel encoders the EKF3 must be used and configured as follows:
set AHRS_EKF_TYPE to 3 (means use EKF3)
set EK2_ENABLE to 0 (disable EKF2)
set EK3_ENABLE to 1 (enable EKF3)
set EK3_SRC1_VELXY to 7 (“WheelEncoder”)
(optionally) set EK3_SRC1_POSXY to 0 (“None”) to disable use of GPS for horizontal position
(optionally) set EK3_SRC1_VELZ to 0 (“None”) to disable use of GPS for vertical velocity
After making the above changes the autopilot should be rebooted
Ground Testing
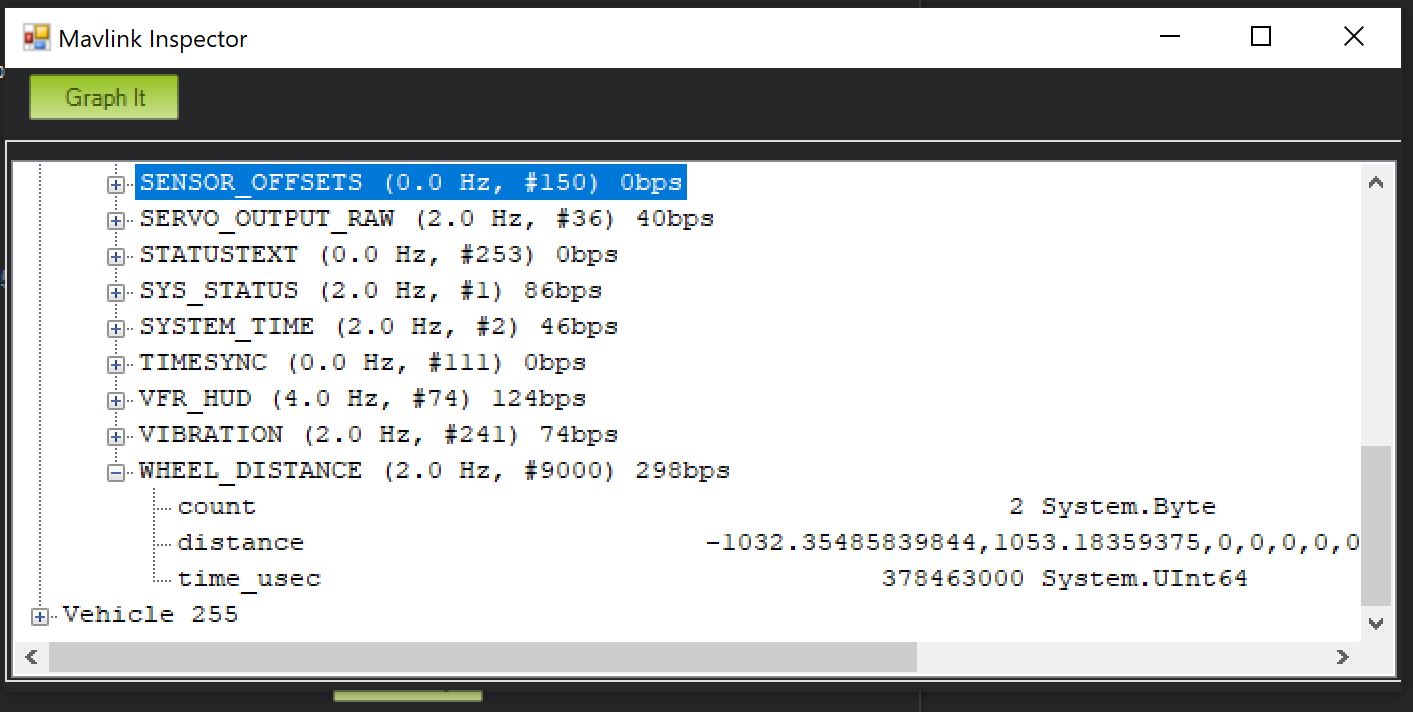
The WHEEL_DISTANCE MAVLink message shows the total distance travelled by each wheel in real time. Mission Planner’s MAVLink Inspector can be used which can be opened by pressing Ctrl-F and then pushing the “MAVLink Inspector” button.
DataFlash logging
The wheel encoder data including total distance travelled by each wheel appears in the WENC dataflash log messages.