Using SITL with Morse
Morse is an open robotics platform that uses python APIs and the blender 3D environment to create a complete robotics platform.
ArduPilot has a Morse SITL simulation backend that allows ArduPilot to control vehicles created within Morse.
Note
Morse has only been tested on Linux/Ubuntu environments
Installing Morse
Official instructions can be found on openrobots.com. Morse uses the Blender Game Engine API to render the build scripts. If the user is installing Morse on Ubuntu 20.04 or later, install the software from the source(manual installation) as described on the Morse installation page(mentioned above). But for older Ubuntu installs all you need is
sudo apt install morse-simulator
Checking the blender version
As mentioned above, Morse relies on the Blender Game Engine for rendering the simulations. Given the fact that the newer Blender versions (v2.80 and above) have discontinued the support for the game engine, users are requested to ensure that the installed Blender version ranges between v2.65 to v2.73 (Official version limit stated by Morse).
Note
Blender v2.74 - v2.79 are also valid versions, as these versions also provide access to a stable Blender Game Engine. The below image shows ArduPilot’s quadcopter Morse simulation running with Blender 2.76.
Builder Scripts
The Morse simulator has the concept of builder scripts, which are python scripts setup to run within the Morse/Blender environment.
Some example builder scripts for use with ArduPilot are provided in the ArduPilot/libraries/SITL/examples/Morse directory.
The examples include:
skid rover
separate Steering and Throttle rover
a simple quadcopter
a rover with a scanning laser rangefinder
These scripts setup the standard sensor suite that ArduPilot needs and exports them using the socket API. It is recommended that you read through both the rover.py and quadcopter.py examples to better understand how to interface Morse with ArduPilot.
Running the Examples
The following steps will get you running with the Skid Rover example.
Ensure the ArduPilot source code is installed on your machine
Open a terminal and start the rover simulator from within your /ardupilot directory:
morse run libraries/SITL/examples/Morse/rover_skid.py
Open another terminal to /ardupilot directory and start ArduPilot SITL, using the morse-skid simulation backend
Tools/autotest/sim_vehicle.py -v Rover --model morse-skid --add-param-file=libraries/SITL/examples/Morse/rover_skid.parm --console --map
A window like below should appear:
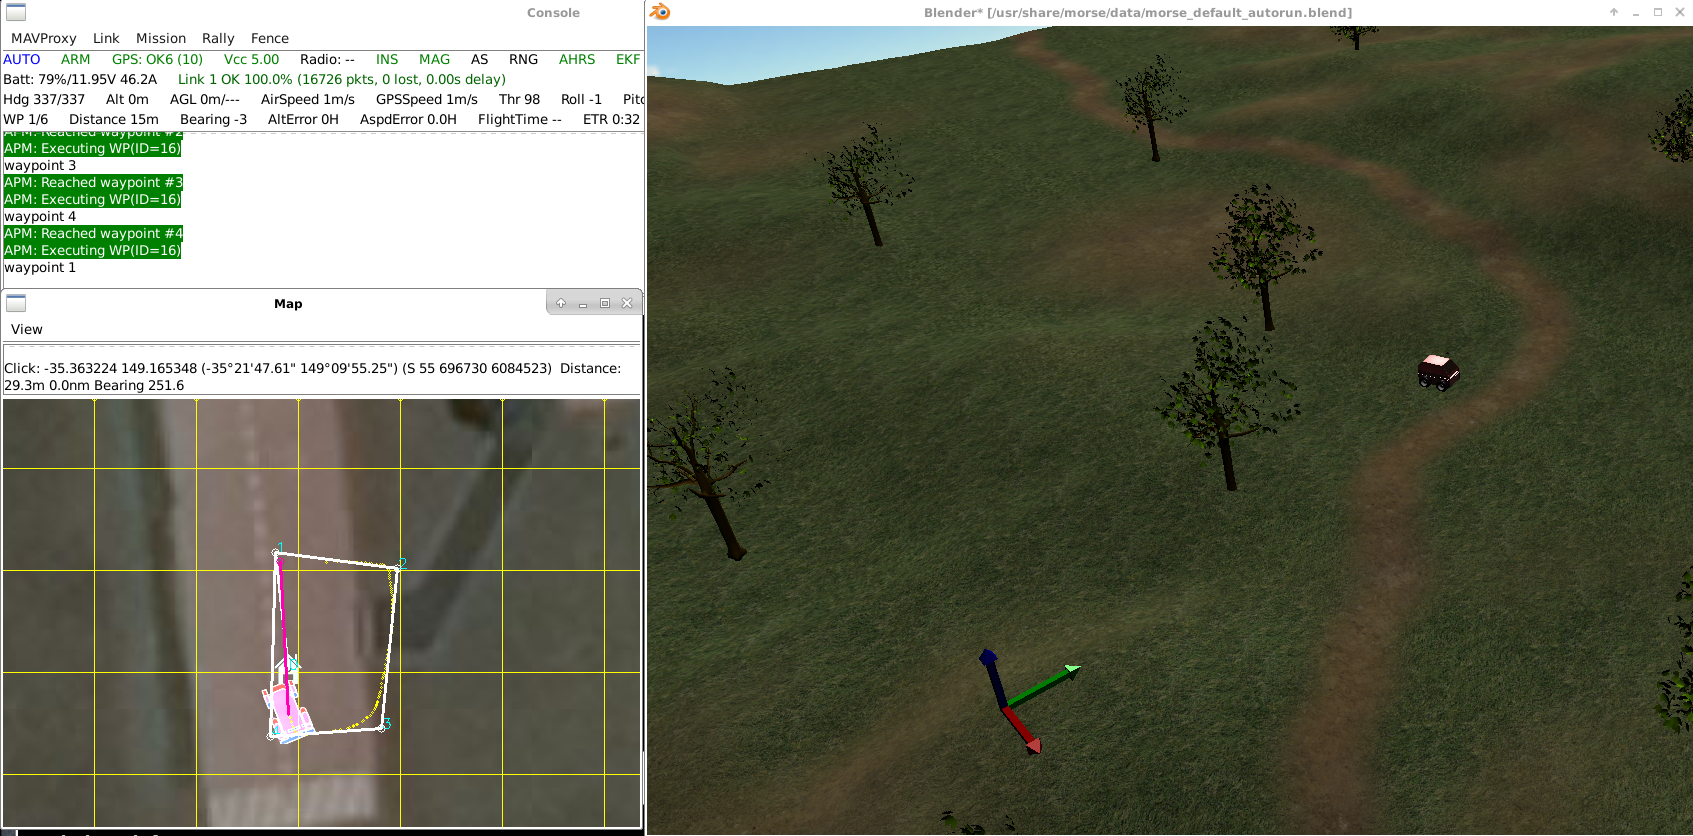
Use the ArduPilot SITL console to control the vehicle (i.e. “arm throttle” to arm the vehicle, “rc 3 1800” to raise throttle to 80%, etc)
The following steps will get you running with the Separate Steering and Throttle Rover example.
morse run libraries/SITL/examples/Morse/rover.py
Open another terminal to /ardupilot directory and start ArduPilot SITL, using the morse-rover simulation backend
Tools/autotest/sim_vehicle.py -v Rover --model morse-rover --add-param-file=libraries/SITL/examples/Morse/rover.parm --console --map
Use the ArduPilot SITL console to control the vehicle (i.e. “arm throttle” to arm the vehicle, “rc 1 ” to control steering “rc 3” to control throttle, etc)
To run the Quadcopter example:
Open a terminal and start the quadcopter simulator from within your /ardupilot directory:
morse run libraries/SITL/examples/Morse/quadcopter.py
Start ArduPilot SITL, using the morse-quad simulation backend
Tools/autotest/sim_vehicle.py -v ArduCopter --model morse-quad --add-param-file=libraries/SITL/examples/Morse/quadcopter.parm --console --map
A window like below should appear:
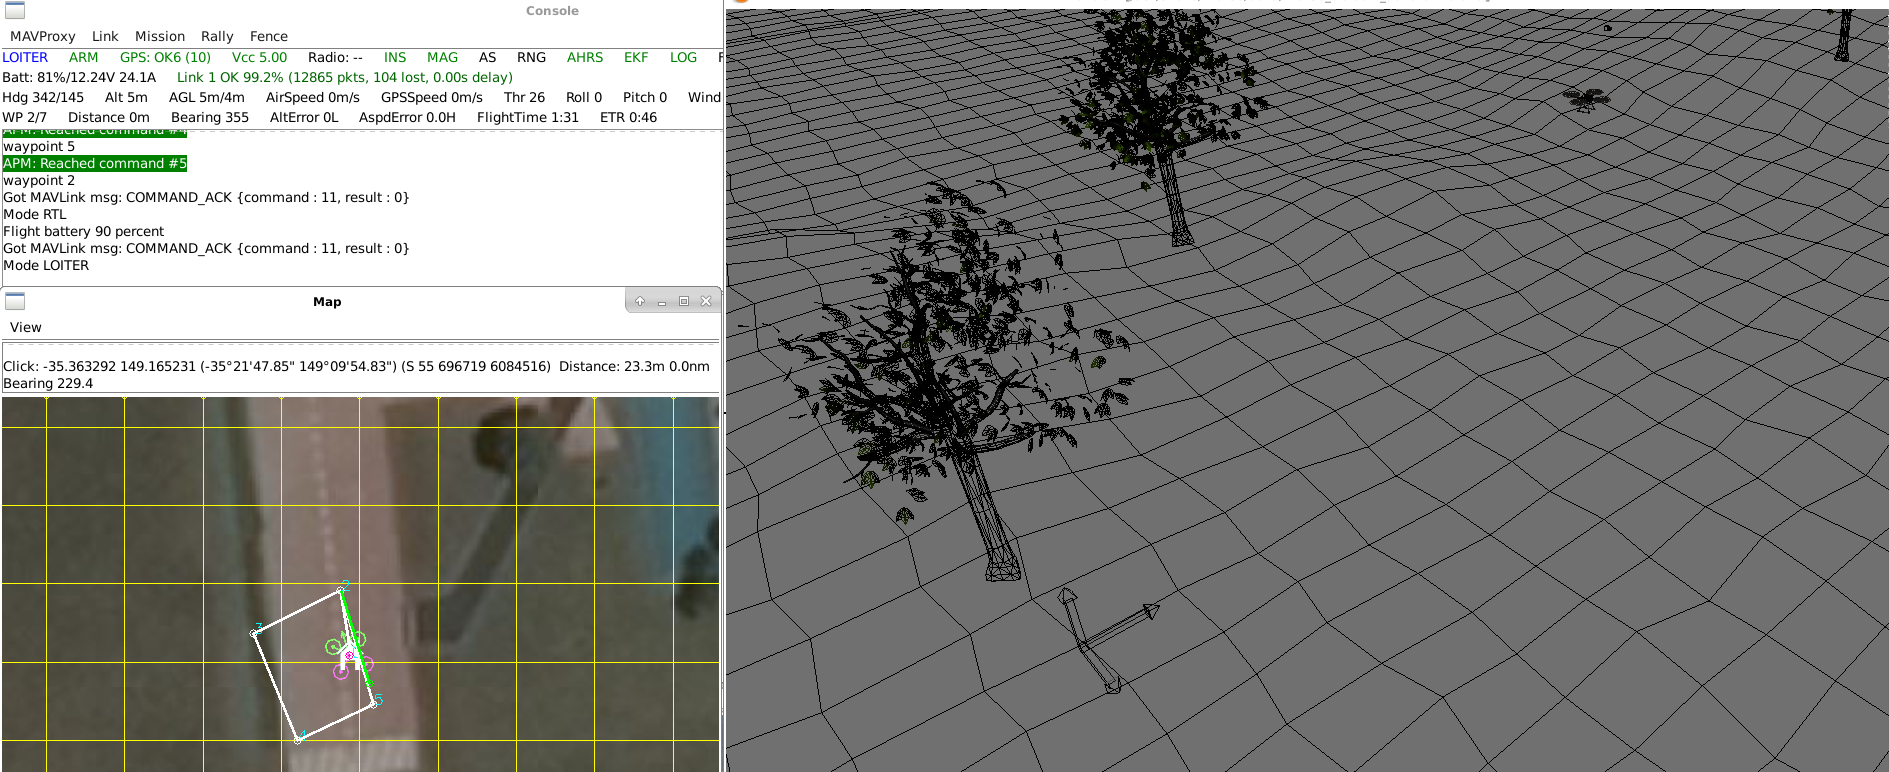
Note that in the image above a wire-frame view is shown instead of a rendered 3D view. That is configured by setting fastmode=True in the Environment() declaration in quadcopter.py. Using fast mode will lower CPU usage a lot which is good for slow machines.
Laser Scanner Support
The Morse SITL backend supports a laser scanner sensor. This allows you to use the proximity avoidance systems in ArduPilot with vehicles created in Morse.
There is an example of a Rover setup with a laser scanner in the rover_scanner.py script. Run it like this:
morse run libraries/SITL/examples/Morse/rover_scanner.py
Then start ArduPilot SITL, using the morse-skid simulation backend
Tools/autotest/sim_vehicle.py -v Rover --model morse-skid --add-param-file=libraries/SITL/examples/Morse/rover_scanner.parm --console --map
That will give you something like this:

The red area shows the extent that the laser scanner proximity sensor is seeing.
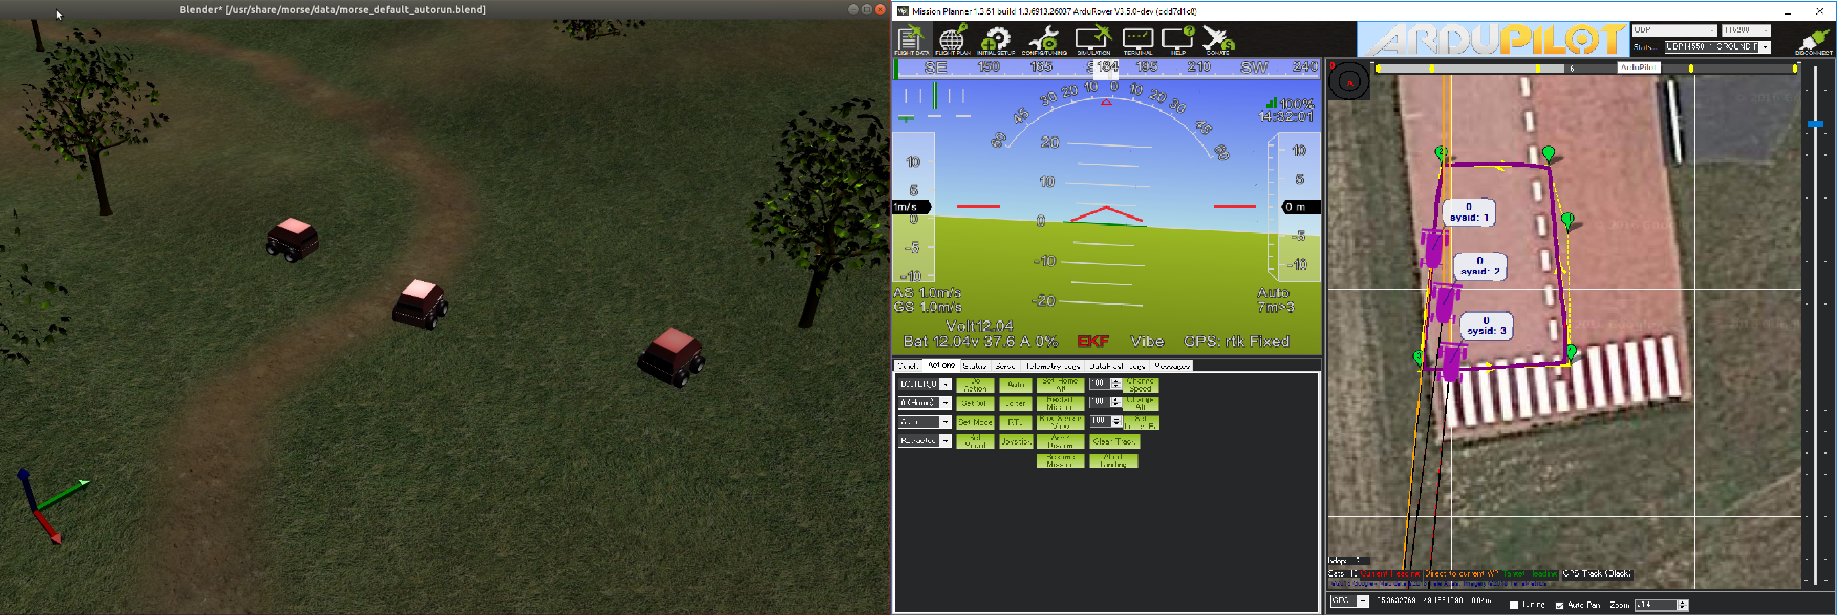
Swarming Support
To start a three rover swarm open two terminals and cd to your /ardupilot directory:
Run the following command to start Morse with three rovers side-by-side
morse run libraries/SITL/examples/Morse/rover_follow.py
Start the ArduPilot SITL environment with three rovers:
libraries/SITL/examples/Morse/start_follow.sh
To connect with Mission Planner
On the Windows machine open a terminal (on the windows machine) and type
ipconfigto determine the machines IP addressOn the Ubuntu machine
open your favourite editor and edit
libraries/SITL/examples/Morse/start_follow.shmodify line 7 of the script to set your windows machines IP address
GCS_IP=192.168.2.48 <-- replace with your windows machine\'s IP address
On the Windows machine start Mission Planner, set the connection type drop-down to “UDP” and press “Connect”
The three vehicles should appear on the map. They can be controlled separately by changing the vehicle selector drop-down just below the “Connect” button