UBlox GPS Configuration
This article explains how to connect to u-center to change the configuration of a 3DR uBlox module. This is not expected to be necessary for normal users.
Connection Option #1 - Mission Planner and Pixhawk as Passthrough
Mission planner and pixhawk can pass through the communication between u-center and the GPS by doing the following:
Connect Pixhawk to your PC and connect with the Mission Planner
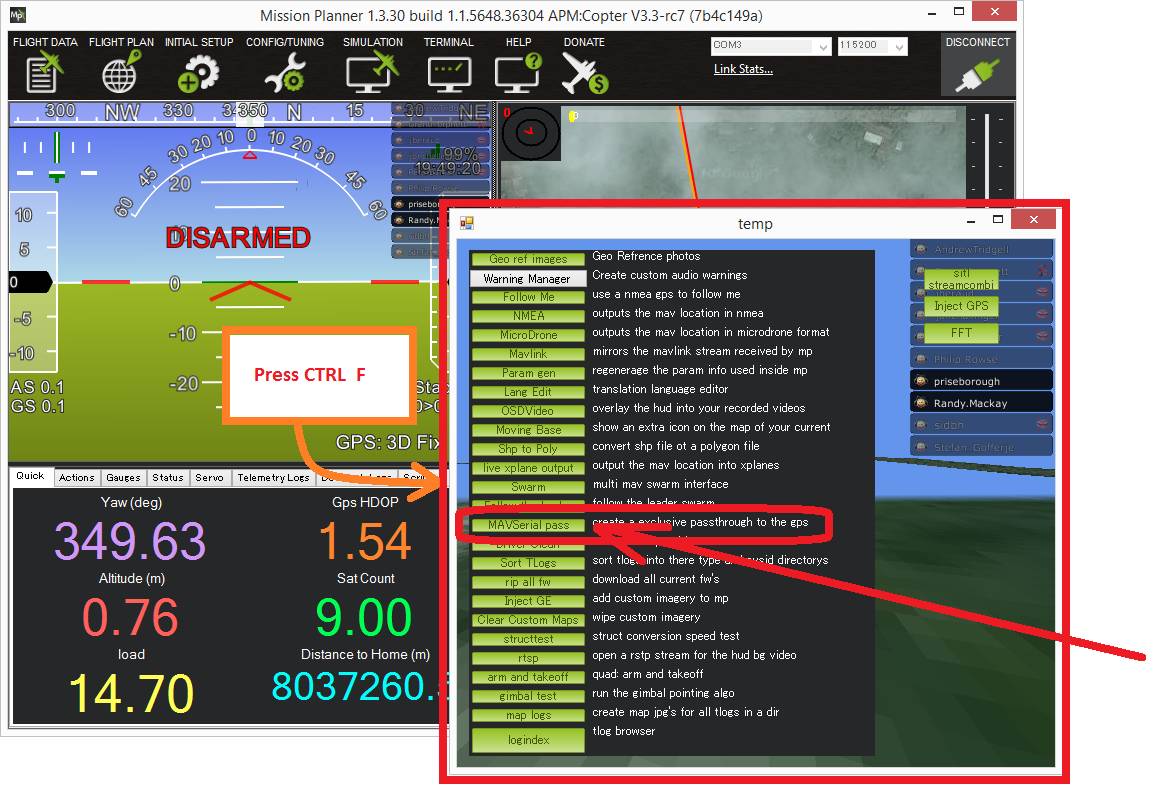
On the Flight Data screen press Ctrl-F and then select “MAVSerial pass”
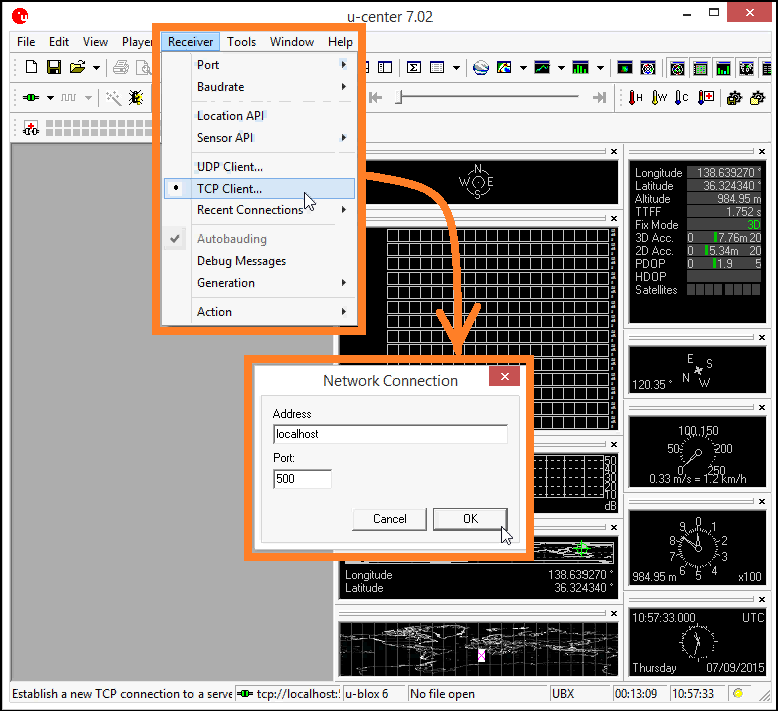
Open u-center and select Receiver, TCP Client and in the Network Connection window set Address to “localhost” and Port to “500” and press OK.
See instructions below as to how to upload config with u-center.
Connection Option #2 - FTDI cable
You will need an FTDI cable and a GPS adapter cable to connect the GPS to your computer. If you have never plugged an FTDI device into your computer, you may need to download and install the Virtual COM port driver.
