Rpanion 4G/LTE Telemetry Setup
This page explains how to install and configure a 4G/LTE telemetry module for use with Rpanion assuming this setup has already been completed.
Rpanion’s official VPN setup instructions are here
Recommended Hardware
LTE modem compatible with RPi. Known working modems include:
A compatible SIM card like those from IIJmio in Japan or Hologram
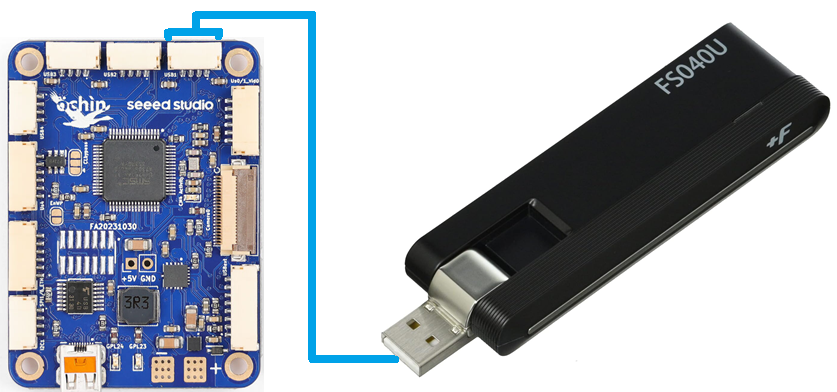
Custom cable to connect the Ochin Tiny Carrier Board V2 to the 4G/LTE modem
Install ZeroTier on Rpanion
If using Rpanion Server ver 0.12 (or earlier) ZeroTier must be installed manually
Mount the RPI CM4/CM5 on the RPI I/O board
Ensure the jumper is removed so the RPI starts normally (e.g. no jumper on “Fit jumper to disable eMMC Boot”)
Connect an Ethernet cable to the I/O board so that it has internet access
Power on the I/O board
On your PC, connect to the “rpanion” wifi access point (password is “rpanion123”)
Use Putty (or any similar terminal program) to connect to the RPI using SSH
Host Name: 10.0.2.100
Connection Type: SSH
Port: 22
Username/password: pi/raspberry
Install ZeroTier by entering, “curl -s https://install.zerotier.com | sudo bash” (official instructions are here)
Type, “sudo poweroff” to power off the RPI
Power off the I/O board
Mount the RPI CM4/CM5 back on the Ochin carrier board and continue with the steps below
ZeroTier Setup Part 1
Create a ZeroTier account (see https://www.zerotier.com/)
Create a new ZeroTier network, record the Network ID
On the PC:
-
Start the ZeroTier App
On bottom right tray, select orange ZeroTier icon, Join new network, paste in the Network ID
-
Rpanion Setup
Power on the vehicle and wait for the modem to connect to the 4G/LTE network
Connect to the “rpanion” wifi access point (password is “rpanion123”)
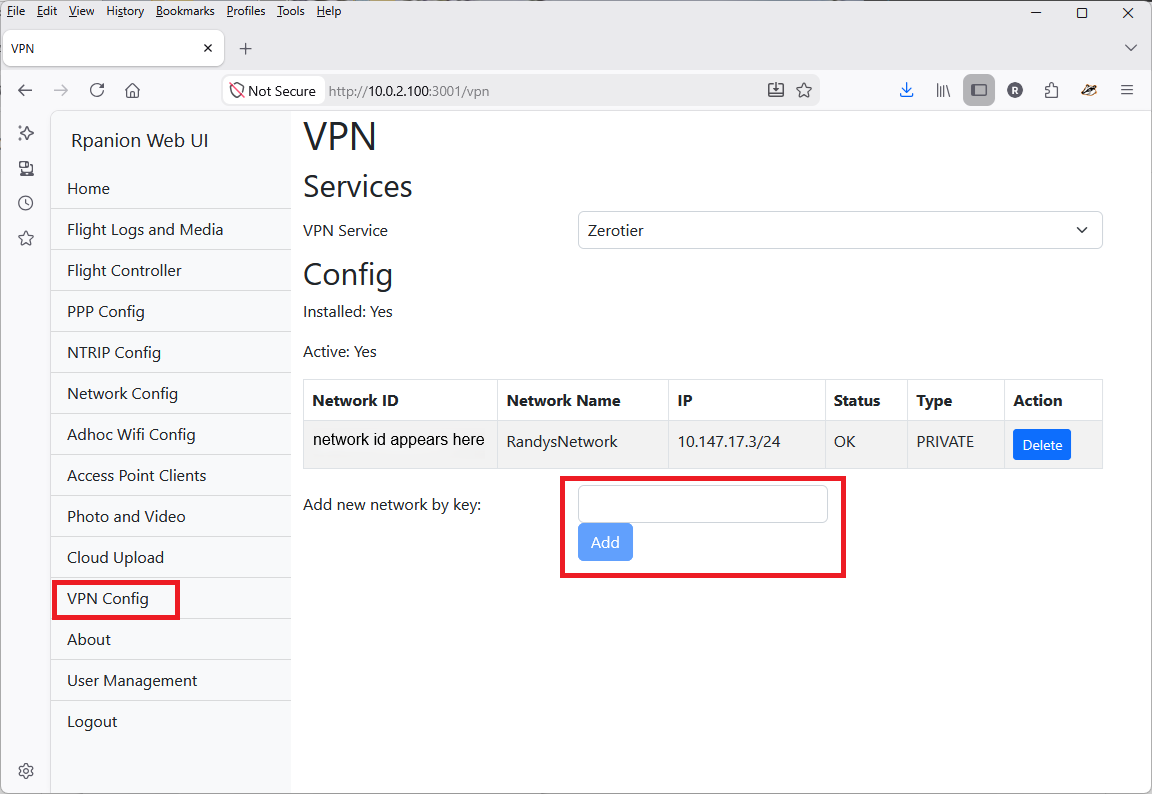
Open a browser to http://10.0.2.100:3001/ and enter username: admin, pw: admin
From the left menu select “VPN Config”
In the “Add new network by key” field enter the Network ID recorded above and push “Add”
ZeroTier Setup Part 2
From a web browser, open zerotier.com and “Log In”. The browser should automatically forward to https://my.zerotier.com/
From the list of Networks, select the Network created in “Part 1” above
Scroll down to the “Members” area, and look for new entries corresponding to the PC and vehicle
Check the “Auth?” column for each, then click on the “Edit” column and fill in the “Name” field
Optionally also change the “IP Assignments” field’s last digit to an easy-to-remember value between 1 and 255
Copy the vehicle’s “Managed IP” address (it will be needed below)
Connecting with Mission Planner
Ensure PC has internet access
Start the ZeroTier App, from the bottom right tray, connect to network
Open a web browser and enter the vehicle’s IP address (see above) with “:3001” appended, the Rpanion web interface should appear
Open Mission Planner, from the top-right drop-down select “UDPCl” and press connect
Enter host name/ip: enter IP address from above
Enter remote port: 14550
Connecting with QGC
Use the same procedure as Mission Planner but if QGC does not automatically connect
Select top-left icon, Application Settings, Comm Links
Add, Name: vehicle, Type:UDPCl, Port:14550, Server Address:, Add Server, OK