BlueOS Installation and Setup
This section explains how to install and configure BlueOS on an RPI compute module connected to an autopilot and camera gimbal via ethernet.
BlueOS’s official wiki is here
Recommended Hardware
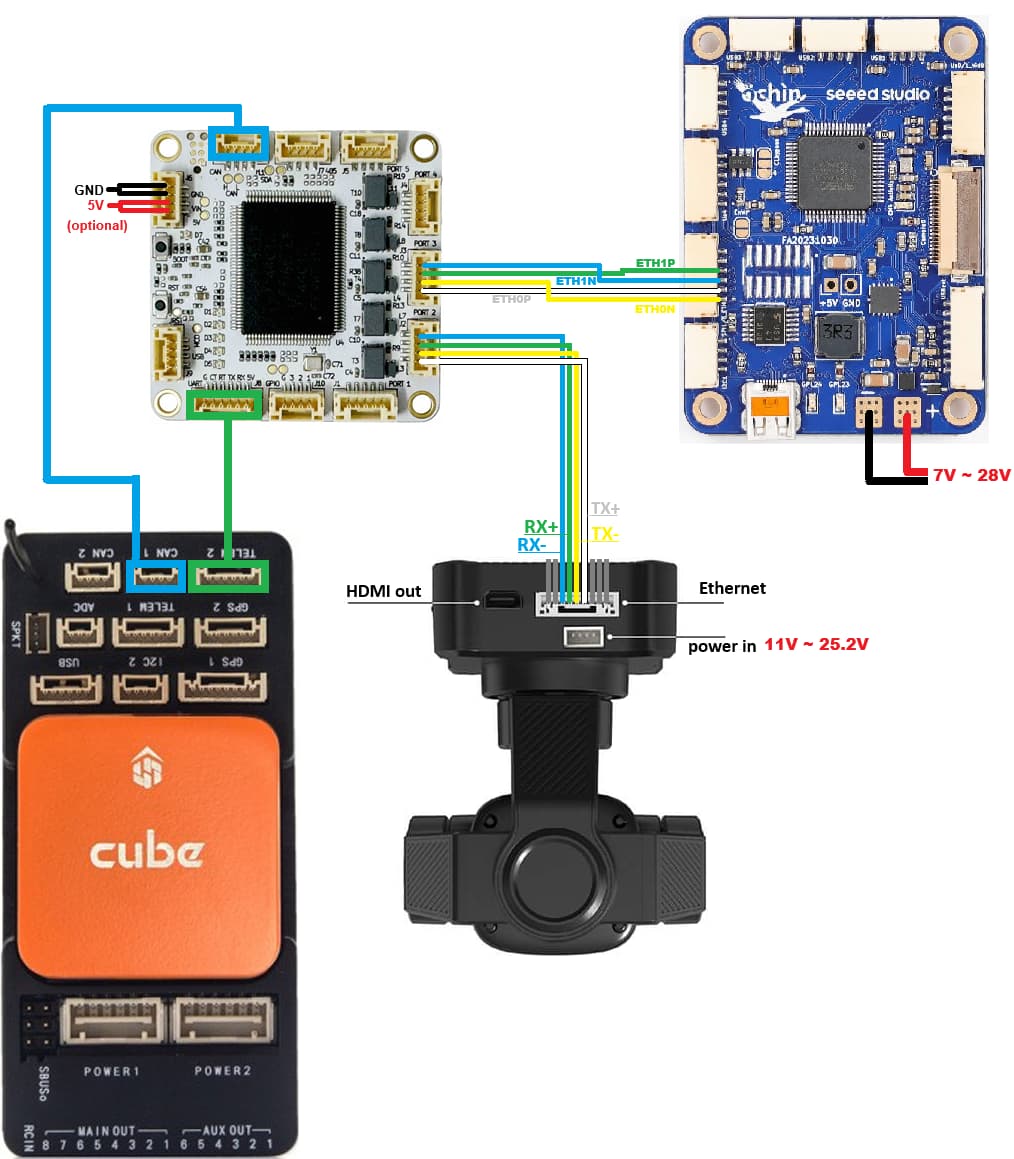
BotBlox DroneNet ethernet switch or CubeNodeETH and CubeLan 8-port ethernet switch (see ethernet adapters)
(optionally) Ethernet enabled camera gimbal (e.g. Siyi A8)
(optionally) 4G/LTE modem
Setup
Please follow the links below for detailed setup instructions.