Walking Robots
ArduPilot Rover 4.1 (and higher) includes basic support for four legged walking robots. More details can be found in this GSoC 2020 blog post
Warning
This page is still a work-in-progress
Hardware Required
1x Lynxmotion Phoenix 3DOF Hexapod frame (only 4 legs will be attached)
1x 2200mAh 2S lipo battery
1x 15Amp UBEC
ArduPilot compatible autopilot with at least 12 PWM outputs and ideally with the powerful STM32H7 CPU to give enough memory to run Lua scripts easily
Hardware Setup
Frontal view
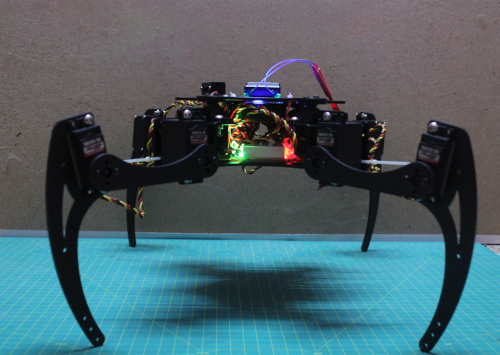
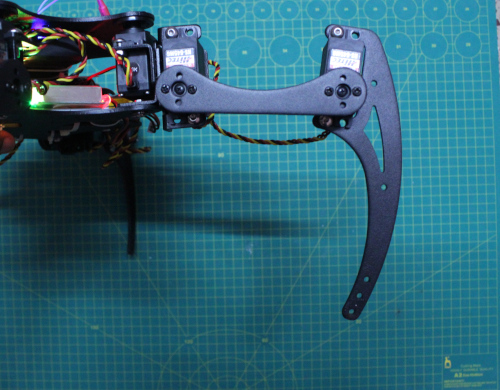
It is critically important that the ArduPilot knows the orientation of each leg when the servos are centered. The code assumes that, when all the servos are centered, the coxa faces directly away from the body, the femur is level with the ground, and the tibia is at an angle of 90 degrees relative to the femur.
Images can be used for reference.
Leg orientation
Top view
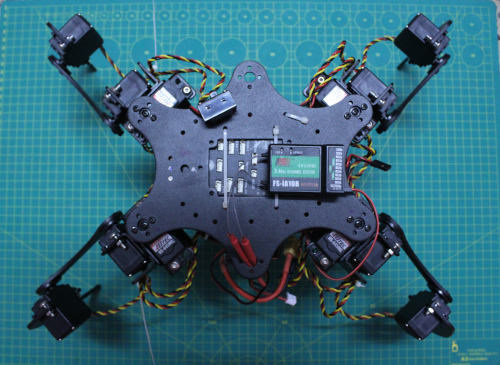

Connect the AutoPilot’s pwm outputs to each servo as listed below:
Output |
Servo |
1 |
front right coxa (hip) servo |
2 |
front right femur(thigh) servo |
3 |
front right tibia(shin) servo |
4 |
front left coxa(hip) servo |
5 |
front left femur(thigh) servo |
6 |
front left tibia(shin) servo |
7 |
back left coxa(hip) servo |
8 |
back left femur(thigh) servo |
9 |
back left tibia(shin) servo |
10 |
back right coxa(hip) servo |
11 |
back right femur(thigh) servo |
12 |
back right tibia(shin) servo |
Configuration and Setup
1) Connections, Firmware and Calibration
Refer to autopilot system assembly instructions for making connections between the autopilot board and each of these components:
Power Module
Servos
RC Receiver
GPS(optional)
Telemetry(optional)
Use a ground station to load Rover-4.1 (or higher) to the autopilot #. Install GCS (Mission Planner recommended) and upload rover firmware, if ArduPilot firmware already is installed, or Loading Firmware onto boards without existing ArduPilot firmware (first time only) #. Perform all the hardware calibration steps for:
RC Mode Setup (Add Manual and Acro Modes)
2) Loading lua script to ardupilot
Connect with a ground station and set SCR_ENABLE = 1 to enable Lua scripting and reboot the autopilot
Download quadruped.lua from the ArduPilot Github repo to your PC
Load the quadruped.lua script to the autopilot using MAVFTP or by directly copying to the SD Card’s APM/scripts directory (see video)
3) Additional Parameter Configuration
set RCx_OPTION parameters
set any unused channels to access these features
Supported Features
RCx_OPTION value |
Feature Description |
201 |
Roll |
202 |
Pitch |
211 |
Walking Height |
4) Arming
Set a transmitter switch for arming. Ensure the channel used for the switch has been calibrated. To configure a channel for arming, for example channel 7, then set the parameter:
RC7_OPTION =41 (Sets function of channel 7 as arming/disarming)
Connect the battery. Connect the autopilot board to GCS via USB or telemetry.
Keep the robot on its belly and then arm it. If arming is not successful check the error message on the GCS and identify the problem from the rover arming page.
After the autopilot board arms, the robot should stand up on it’s own
Simulation with SITL and pyBullet
The following steps will get you running with the quadruped example.
Ensure the ArduPilot source code is installed on your machine
Ensure the PC is running Ubuntu 18.04 (other versions may work but this has not been confirmed yet)
Install pybullet
python3 -m pip install pybullet
cd to the ardupilot/Rover directory
create a “scripts” directory and copy quadruped.lua into it
Open a terminal to /ardupilot/Rover directory and start ArduPilot SITL
simvehicle.py --map --console -D -f JSON
Enable scripting and then restart SITL
param set SCR_ENABLE 1
- Set channels for roll, pitch and height
Example:
param set RCx_OPTION 202
Open another terminal to launch pyBullet
cd ardupilot/libraries/SITL/examples/JSON/pybullet
python3 walking_robot.py