Setting up the Build Environment (Linux/Ubuntu)
This article shows how to setup your build environment on Linux/Ubuntu machines.
Setup on Ubuntu
Get git
Git is a free and open source distributed version control system that is used to manage ArduPilot codebase. Git is available on all major OS platforms, and a variety of tools exist to make it easier to get started.
Git command line
Ubuntu
Linux/Ubuntu users can install with apt :
sudo apt-get update
sudo apt-get install git
sudo apt-get install gitk git-gui
Windows and other Systems
download and install from git-scm.com’s download page
Recommended GUI Tools
The git command line, gitk and git-gui tools are the basics that all users should have installed and are available from a few places.
A comprehensive list of GUI tools are listed here on git-scm.com but here are a few of the developer favourites:
GitHub Desktop for Windows and Mac is an easy to use tool with good GitHub integration but has fewer features than other clients.
Sourcetree for Windows and Mac OSX is a full featured tool with a nice interface with many features including allowing individual lines from a file to be included in a new commit (simpler tools only allow the entire file to be included)
GitKraken is a a full featured tool for Windows, Mac and Linux
Clone ArduPilot repository
“Cloning” is git’s term for making a local copy of a remote repository (i.e. one held on the GitHub servers).
Developers should clone the main ArduPilot repository (if they simply want to download and compile the latest code) or their own fork (if they want to make changes to the source code and potentially submit changes back).
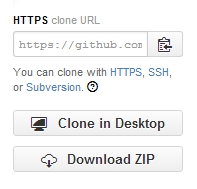
Instructions for commonly used tools are below but whichever tool is used, the URL for the source repo will be required. This can be found on the right side of the screen on each Github repository home page but in general the URL is:
https://github.com/ArduPilot/ardupilot.gitfor the main ardupilot repohttps://github.com/your-github-account/ardupilotfor your fork of the ardupilot repo
Cloning with the command line
open a terminal and navigate to the directory where you would like the clone to be stored
clone your fork:
git clone --recurse-submodules https://github.com/your-github-userid/ardupilot
cd ardupilot
Note
In case some firewalls do not allow ssh access which can cause the above submodule updates to fail, in this instance, you can tell git to unilaterally use https through the following command:
git config --global url."https://".insteadOf git://
to use https protocols instead of the default git:// prefix.
Install some required packages
If you are on a debian based system (such as Ubuntu or Mint), we provide a script that will do it for you. This script does NOT support building on operating systems that have reached end of Standard Support such as Ubuntu 20.04 LTS (Focal Fossa).
From the cloned ardupilot directory :
Tools/environment_install/install-prereqs-ubuntu.sh -y
Reload the path (log-out and log-in to make it permanent):
. ~/.profile
Warning
if you update your Linux distribution to a later version, then you will need to repeat this step to assure that all the packages needed will be re-installed for this Linux version
Build the code for an autopilot or peripheral board
Now you should be able to build with waf as described in BUILD.md. For example, for a Copter build for the MatekH743 board:
./waf configure --board MatekH743
./waf copter

The first configure command should be called only once or when you want to change a
configuration option. One configuration often used is the `--board` option to
switch from one board to another one. For example we could switch to
SkyViper GPS drone and build again:
./waf configure --board skyviper-v2450
./waf copter
Note
the - -help option will list many build options as well as a list of features that can be enabled or disabled, just as in the Custom Firmware Build Server
Note
At this point you have already installed the MAVProxy Ground Control Station (MAVProxy GCS) and are also ready to do Software In the Loop (SITL) simulations of the vehicle code. See SITL Simulator (Software in the Loop) and Setting up SITL on Linux. You are ready to not only build the code but run your build in the ArduPilot SITL simulator.
Cleaning
If there have been updates to some git submodules you may need to do a full clean build. To do that use:
./waf clean
That will remove the build artifacts so you can do a build from scratch
Setup for other Distributions Using the STM Toolchain
Add some directories to your search path (Facultative)
Note
ONLY if you didn’t run the install-prereqs script from the previous step.
Add the following lines to the end of your “.bashrc” in your home directory (notice the . on the start of that filename. Also, this is a hidden file, so if you’re using a file manager, make sure to turn on “show hidden files”).
export PATH=$PATH:$HOME/ardupilot/Tools/autotest
export PATH=/usr/lib/ccache:$PATH
Then reload your PATH by using the “dot” command in a terminal
. ~/.bashrc
Warning
Do not use this if you have already use the install-prereqs-ubuntu.sh script !
To build for an autopilot target on Linux you need the following tools and git repositories:
The gcc-arm cross-compiler from here (ArduPilot is only built and tested on these specific versions of gcc-arm; if installed with
apt-getgcc-arm will not produce a working binary in many cases)gnu make, gawk and associated standard Linux build tools
On a 64 bit system you will also need to have installed libc6-i386.
Also, it’s worth mentioning here that you want to ensure that the modemmanager package is not installed and the modem-manager process is not running.
Compiler
You need the specific gcc-arm cross-compiler linked above. You need to unpack it where you want, for now let’s call this location TARGET_DIR:
cd TARGET_DIR
tar -xjvf gcc-arm-none-eabi-10-2020-q4-major-x86_64-linux.tar.bz2
and then add the bin directory from the tarball to your $PATH by editing the $HOME/.bashrc file and adding a line like this to the end. TARGET_DIR is the location chosen previously where you unpacked the toolchain:
export PATH=$PATH:TARGET_DIR/gcc-arm-none-eabi-10-2020-q4-major/bin
Note
Versions of ArduPilot before 4.1 must use the following compiler, gcc-arm-none-eabi-6-2017-q2, which can be found here.
Permissions
You need to make your user a member of the dialout group:
sudo usermod -a -G dialout $USER
You will need to log out and then log back in for the group change to take effect.
Now you should be able to build with waf as described in BUILD.md.
ccache for faster builds
Installing ccache will speed up your builds a lot. Once you install it (for example with “sudo apt-get install ccache”) you should link the compiler into /usr/lib/ccache like this:
cd /usr/lib/ccache
sudo ln -s /usr/bin/ccache arm-none-eabi-g++
sudo ln -s /usr/bin/ccache arm-none-eabi-gcc
Then add /usr/lib/ccache to the front of your $PATH
Setup using Docker
Note
This is not recommended except for special cases where an isolated build environment is required. Using this setup below will prevent the use of graphical elements in SITL unless custom options are added.
Clone ArduPilot repository
“Cloning” is git’s term for making a local copy of a remote repository (i.e. one held on the GitHub servers).
Developers should clone the main ArduPilot repository (if they simply want to download and compile the latest code) or their own fork (if they want to make changes to the source code and potentially submit changes back).
Instructions for commonly used tools are below but whichever tool is used, the URL for the source repo will be required. This can be found on the right side of the screen on each Github repository home page but in general the URL is:
https://github.com/ArduPilot/ardupilot.gitfor the main ardupilot repohttps://github.com/your-github-account/ardupilotfor your fork of the ardupilot repo
Cloning with the command line
open a terminal and navigate to the directory where you would like the clone to be stored
clone your fork:
git clone --recurse-submodules https://github.com/your-github-userid/ardupilot
cd ardupilot
How to Build the Docker Image
Build the docker image and tag it with the name ardupilot:
docker build . -t ardupilot --build-arg USER_UID=$(id -u) --build-arg USER_GID=$(id -g)
Run ArduPilot Container
The following command runs the docker container, linking your current directory with the Ardupilot source, and launches an interactive shell inside the container. From here you can build Ardupilot:
docker run --rm -it -v "$(pwd):/ardupilot" -u "$(id -u):$(id -g)" ardupilot:latest bash