Setup Eclipse on Windows
This page shows how to setup Eclipse on Windows to build using waf which allows building for all supported boards.
Note
These instructions assume you have already Setup the Build Environment on Windows using Cygwin
Remove Pixhawk Toolchain (if present)
If you have been using the older method which relied on Make first remove the old tool chain by renaming the C:\pixhawk_toolchain directory to C:\pixhawk_toolchain.bak
Install and Run Eclipse
Download Eclipse 64 bit from here
Run the downloaded eclipse installer and select “Eclipse IDE for C/C++ Developers”
Accept the Eclipse Foundation certificate when asked
Launch Eclipse and click on the “Workbench” button on the top right
Import ArduPilot
Once Eclipse has been started import ArduPilot by doing the following:
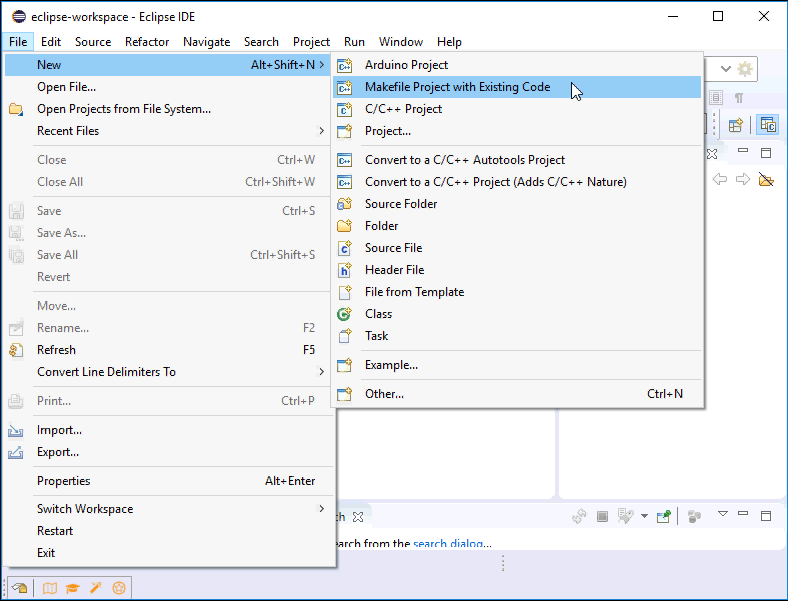
Select File, New, Makefile Project with Existing Code
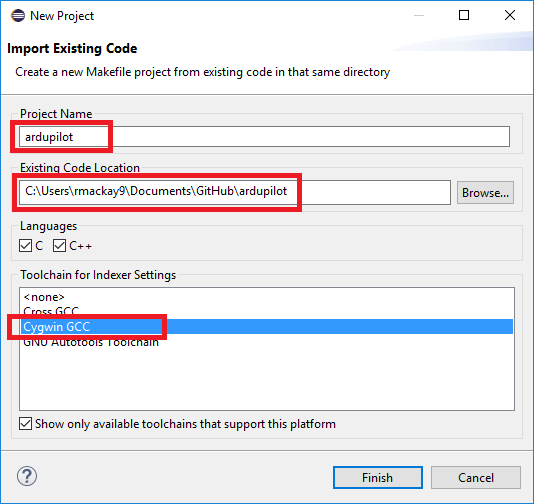
When the “New Project” window appears select the folder into which ardupilot was cloned and select the Toolchain to be “Cygwin GCC”
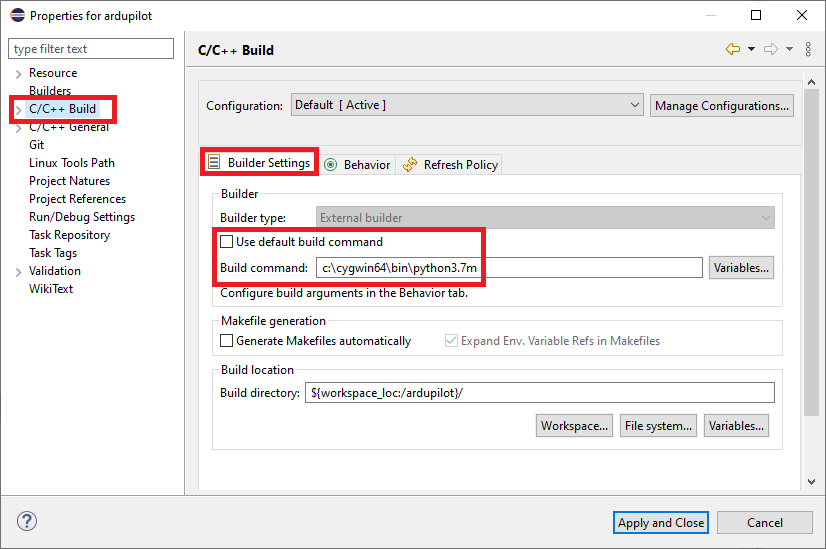
In the Project Explorer tab on the top right, right-mouse-button-click on the “ardupilot” folder and select “Properties”
When the “Properties for ardupilot” window appears, under “C/C++ Build”, uncheck “Use default build command” and enter
c:\cygwin64\bin\python3.7minto the “Build command” field as shown below
Click the “Behavior” tab, select “Use custom build arguments” enter
waf. Additional arguments such as-j 16may be added here. The argument-j 16configures Cygwin to use 16 logical processors of the 8 core machine in this example.Setting “Workbench Build Behavior” will allow the use of built-in buttons for clean and build all targets. Note if you prefer to only build for a single vehicle type using these buttons change “build” to “copter”.

Setup Build Target
Within the “Build Targets” tab on the right select “ardupilot” and push the green “New Build Target” button.
In the “Target name” field enter
configure --board fmuv3 --no-submodule-updateand press OK to create a build target to configure the waf build for Pixhawk/Cube flight controllers using ChibiOSCreate another build target called
copterRun these two targets in order to create an ArduPilot Copter binary for Pixhawk/Cube flight controllers
If the build fails with a “Missing configuration file” check the ardupilot directory for a directory called “build” and delete it and try again
Other useful build targets include,
clean,plane,roverand--help
The arducopter.apj firmware will be created in the ardupilot\build\fmuv3\bin directory and can be uploaded from the Mission Planner or other ground station.

Note
The configure build target described above requires the --no-submodule-update be prepended because the submodule update step of the build does not yet work with the setup described here. We expect this to be resolved in the future but until then, please open a git bash terminal and run git submodule update --recursive if you believe the submodules have been updated recently.
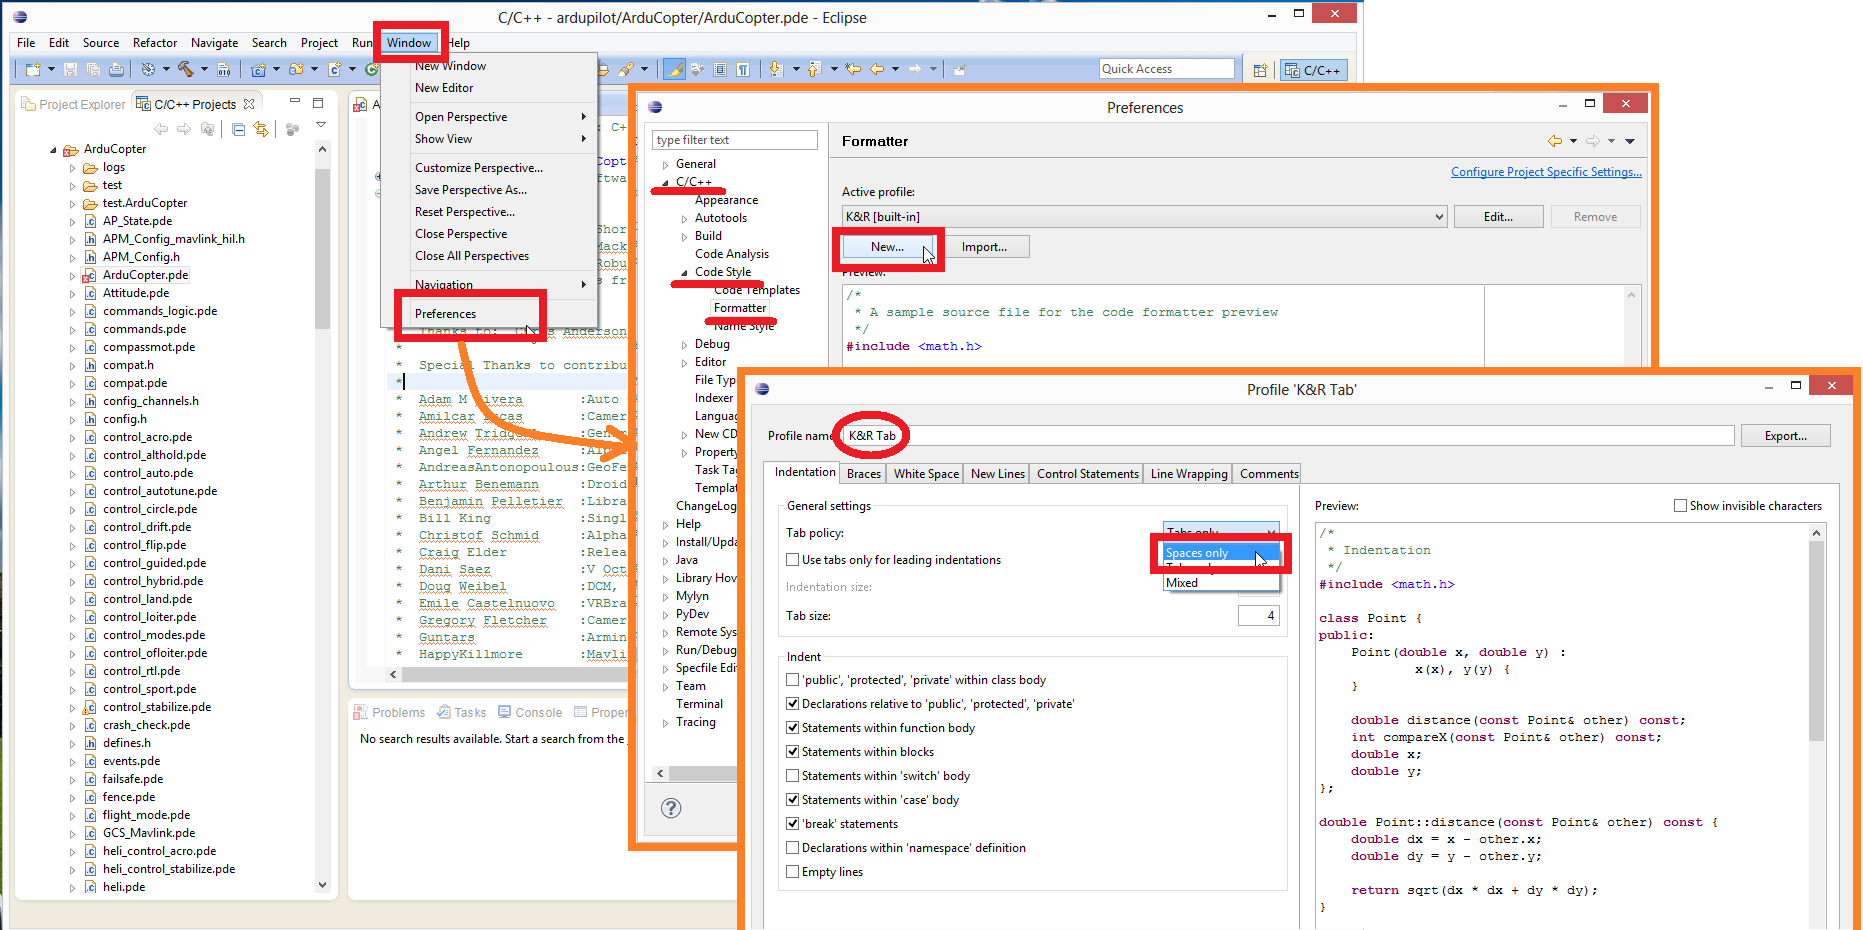
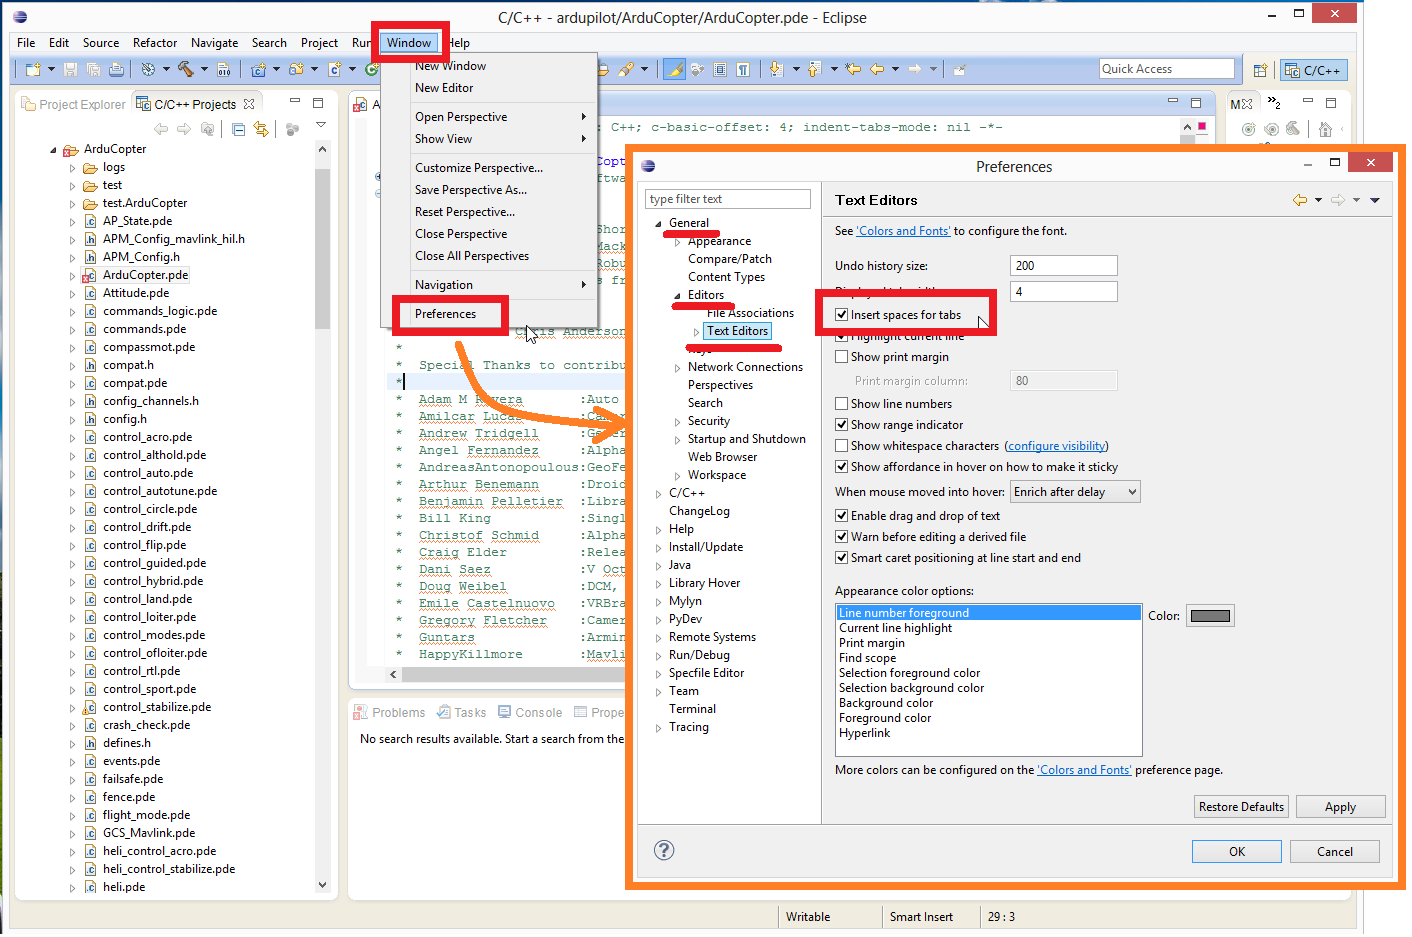
Use spaces instead of tabs
By default Copter, Plane and Rover use spaces in place of tabs. This can be set to the default in Eclipse by changing two settings
Select Window | Preferences | General | Editors | Text Editors | Insert spaces for tabs.
Select Windows | Preferences | C/C++ | Code Style | Formatter and creating a new Profile (i.e. “K&R Tab”) which has the “Indentation” set to “Spaces only”