BlueOS Precision Landing Extension
BlueOS’s Precision Landing Extension allows a downward facing camera gimbal to be used to land precisely on a landing pad identified with an April Tag
Note
Support for this extension was added in ArduPilot-4.7
Hardware Required
Please see ArduPilot’s BlueOS installation instructions which also includes hardware recommendations.
Any supported camera gimbal with ethernet connectivity should work including the Siyi, ViewPro and XFRobot camera gimbals.
The camera gimbal should be mounted on the underside of the vehicle and precision landing will only operate when the camera gimbal is pointing downwards.
Print an AprilTag for the landing pad. This online AprilTag generator using the “tag36h11” tag family has been used successfully.
A rangefinder is also required.
BlueOS Extension Installation
Once BlueOS has been installed on the companion computer:
Ensure the companion computer is connected to the internet
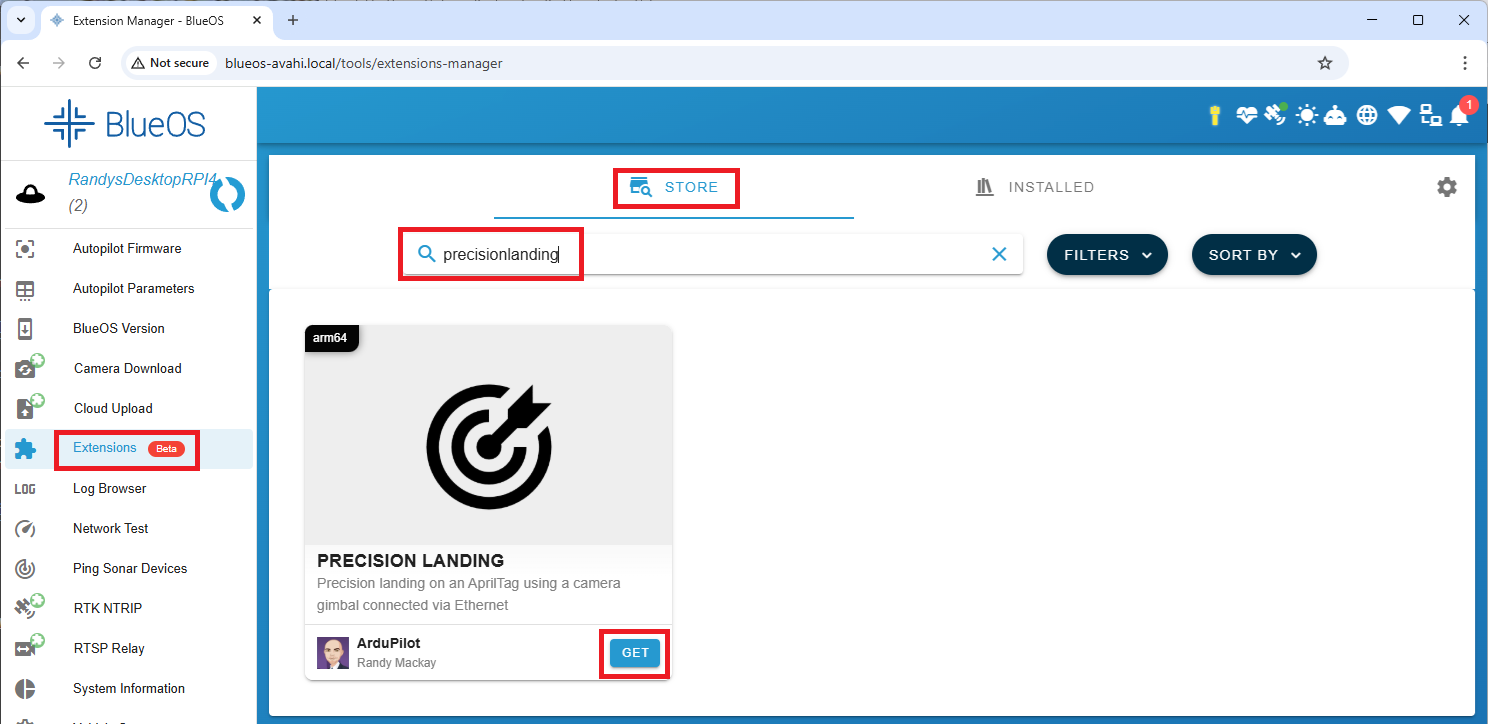
From the left menu, select “Extensions”
Search for “precision landing” and push the “GET” and “INSTALL” buttons
From the left menu, select “Precision Landing”
Select the “Camera Type” being used
Optionally adjust the “Horizontal FOV” to match the camera gimbal’s lens
Set the “AprilTag Family” and “AprilTag ID” to the values used when printing the AprilTag
Optionally reduce the “AprilTag Detection Quality” to improve detection speed at the cost of range (2 is normally a good value)
Leave “Undistort Image” unchecked unless a very high powered companion computer is being used
“Flight Controller SysID” should match the vehicle’s MAV_SYSID parameter (normally 1)
Press “Save Setting” buttons
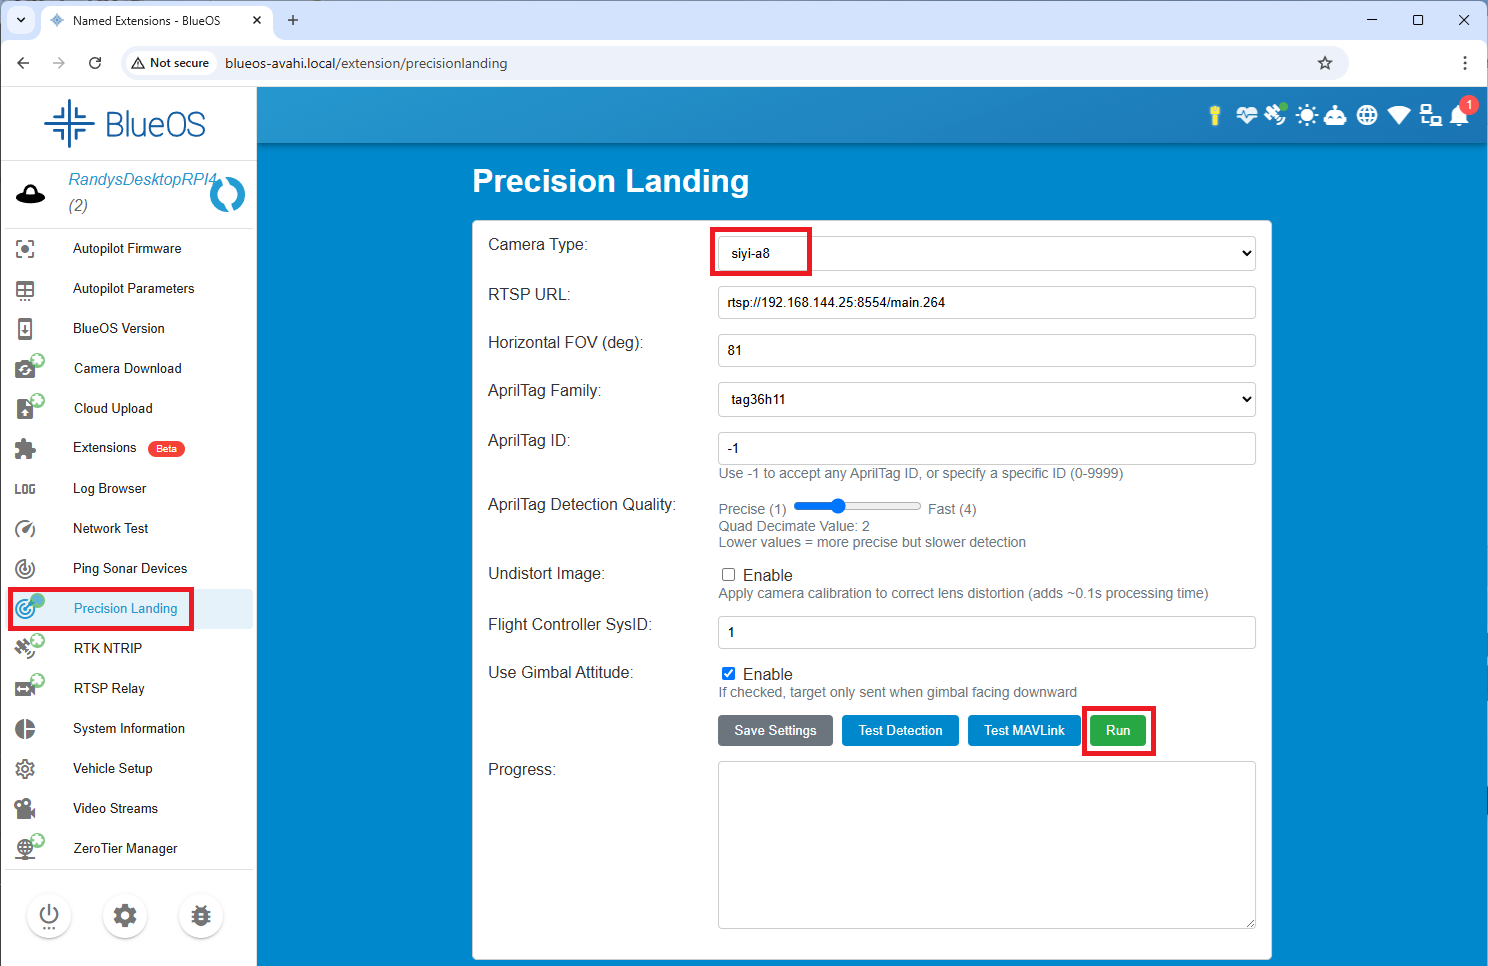
Place the tag in front of the camera and press the “Test Detection” button. Within a few seconds an image from the camera should be displayed with the AprilTag highlighted in red.
Press the “Run” button to run the precision landing algorithm continuously. This is persistent meaning the algorithm will start automatically if the companion computer is rebooted.
AutoPilot Configuration
Set PLND_ENABLED = 1 (Enabled)
Set PLND_TYPE = 1 (MAVLink)
To improve performance set the PLND_CAM_POS_X, PLND_CAM_POS_Y, and PLND_CAM_POS_Z parameters. For more details see the sensor position offsets page.
Flying and Testing
Setup the vehicle with one of the flight modes set to RTL or Land mode.
Place the AprilTag on the ground and take-off to approximately 10m above the target. Switch the vehicle to Land. If everything is working properly, the copter should move toward the AprilTag.
Tip
Be prepared to retake control in Stabilize, AltHold or Loiter if there are sudden unexpected movements
If the vehicle does not behave appropriately, download the dataflash logs and examine the PL messages.
If the “Heal” (meaning health) field is not “1” then there may be a communication issue between the autopilot and BlueOS
If the “TAcq” (meaning Target Acquired) field is not “1” then the sensor is not seeing the target.
The pX, pY values show the horizontal distance to the target from the vehicle.
The vX, vY values show the estimated velocity of the target relative to the vehicle.