IR-LOCK Precision Landing System
Precision Landing demonstration.
Precision Loiter demonstration.
Overview
The IR-LOCK sensor is a modified version of the Pixy camera, which comes pre-configured to work as an IR beacon detector. There are multiple IR beacons which are compatible with the sensor. The MarkOne Beacon V3.0 can be reliably detected in all lighting conditions, with a detection range of 15 meters. The Beacon V1.1 is a more cost-effective option which can be reliably detected in most lighting conditions.
Where to Buy
The IR-LOCK sensor and beacons can be purchased from irlock.com.
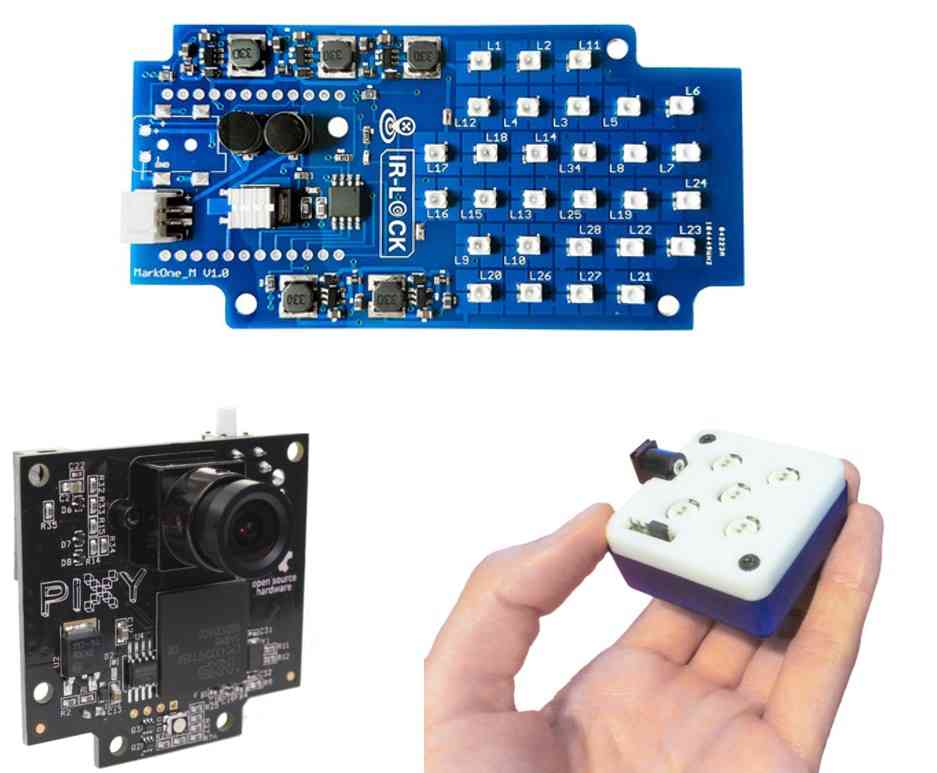
IR-LOCK Sensor and IR Beacons
Connecting to the Autopilot
The IR-LOCK sensor can be connected directly to the autopilot via an I2C cable. If you are using multiple I2C sensors, then you will need an I2C splitter. More detailed instructions are included in the IR-LOCK documentation.
Other PLND_ parameters are provided to adjust for landing detector position on the vehicle, if needed.
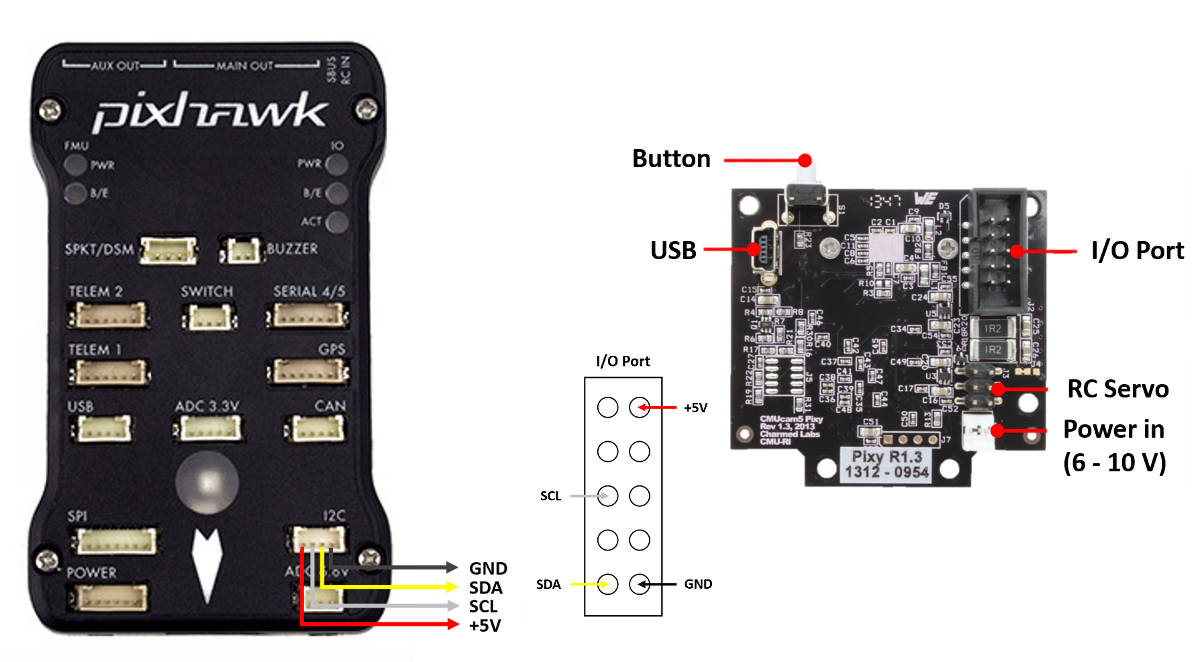
IR-LOCK sensor/Autopilot Wiring
Mounting to the Frame
The IR-LOCK sensor should be mounted to the underside of the frame with the camera lens pointing directly down toward the ground. A mounting bracket for IRIS is sold here (and pictured below). The sensor board should be oriented so that the white button on the board points towards the front of the vehicle (or to put it another way, the side closest to the camera lens should be towards the front of the vehicle).
The image below shows the camera mounted on the bottom of a 3DR IRIS+. It is probably best to mount the sensor as close as possible to the autopilot, but successful tests have also been performed with various mounting locations.
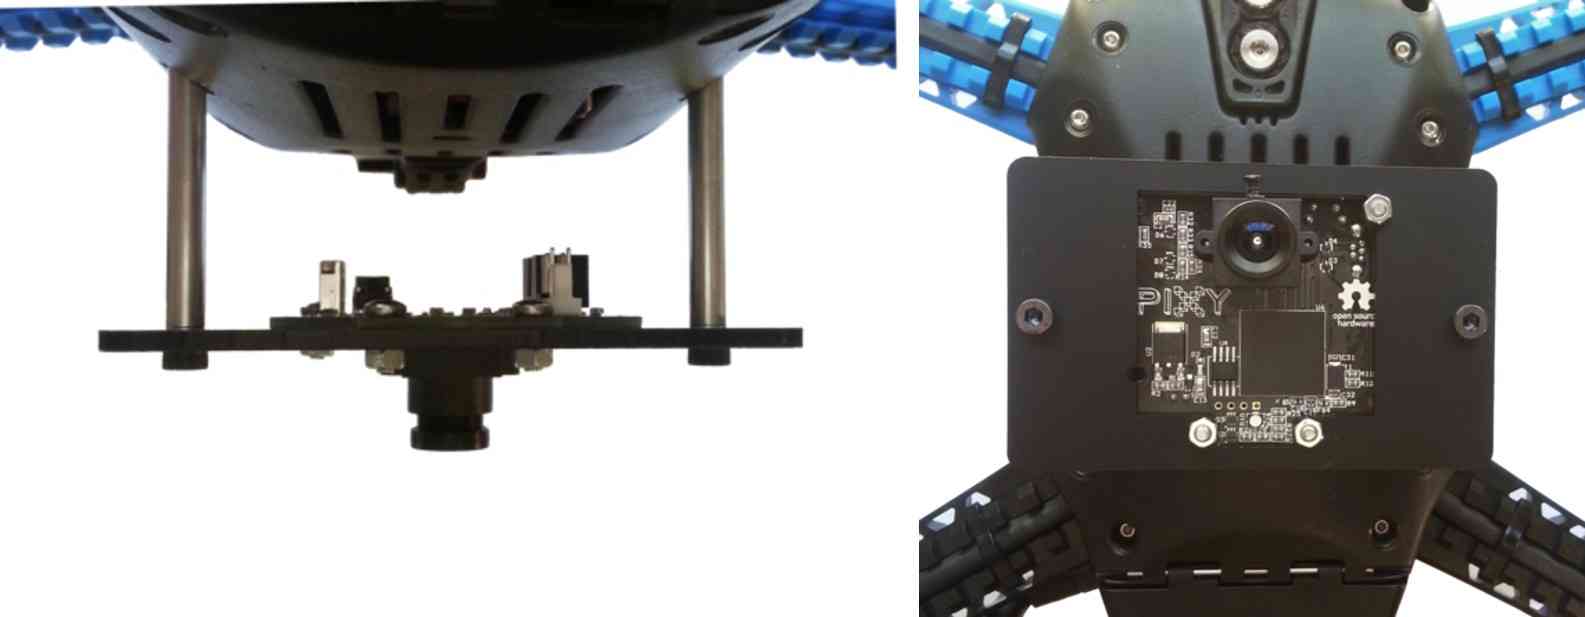
IR-LOCK Sensor Mounted on Bottom of Iris+
IR-LOCK sensor installation.
Setup through Mission Planner
Set the following parameters through the Mission Planner (or other GCS) to enable the precision landing feature and then Reboot the autopilot.
PLND_ENABLED = 1
PLND_TYPE = 2
To enable Precision Loiter, an Auxiliary Function Switch must be set to 39 (PrecLoiter Enable). In versions prior to Copter-4.0, a CHx_OPT parameter could be set via Mission Planner to 39 for this enable.
Flying and Testing
Setup the vehicle with one of the flight modes set to Land (as of the time this wiki page was written, the precision landing function only operates in Land mode).
Place the IR beacon on the ground and take-off to approximately 10m above the target. Switch the vehicle to Land. If everything is working properly, the copter should move toward the IR beacon. A successful demo is shown below (using an older firmware).
Tip
Be prepared to retake control if there are sudden unexpected movements (Change mode to Stabilize, AltHold or Loiter).
If the vehicle does behave appropriately, download the dataflash logs and examine the PL messages.
If the “Heal” (meaning health) field is not “1” then there may be a communication issue between the autopilot and IR-LOCK sensor.
If the “TAcq” (meaning Target Acquired) field is not “1” then the sensor is not seeing the target.
The pX, pY values show the horizontal distance to the target from the vehicle.
The vX, vY values show the estimated velocity of the target relative to the vehicle.
Demonstration of consecutive precision landings.