Script Setup and Use Examples
Running a Script in SITL
In Linux:
Assuming you have setup the build and SITL environment, run SITL. See Using SITL. For example:
cd /path/to/ardupilot
./Tools/autotest/sim_vehicle.py -v plane --console
Mavproxy ground control station will automatically be started. You can also start QGC (using the QGroundControl.AppImage) and/or Mission Planner (using WISE to run under Linux). Any or all three can be used simultaneously.
From your GCS, enable scripting by setting the SCR_ENABLE parameter to “1”. Restart the simulation by halting it with CTRL+C and restarting sim_vehicle, or in MAVProxy, type
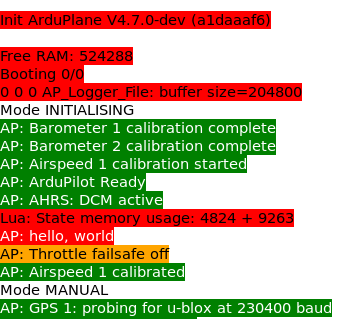
reboot.A “scripts” sub-directory will be created in the directory you started the simulation, if it did not already exist. You should expect to see a line similar to the following:
Lua: State memory usage: 4824 + 9263. This shows that scripting is now enabled.Now, create your first script in the
scriptsfolder. If it’s your first time, try the hello world scriptcp libraries/AP_Scripting/examples/hello_world.lua scripts/
Again, restart the simulation.
You should now observe the following in console.
Now, you can try changing the script to say something else and saving the Lua script.
In MAVProxy, once you you save changes to your Lua script, you can just restart the scripting engine with
scripting restart. This allows to you keep SITL running and quickly change your script.If you get a “Scripting: out of memory” GCS message then you will need to increase SCR_HEAP_SIZE parameter and try to restart the simulation. The hello world script has enough memory.
In Mission Planner (Windows):
Start the simulation in Mission Planner as normal (see Mission Planner Simulation)
In the CONFIG->Full Parameter List, set the SCR_ENABLE parameter to “1”. Restart the simulation.
The ‘scripts’ subdirectory will be located in your Documents->Mission Planner->sitl directory.Place the script you downloaded into this directory. Again, restart the simulation.
If you get a “Scripting: out of memory” GCS message then you will need to increase the SCR_HEAP_SIZE parameter and try to restart the simulation.
Running a script on your Autopilot
Connect your GCS and navigate to its parameters screen (CONFIG->Full Parameter List in Mission Planner, Vehicle Setup->Parameters in QGC) . Enable SCR_ENABLE =1. Disconnect and reconnect the autopilot.
On your SD card, place the script in the APM/scripts directory. This directory will be created on the SD card when you have enabled the SCR_ENABLE via your GCS. If it does not exist, create it and load the script. You can use Mission Planner’s CONFIG->MAVFTP tab or take out the SD card and use a PC to write the script onto the card.
Restart the autopilot with the SD card in and the script(s) on it will load and execute.
If you get a “Scripting: out of memory” GCS message then you will need to increase SCR_HEAP_SIZE parameter and try to restart the simulation. How much memory is needed is dependent on the script and the configuration of peripherals and features in use on the autopilot.
Once Script is running
Many scripts will require parameters created by the script to be setup or RC switches configured. This should be explained in the script’s README.md file co-located with the script in the ArduPilot repo.
You can stop or restart scripting operations from the RC transmitter (see Auxiliary switches) or via MAVLink command (GCS).