CORVON CV0850 Optical Flow and Lidar
The CORVON CV0850 combines an optical flow camera with an 8m dToF lidar. It sends optical flow and distance data to the autopilot over UART using MAVLink.
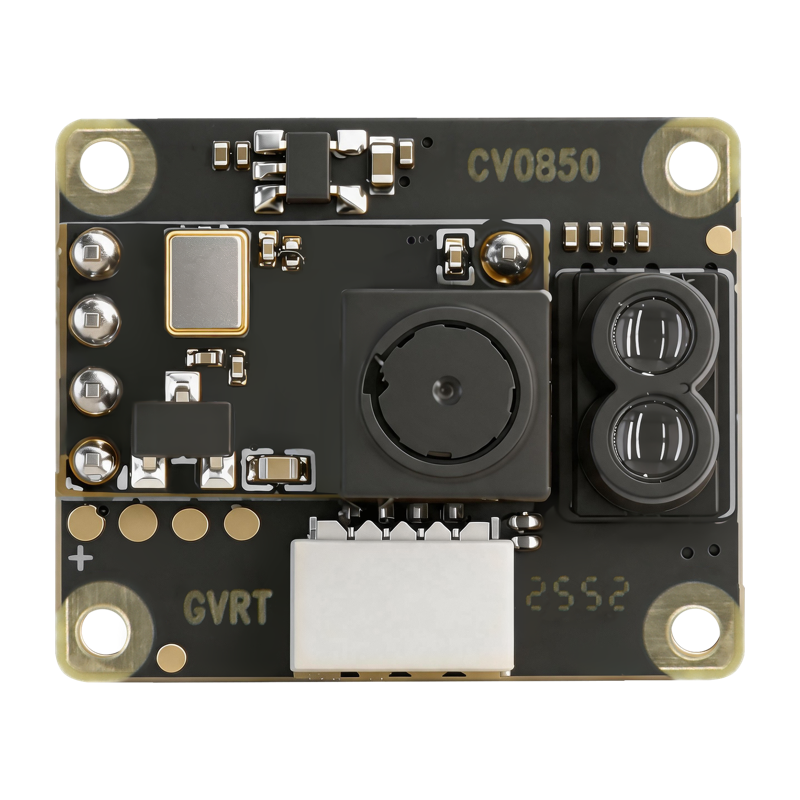
Specifications
Lidar range: 2cm to 8m, field of view less than 3 degrees, 50Hz update rate
Lidar accuracy: +/-3cm below 1m, +/-3% at 1m and above
Supply voltage: 3.5V to 5.5V, 40mA maximum at 5V
Interface: UART at 115200 baud
Size: 20.0 x 16.5 x 6.7mm
Weight: 1.8g
See the datasheet for full details.
Where to Buy
The sensor is available from CORVON.
Sensor Setup
Connect the sensor to a PC using an FTDI adapter (USB to serial)
Open the CORVON TOF Tool in Chrome or Edge and select the adapter’s serial port
Set the protocol to “MAVLink (APM)” and the mounting orientation to downward facing
Save the settings to the sensor
Connection to Autopilot
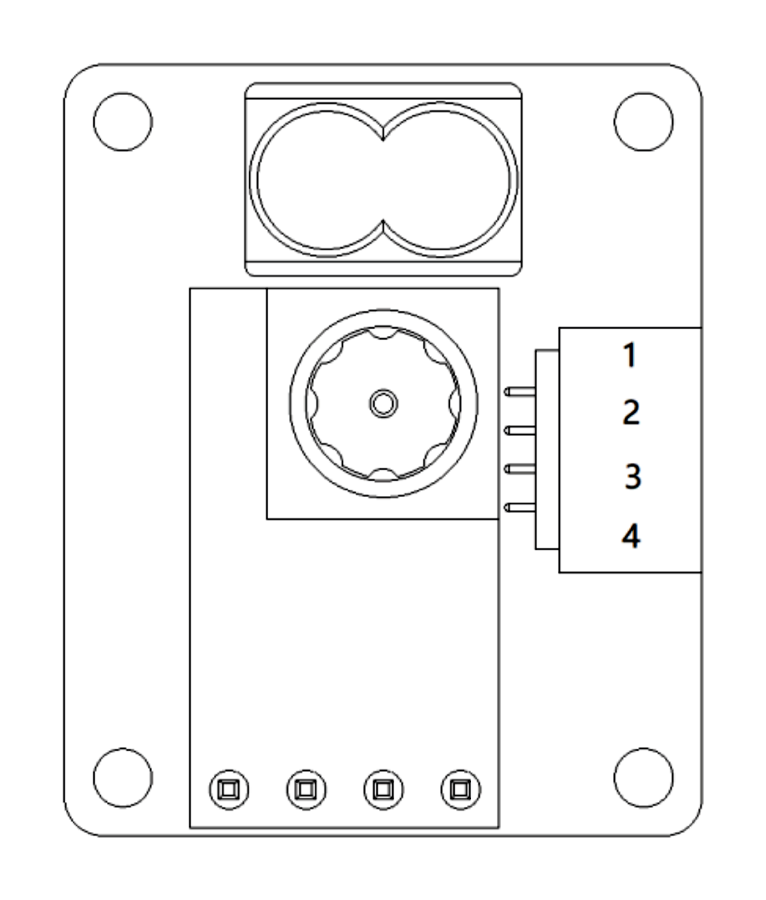
Connect the sensor to any spare serial port on the autopilot:
Pin 1 (TX) to the autopilot serial port’s RX
Pin 2 (RX) to the autopilot serial port’s TX
Pin 3 (VCC) to 5V
Pin 4 (GND) to GND
Mounting Orientation
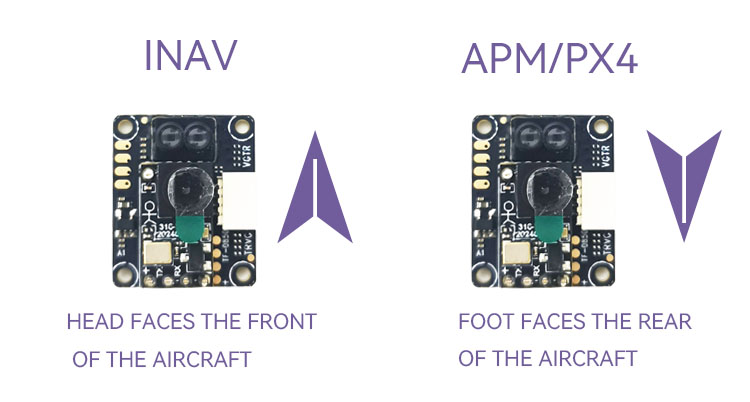
Mount the sensor on the underside of the vehicle with the lenses pointing downwards, and with the end of the board carrying the two lidar lenses towards the front of the vehicle. Mounted this way FLOW_ORIENT_YAW can be left at 0.
Warning
Incorrect flow orientation can cause a flyaway. Check the sensor axes using the procedure in Optical Flow setup before relying on optical flow in flight.
Parameters
These settings assume a connection to Serial2. For another port, change the SERIAL2_ parameters to match.
Set SERIAL2_BAUD = 115
Set SERIAL2_PROTOCOL = 1 (MAVLink1)
Set FLOW_TYPE = 5 (MAVLink)
Set RNGFND1_TYPE = 10 (MAVLink)
Reboot the autopilot to see the rangefinder parameters
Set RNGFND1_MAX = 8
Set RNGFND1_MIN = 0.02
Set RNGFND1_ORIENT = 25 (Downward)
Set bit 1 (value 2) of the
MAVx_OPTIONSof the sensor’s MAVLink channel (Don’t forward mavlink to/from) to keep its messages off the telemetry link. See MAVLink configuration for how the channels are numberedReboot the autopilot again to apply the MAVLink forwarding setting
Note
On 4.6 and earlier the forwarding option is bit 10 of SERIAL2_OPTIONS (value 1024) instead. Do not set that bit on 4.7 or later; it fails a pre-arm check.
In Mission Planner, open Flight Data > Status. Check opt_m_x, opt_m_y and opt_qua while moving the sensor over a textured surface, and rangefinder1 while changing its height above it.
Optical Flow Use and Calibration
Follow Optical Flow setup to calibrate the sensor and configure the EKF.