ARCHIVED: See GeoFencing for info for firmware versions 4.1 and later
Geo-Fencing in Plane
The Geo-Fencing support in Plane firmware versions prior to 4.1, allows you to set a virtual ‘fence’ around the area you want to fly in, specified as an enclosed polygon of GPS positions plus a minimum and maximum altitude. For firmware versions 4.1 and later, Plane uses the either a home centered Cylindrical Fence, see Cylindrical Fence and/or Inclusion/Exclusion Fences, see Inclusion and Exclusion Fences.
Note
In Plane you MUST have the fence polygon drawn for the geofence parameters to work. In Copter you can specify a maximum fence altitude without the fence polygon and Copter will adhere to it but Plane requires you to draw the polygon for any of the fence parameters including the max/min ALT to work.
When fencing is enabled, if your plane goes outside the fenced area then it will switch to GUIDED mode, and will fly back to a pre-defined return point, and loiter there ready for you to take over again. You then use a switch on your transmitter or use commands in your Ground Control Station (GCS) to take back control.
Use for R/C training
One of the main uses of geo-fencing is to teach yourself (or someone else) to fly radio controlled planes. When you have a properly configured geo-fence it is very hard to crash, and you can try manoeuvres that would normally be too likely to end in a crash, trusting the APM to ‘bounce’ the plane off the geo-fence before the flight ends in disaster.
Geo-fencing can be combined with any flight mode. So for a raw beginner, you would combine it with one of the stabilised flight modes (such as STABILIZE or FBWA). Once the pilot has gained some confidence you could combine it with MANUAL mode, which gives direct control of the plane and allows for the most interesting aerobatic manoeuvres. When used in this way the autopilot stays out of your way completely, just passing the controls to the servos directly, and only takes control if you go outside the fenced area or outside the defined altitude range.
Use for containment
During fully autonomous operation the fence can be used as a failsafe measure to ensure the aircraft stays within the intended flight area. During fully autonomous operation use the FENCE_AUTOENABLE parameter and the plane will automatically engage the fence after takeoff is complete and automatically disable the fence when it arrives at a landing waypoint. Set the FENCE_AUTOENABLE parameter to 1 to use this feature. For details on setting up landing and takeoff waypoints see the Planning a Mission with Waypoints and Events page.
Of course, the fence can be used for containment in semi-autonomous missions as well (missions where, e.g., takeoff and/or landing are manual) – the fence would still be enabled/disabled via the R/C transmitter or the GCS in that case – FENCE_AUTOENABLE is optional.
Setting up geo-fencing
To setup geo-fencing in Plane you need to configure several things:
the boundary of the fence, as a set of GPS points
the action to take on fence breach
the location of the return point; note that optionally you may use the FENCE_RET_RALLY parameter to have the plane return to the closest Rally Point instead of the fence return point.
the minimum and maximum altitude of the fenced area
what RC channel on your transmitter you will use to enable geo-fencing (if any)
an optional setting (FENCE_AUTOENABLE) when you want to configure the fence to automatically enable after an autonomous takeoff and automatically disable after an autonomous landing
how you want to take back control after a fence breach
These can all be setup using Mission Planner.
There are a few rules that you must follow when setting up your fence boundary:
the return point must be inside the fence boundary
the fence boundary must be fully enclosed. This means it must have at least 4 points, and the last point must be the same as the first point
the boundary can have at most 18 points
If you setup your fence with the APM planner it should ensure you follow these rules.
Please remember when making your fence boundary that your plane will have some momentum when it hits the fence, and will take time to turn back to the return point. For a plane like the SkyWalker we recommend an additional safety margin of around 30 meters inside the true boundary of where you want to fly. The same goes for the minimum altitude - you need to make it high enough that the APM has time to recover from a fast dive. How much margin you need depends on the flight characteristics of your plane.
Apart from the fence boundary, the following MAVLink parameters control geo-fencing behaviour:
FENCE_ACTION - the action to take on fence breach. This defaults to zero which disables geo-fencing. Set it to 1 to enable geo-fencing and fly to the return point on fence breach. Set to 2 to report a breach to the GCS but take no other action. Set to 3 to have the plane head to the return point on breach, but the pilot will maintain manual throttle control in this case.
FENCE_ALT_MIN - the minimum altitude in meters. If this is zero then you will not have a minimum altitude.
FENCE_ALT_MAX - the maximum altitude in meters. If this is zero then you will not have a maximum altitude.
FENCE_CHANNEL<FENCE_CHANNEL>(revs previous to 4.1),RCx_OPTION= 11 - the RC input channel to watch for enabling the geo-fence. This defaults to zero, which disables geo-fencing. You should set it to a spare RC input channel that is connected to a two position switch on your transmitter. Fencing will be enabled when this channel goes above a PWM value of 1750. If your transmitter supports it it is also a good idea to enable audible feedback when this channel is enabled (a beep every few seconds), so you can tell if the fencing is enabled without looking down.FENCE_TOTAL - the number of points in your fence (the return point plus the enclosed boundary). This should be set for you by the planner when you create the fence.
FENCE_RETALT- the altitude the aircraft will fly at when flying to the return point and when loitering at the return point (in meters). Note that when FENCE_RET_RALLY is set to 1 this parameter is ignored and the loiter altitude of the closest Rally Point is used instead. If this parameter is zero and FENCE_RET_RALLY is also zero, the midpoint of the FENCE_MAXALT` andFENCE_MINALTparameters is used as the return altitude.FENCE_AUTOENABLE - if set to 1, the aircraft will boot with the fence disabled. After an autonomous takeoff completes the fences will automatically enable. When the autonomous mission arrives at a landing waypoint the fence automatically disables.
FENCE_RET_RALLY - if set to 1 the aircraft will head to the nearest Rally Point rather than the fence return point when the fence is breached. Note that the loiter altitude of the Rally Point is used as the return altitude.
Note
A Rally Point can be outside of the geofence but this is NOT
recommended. If you have a rally point outside the geofence you
will need to disable the geofence using FENCE_CHANNEL before you
can control the plane again otherwise the plane will stay in GUIDED
mode FOREVER circling the rally point. Once the geofence is disabled
you should fly the plane back inside the geofence and then re-enable
it.
One additional parameter may be useful to get the most out of geo-fencing. When you breach the fence, the plane will switch to GUIDED mode and fly back to the return point (or the nearest Rally Point, if FENCE_RET_RALLY has been set to 1). Once you are back inside the fence boundary you are able to take control again, and you need to tell the APM that you want to take control. You can do that in one of 3 ways:
changing modes using the mode switch on your transmitter, or changing modes via the Mission Planner GCS (e.g., change from GUIDED mode to AUTO mode).
disabling and re-enabling geo-fencing using the rc channel setup for fence control above.
set the
RST_SWITCH_CHMAVLink parameter to another two-position channel that is attached to a spring loaded switch. TheRST_SWITCHparameter defaults to zero which disables it. If you set it to a channel then you can use this channel switch to take back control after a fence breach.
If not flying completely autonomously, I find that using RST_SWITCH_CH
is the best option for geo-fencing as it means that the APM has fencing
enabled throughout the flight, and you don’t get any behaviour change by
switching modes. It does take up another channel though, so some people
may not have enough channels to use it.
Setting up the fence boundary
APMPlanner
To setup a fence boundary you should use the ‘Flight Planner’ screen in the APM Planner.
Start by right-clicking the location you want for the return point and choosing ‘Set return location’. The return point should be somewhere in the middle of your flight area, and in easy visual range of where you will be standing when you fly.
After you’ve set the return point you should right click on the first point on the boundary of the fence you want. Choose ‘Draw Polygon ->
Add polygon point’. You are then in polygon mode, and you should left-click to add each point in the boundary of your fence. The planner will automatically complete the polygon by connecting the last point to the first one.
You can then right-click and choose geo-fencing upload to send your fence boundary to the APM. The planner will ask you for the minimum and maximum altitude (in meters) of your fence before uploading. You can also save your fence to a file for later loading.
Mission Planner
Mission Planner follows a very similar process. Start by right-clicking where you want to begin the geo-fence boundary.
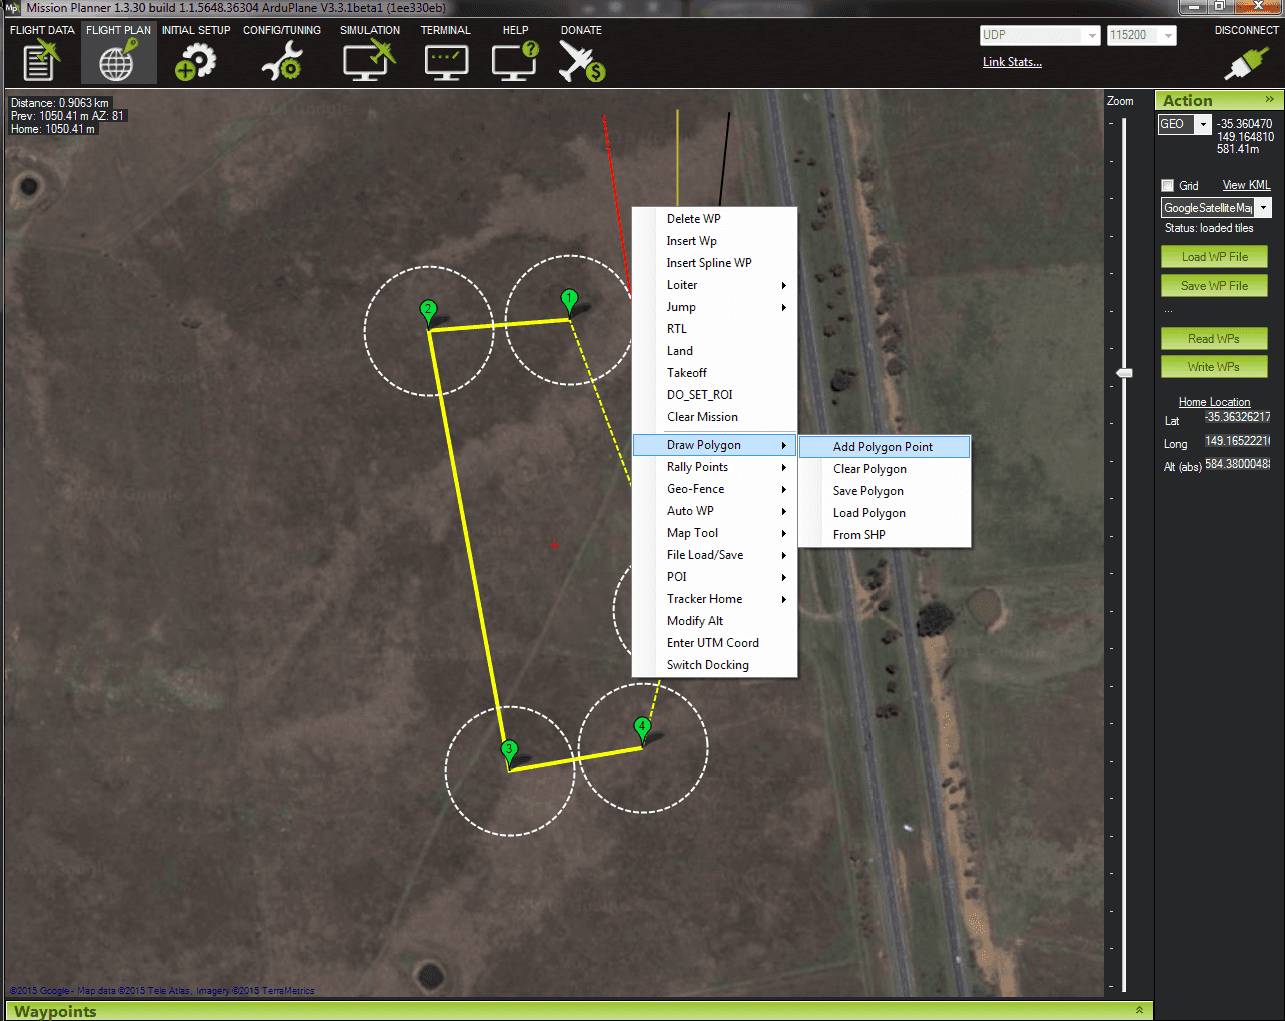
Add Polygon Point
Continue to click on the map where you want the geo-fence boundary and the polygon will appear. You can drag any points you want to adjust. Then right click on the map where you want the plane to return to when a geo-fence breach occurs.
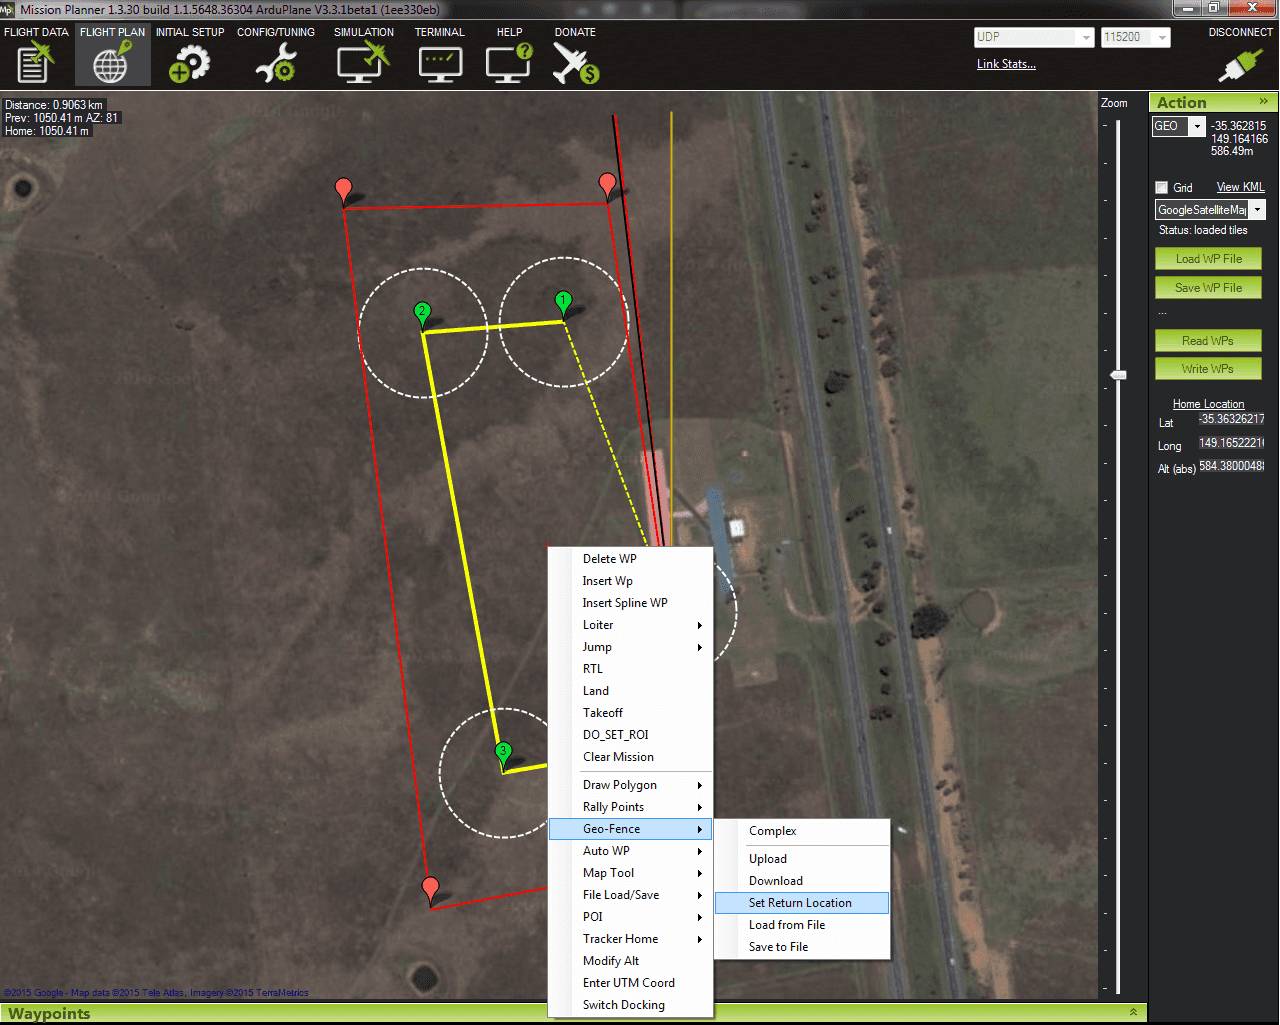
Geo-Fence Set ReturnLocation
Finally upload the geo-fence.
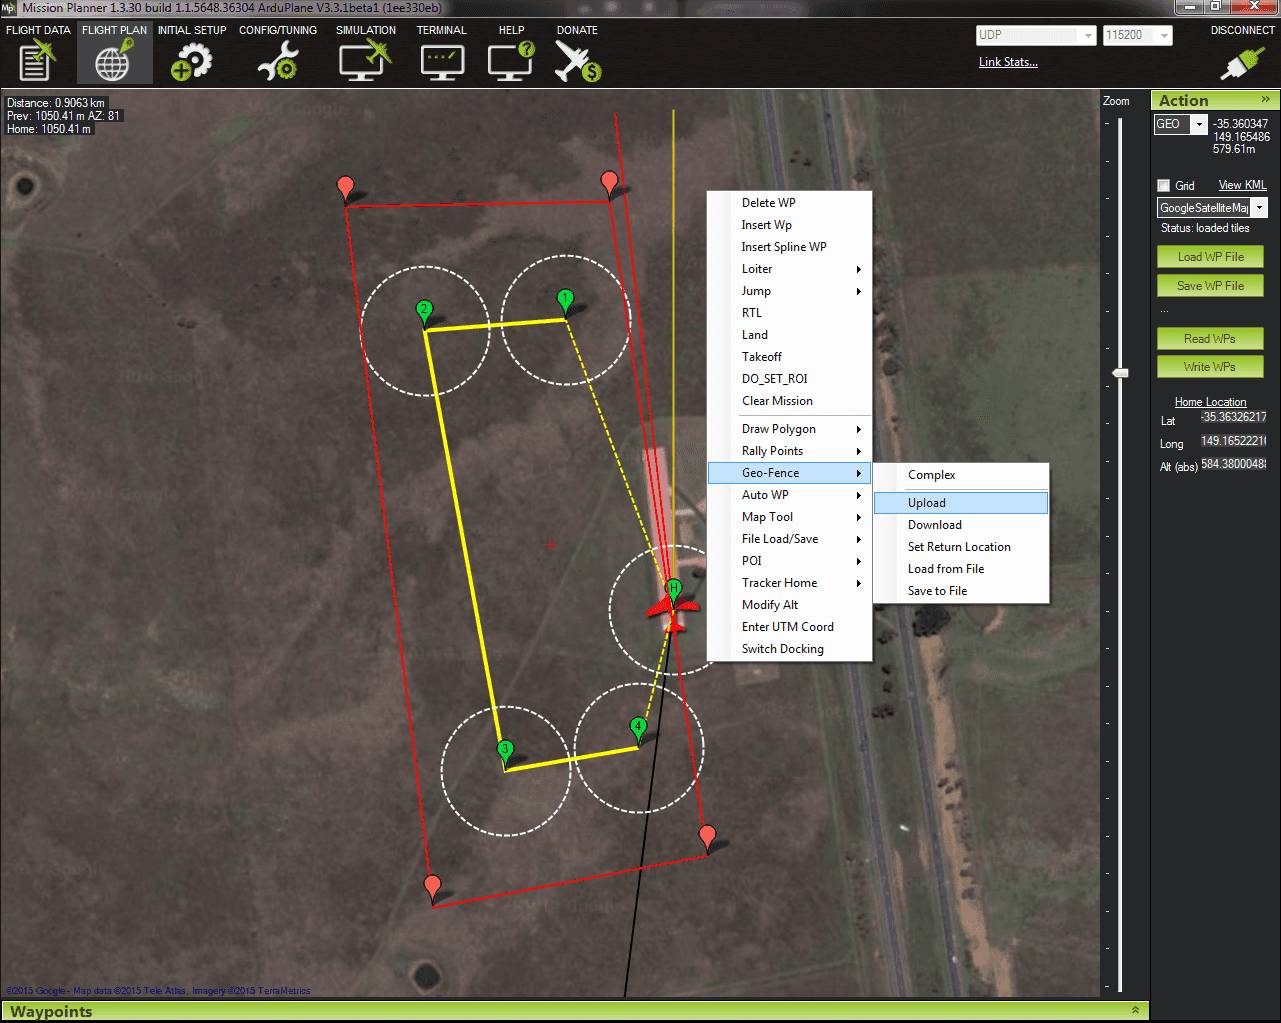
Geo-Fence Upload
Altitude of the return point
If you set the FENCE_RET_RALLY parameter to 1, then the return
altitude will be the same as the loiter altitude of the nearest Rally
Point. If the FENCE_RET_RALLY is set to 0, then you may set the
return altitude in meters above the Home Point with the FENCE_RETALT
parameter. Otherwise:
If you set FENCE_MINALT and FENCE_MAXALT to other than zero (and have
FENCE_MAXALT greater than FENCE_MINALT) then the return point altitude
will be half way between FENCE_MINALT and FENCE_MAXALT.
If you don’t setup FENCE_MINALT and FENCE_MAXALT (ie. leave them at
zero) then the return point altitude will be given by the RTL_ALTITUDE
parameter, which is also used for RTL mode. Note that RTL_ALTITUDE is
in centimetres, whereas FENCE_MINALT and FENCE_MAXALT are in meters.
If your flying club and local flying rules don’t set a maximum altitude then we recommend you use a maximum altitude of at most 122 meters (which is around 400 feet). Beyond that altitude it becomes quite difficult to keep good eye contact with your model.
With FENCE_MINALT set at 30 meters (to allow for some dive momentum)
and FENCE_MAXALT set to 122 meters, the return point will be 76 meters,
which is quite a good altitude to leave the plane loitering while you
are getting ready to have another go.
Stick-mixing on fence breach
ArduPilot enables ‘stick mixing’ by default when in auto modes. This means that you can change the path of a loiter, for example, by using your transmitter sticks.
When you are using geo-fencing, stick mixing will be disabled on fence breach until your plane is back inside the fenced region. This is to ensure that the bad control inputs that caused you to breach the fence don’t prevent it from recovering to the return point.
As soon as you are back inside the fence stick mixing will be re-enabled, allowing you to control the GUIDED mode that the plane will be in. If by using stick mixing you manage to take the plane outside the fence again then stick mixing will again be disabled until you are back inside the fence.
Tips for flying with geo-fencing
You should have geo-fencing disabled when on the ground and for takeoff. Be careful not to enable it on the ground, as it may declare a fence breach and try to fly to the return point. If flying fully autonomously you may use the FENCE_AUTOENABLE parameter to assist with this complication.
Also remember to disable it for landing, as the altitude breach when you are coming in will make it very hard to land!
If you are using an APM1 and want to combine geo-fencing with MANUAL mode, then remember that on the APM1 the APM software is bypassed when using channel 8 for mode switching and a switch PWM channel value above 1750 (this is called ‘hardware manual’ on the APM1). So you either need to set a different switch position as MANUAL, or use a different mode switch control channel (and set FLTMODE_CH to the channel you are using).
Before you takeoff and fly with geo-fencing make sure all the parameters are setup as described above, and also make sure you have a good GPS lock. If you lose GPS lock then geo-fencing will disable itself until GPS lock is regained, so don’t use it if your GPS signal is marginal.
I’d also recommend you test it gently at first. Try slowly approaching a
fence boundary and ensure it correctly ‘bounces’ off the virtual wall
and returns to the return point OK. Then after taking control again, try
slowly approaching the minimum altitude and ensure it bounces off the
FENCE_MINALT you have set.
While developing geo-fencing I found that combining it with MANUAL mode is the most fun. It gives you all of the excitement of manual flight with sharp turns and fancy stunts while saving your plane when you make a mistake.
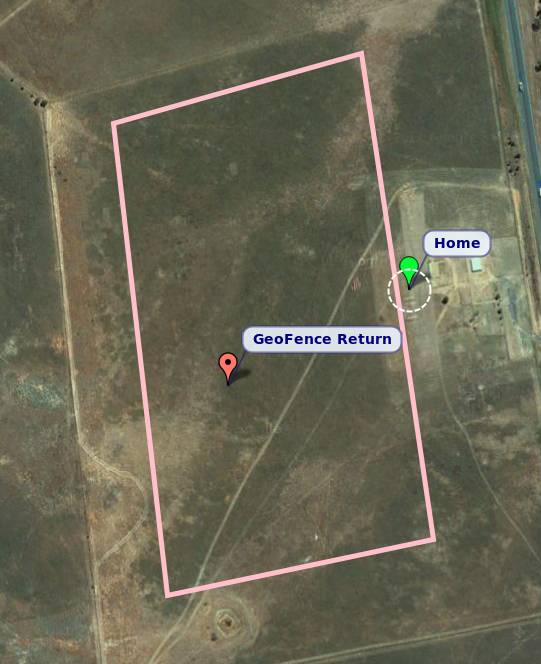
Example flight
This is the track from a flight with geo-fencing enabled at my local flying club while flying my !SkyWalker. The white lines show the geo-fence boundary, plus you can see the return point in the middle. You can also see the points where the plane breached the geo-fence to the north, west and south. There were also numerous altitude breaches, as I was using this flight to try to improve my inverted flight skills in MANUAL mode. The plane would not have survived without the geo-fence!
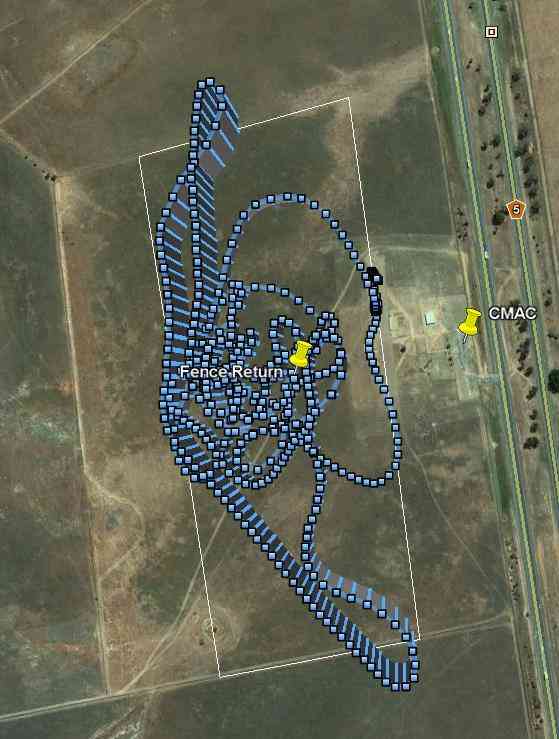
Notice that the geo-fence in this example runs along the middle of the
runway. This is to conform to my local club rules. The takeoff and
landing were done with the fence disabled. I had FENCE_CHANNEL set to
7, and RST_SWITCH_CH set to 6. That allowed me to enable the fence
after takeoff using one switch, then to take back control after a breach
using the spring loaded trainer switch.
Note
in firmware versions 4.1 and later, FENCE_CHANNEL is replaced by setting a channel’s RCx_OPTION to 208, and RST_SWITCH_CH is replaced by setting a channel’s RCx_OPTION to 96.
MAVLink support
ArduPilot will report the fence status via the MAVLink GCS protocol. The key status packet is called FENCE_STATUS, and is defined in “ardupilotmega.xml”. A typical FENCE_STATUSpacket looks like this:
2011-12-20 16:36:35.60: FENCE_STATUS breach_status : 1, breach_count : 15, breach_type : 1, breach_time : 1706506
The breach_status field is 0 if inside the fence, and 1 if outside. The breach_count is how many fence breaches you have had on this flight. The breach_type is the type of the last breach (see the FENCE_BREACH enum in ardupilotmega.xml). The breach_time is the time in milliseconds of the breach since APM was booted.
The MAV_SYS_STATUS_GEOFENCE bit of the MAV_SYS_STATUS_SENSOR portion of the SYS_STATUS message indicates whether or not the geo-fence is breached. As of this writing only the MAVProxy GCS recognizes this status bit and reports the status of the geo-fence. In the future the Mission Planner, APM Planner, and other GCS applications should get support for announcing geo-fence status during the flight.
The MAV_CMD_DO_FENCE_ENABLE MAVLink command message allows a GCS to enable or disable a fence interactively. As of this writing only MAVProxy supports this message using the “fence enable” or “fence disable” commands. In the future Mission Planner, APM Planner, and other GCS applications should get support for interactively enabling and disabling the geo-fence without needing to use a manual transmitter.
Advanced Features
Geo-fencing in Plane can also be used as part of a failsafe system, for competitions like the Outback Challenge. For those type of events you should define your fence boundary as usual, but additionally build APM with the FENCE_TRIGGERED_PIN option set in APM_Config.h. This option allows you to set a digital pin on your APM to go high when the fence is breached. You can connect this pin to your planes failsafe device to trigger the planes failsafe mode (which for the OBC competition involves setting extreme servo values to dive the plane into the ground).