Hitec DroneCAN Linear Actuators
Hitec supplies several linear actuators that support the DroneCAN protocol using the same commands and feedback as are used for servos. Before purchasing, ensure the product description includes the word “DroneCAN”.
Where to Buy
Hitec linear actuators can be purchased directly from Hitec or from their distributors
Setup and Configuration
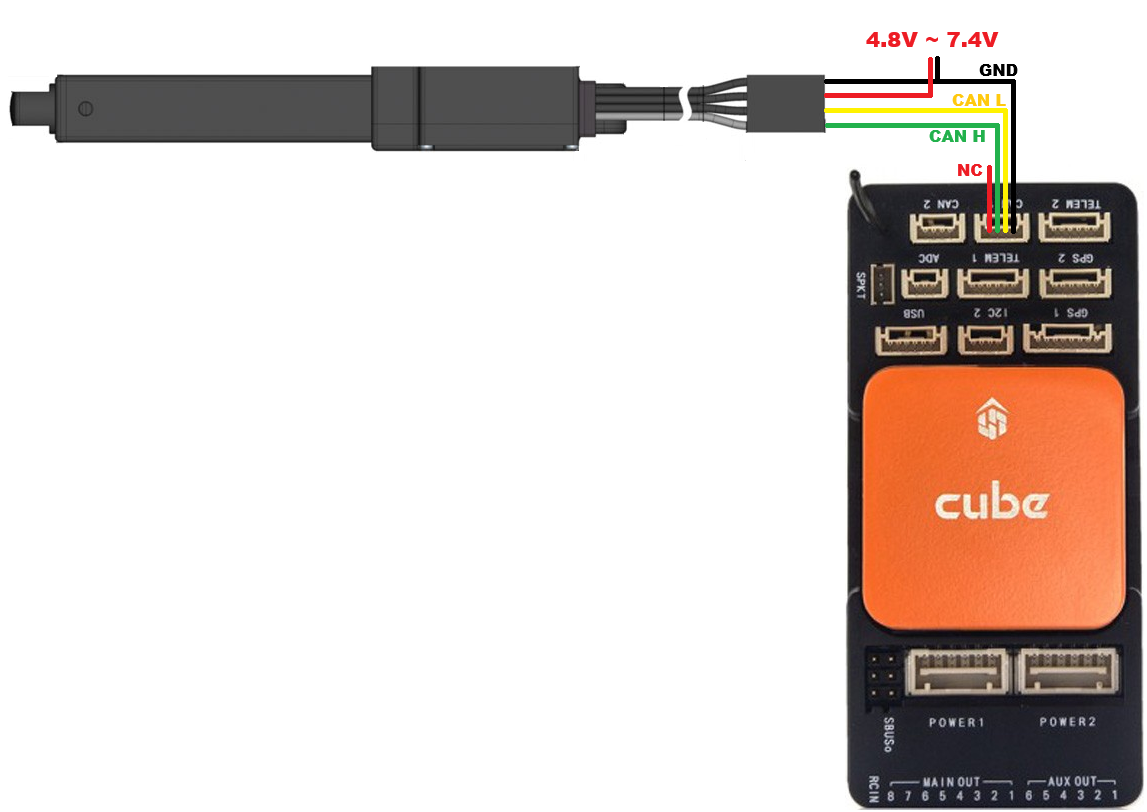
Connect the linear actuator to the autopilot and power supply as shown above and set the following parameters:
CAN_P1_DRIVER = 1 (First Driver)
CAN_D1_PROTOCOL = 1 (DroneCAN)
CAN_D1_UC_SRV_BM: bitmask of servo output channels that should be sent via DroneCAN. E.g. “256” for Servo9
(Optionally) CAN_D1_UC_SRV_RT: rate that servo outputs are sent from the autopilot to the actuator
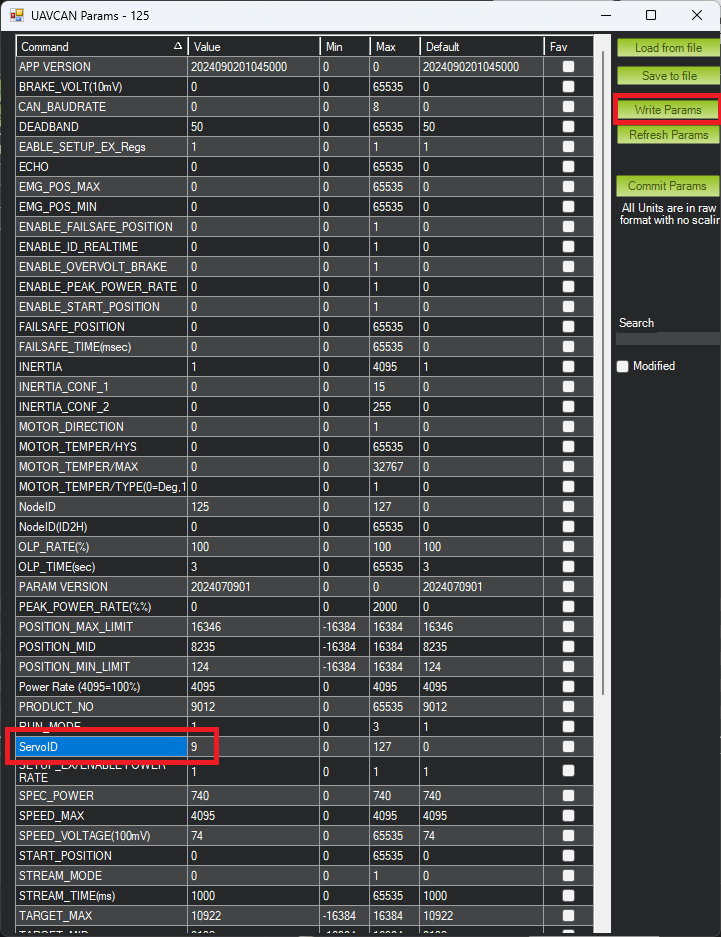
Use the DroneCAN GUI Tool or Mission Planner’s DroneCAN/UAVCAN screen to confirm communication with the autopilot is working correctly and to set the actuator’s ServoId parameter
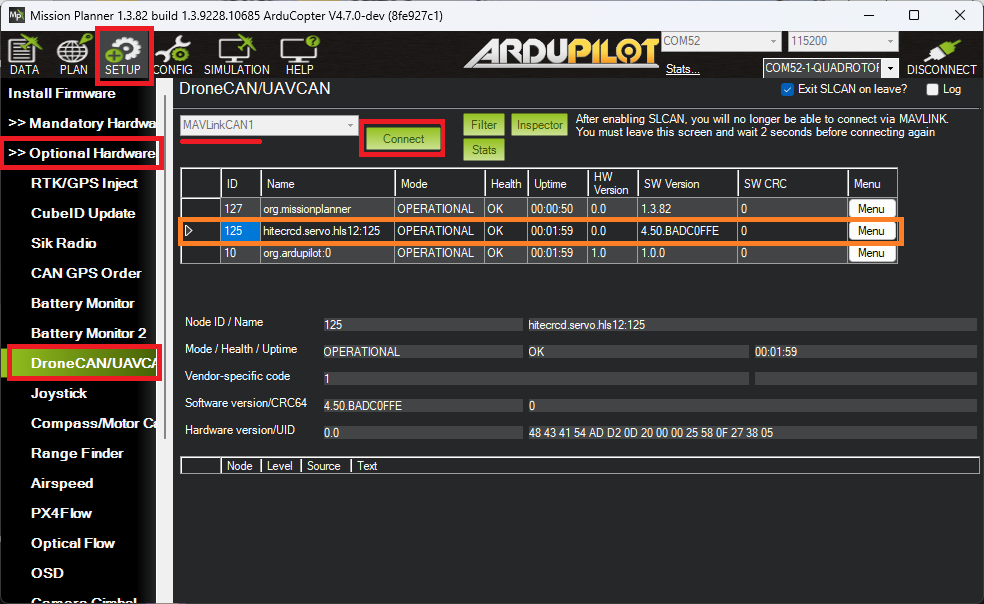
If using Mission Planner
Open Setup, Optional Hardware, DroneCAN/UAVCAN
Select MAVLinkCAN1 from the drop-down an press “Connect”
“hitecrcd.servo.hls” should appear in the list. From the right side select Menu, Parameters
Set “ServoID” to the servo output channel that the linear actuator should take its position from (e.g. “9” to mirror SERVO9’s output)
Reboot the autopilot and linear actuator
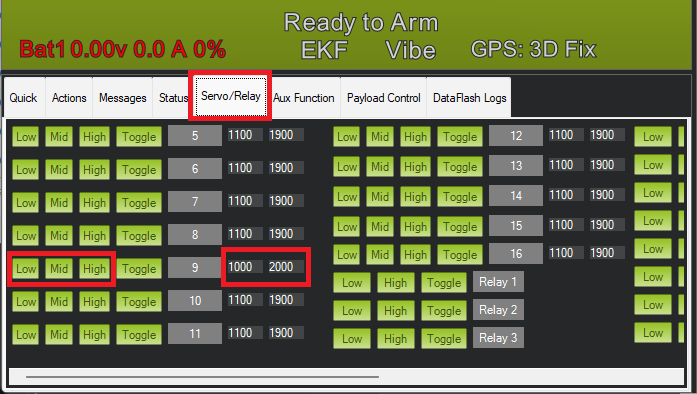
Testing
Open Mission Planner’s Data, Servo/Relay tab and use the Low, Mid and High buttons to test the actuator moves as expected