Archived:Loading ChibiOS firmware onto Pixhawk
These instructions explain how to download and install the beta ArduPilot with ChibiOS firmware onto a pixhawk autopilot.
In tests the development team has found using ChibiOS (in place of NuttX) results in a smaller firmware with faster loop rates and less timing jitter. ChibiOS builds have less testing and a few missing features however.
Parameters are preserved when moving between ChibiOS and NuttX firmwares and no re-tuning of the vehicle should be required.
Downloading the beta firmware
Download the appropriate beta firmware from firmware.ardupilot.org using the links below and save the resulting .apj file somewhere on your PC:
Uploading as Custom Firmware
connect the ground station PC to the autopilot using a USB cable
select the COM port and baud rate (normally 115200) for the board. If using the Mission Planner these are selected on the top right of the screen. Do not press the Connect button
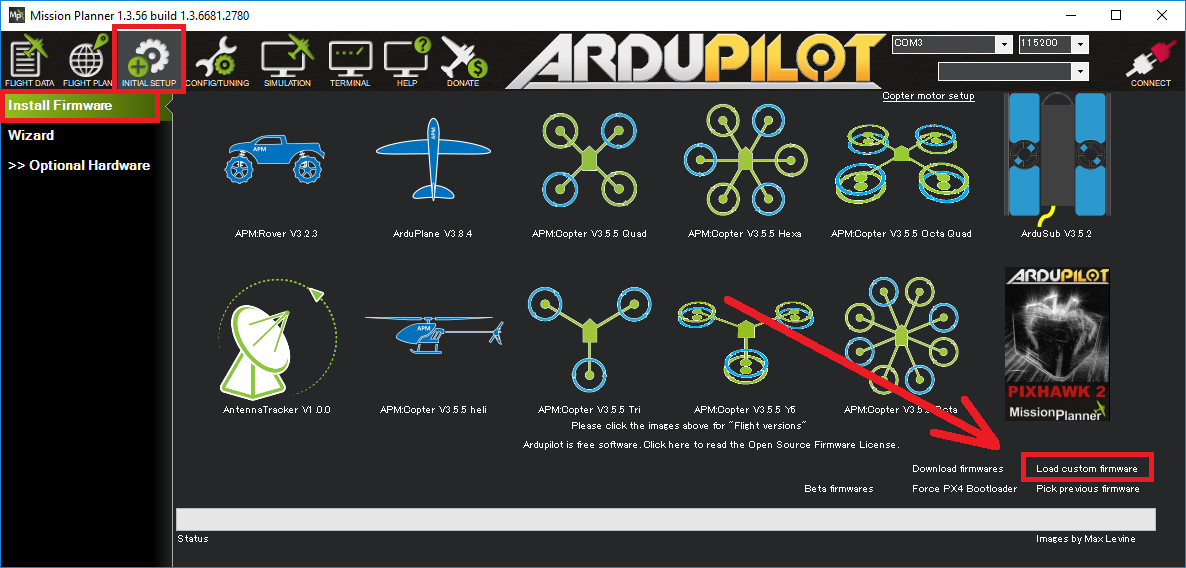
go to the GCS’s firmware install screen. If using the Mission Planner select “Initial Setup >> Install Firmware”
click the “Load custom firmware” link and select the .apj file downloaded above. If using the Mission Planner and the “Load custom firmware” link is not visible select “Config/Tuning >> Planner” and set the “Layout” drop-down to “Advanced”.
following any instructions displayed regarding plugging/unplugging the board
if all goes well some status should be displayed at the bottom of the screen. i.e. “erase…”, “program…”, “verify..” and “Upload Done”.
Testing
open the ground stations’s flight data screen
select the COM port (which will have changed compared to the NuttX versions) and baud (normally 115200)
press the Connect button
after parameters are downloaded, the HUD should update as you tilt the board
More details on connecting a GCS to the autopilot are described here.