Archived: Build Your Own Multicopter
There are Lots of Ways you Can Put Together a MultiCopter
Thoughtful, slow progression is better than jumping in with both feet, you can easily get discouraged by trying to do too much too fast.
You are likely to have a good experience if you start with a simple, small QuadCopter, either a Ready to Fly or an All Inclusive Kit.
For those with good DIY capabilities an Almost Ready To Fly build like the F450 FlameWheel described below can also work well.
For your first MultiCopter, DO NOT initially try to build a Photo / Video or First Person View copter, just build a good QuadCopter.
Even if you know that’s what you really want to do, it will take you some time to come up to speed on our copters and autopilots.
If you just want to get a taste and have a lot of fun, try one of the little inexpensive, safe, sturdy, ready to use Micro-QuadCopters below.
If you know you’re serious, try the Flamewheel ARF Build or if you just want to fly and can afford it get the high end Iris QuadCopter.
The Iris includes a top end Pixhawk autopilot and both the Iris and the Flamewheel can do FPV or Video when you are ready.
Don’t start with a Frame Up Build unless you have a complete article on how to build a really good simple Quadcopter like the Flip Sport.
Absolutely do not start by trying to Build Your Own Frame, even among experienced builders there are more failures than successes.
It is very important to NOT start out with a big (dangerous) multicopter with a bunch of photo or video stuff on it, you will regret it.
A small, agile QuadCopter is always a lot more fun to fly than a big, ponderous and slow Hex or OctoCopter in any case.
Except for top end professional HD video or photography requiring big cameras you are always better off thinking small, light and agile.
Warning
Safety is very important with multicopters, keep plenty of distance from living or expensive things and review our Safety Page.
Chinese Imports Good Deal / Bad Deal?
It is very tempting especially when just starting out to buy lots of Chinese direct import stuff because it is so much cheaper: Bad Idea!
As you gain experience, you will learn which import items are serviceable, if you try to do it at the beginning things will not go well.
I recommend you always get the main electronics (autopilot) from the primary source, in our case the Pixhawk from 3DRobotics.
You will also want to get the electronic accessories (GPS, magentometer, telemetry and OSD if used) from 3DRobotics as well.
If your going to do first person view, get a 3DRobotics FPV kit or a FatShark Attitude video goggle and transmitter.
As for cameras, the GoPro Hero 3 and especially the Black is the one to get, because it is what everybody uses and it works well.
The DJI Flamewheel ARF kit which is recommended is made in China but is a known quality setup, so where you get it is up to you.
The Traxxas, Hubsan and Helimax highly recommended starter micro-Quadcopters are also made in China but are still a great way to start.
Motors, Batteries, ESCs, frames and even FRSky or Turnigy RC transmitters and receivers can be very good deals direct from China.
A lot of items we buy domestically are actually made in China and of course, quality varies widely, regardless of country of origin.
A $25.00 RC-Timer motor is not likely to be of the same quality as the equivalent $100.00 Tiger-Motor, but hey, it’s only $25.00.
Although direct Chinese imports generally have pretty reliable shipping, aftermarket support or returns are often very problematic.
If you build in a ten to twenty percent broken, damaged or not included expectation for Chinese imports you will not be disappointed.
In any case, start with two or three of the recommended “builds” below so that you can experience success and learn to fly first.
Inexpensive, Ready To Fly Nano, Micro or Small QuadCopter
Tip
If you are new to MultiCopters, I very strongly suggest you start with one of these inexpensive Ready To Fly QuadCopters.
They come with everything you need including the radio and the battery, require no assembly, are very sturdy and are great for learning.
They are also a ton of fun, can easily and safely be used indoors and typically cost less than a hundred dollars.
Importantly you will get you a much better understanding of how they work and of what you really want to do next.
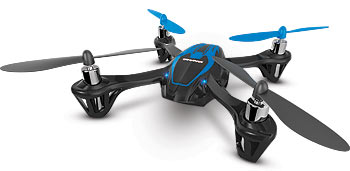
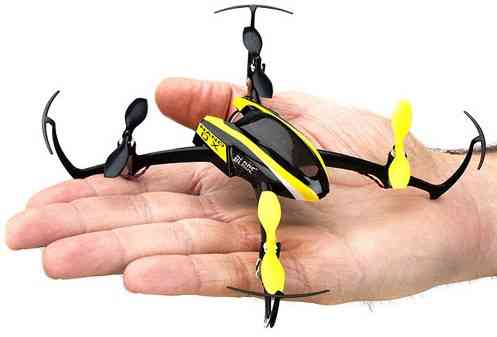
The Traxxas QR1 QuadCopter is an inexpensive RTF Micro Quadcopter that is great for a first experience. (Left image below).
For $45.00 the (Hubsan X4) is identical to the Traxxas and for $70.00 you can get it with a still photo and 720P HD video camera.Hubsan
For $200.00 there is even a really easy to fly FPV version of the Hubsan that comes with a RC transmitter with an excellent LCD display.
Even the parts for the Hubsans are readily available: Hobby Flip
The Helimax 1SQ is another low cost palm sized micro QuadCopter.
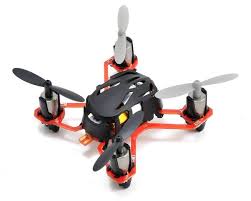
Or even the really, really tiny $40.00 Estes Proto X actually a Hubsan H111 which flies remarkably well (Middle and right images below).

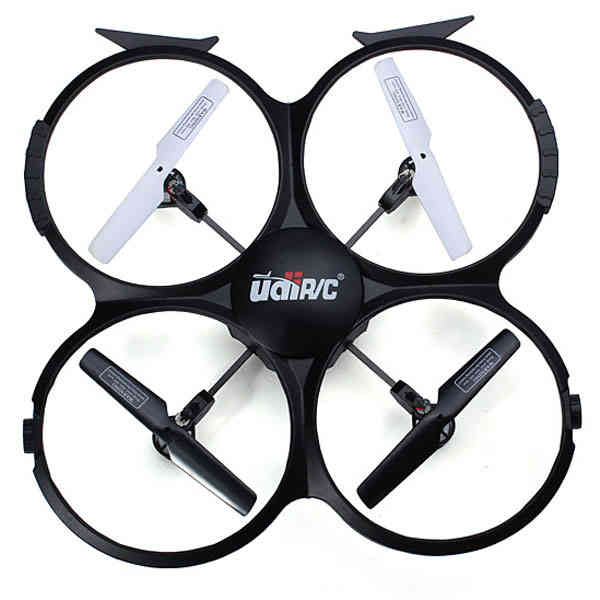
Below left is a larger, but very durable copter, the $88.00 UDI U818A 2.4GHz Quadcopter with Camera from Amazon Prime.
And a link to an important Blog Article by RocklandUSA for all people considering their first Multicopter purchase.
The Blade Nano QX at $90.00 below right is also highly recommended, is very light and easy to fly and incredibly durable.
If you are just starting out: Get one of these inexpensive, small, durable Quadcopters and learn to fly it well, it will save you a lot of money.
All Inclusive Kit
#. The easiest way to build is to buy a single kit that has all the parts necessary in one box and a set of instructions for each step.
#. Outside of (Ready To Fly) a good all inclusive kit is the most reliable and straightforward way to construct a quality MultiCopter.
#. Usually all of the components are well balanced with each other and the entire craft can be expected to perform well.
#. For an all inclusive kit, assembly is just nuts and bolts and possibly some soldering.
#. The assembly procedure is usually well explained in the supplied instructions.
#. The downside is that often quality kits are a bit more expensive than other alternatives and customization has to be added on.
#. If you are not already well qualified at Do It Yourself projects, A good all inclusive kit is definitely the best place to start.
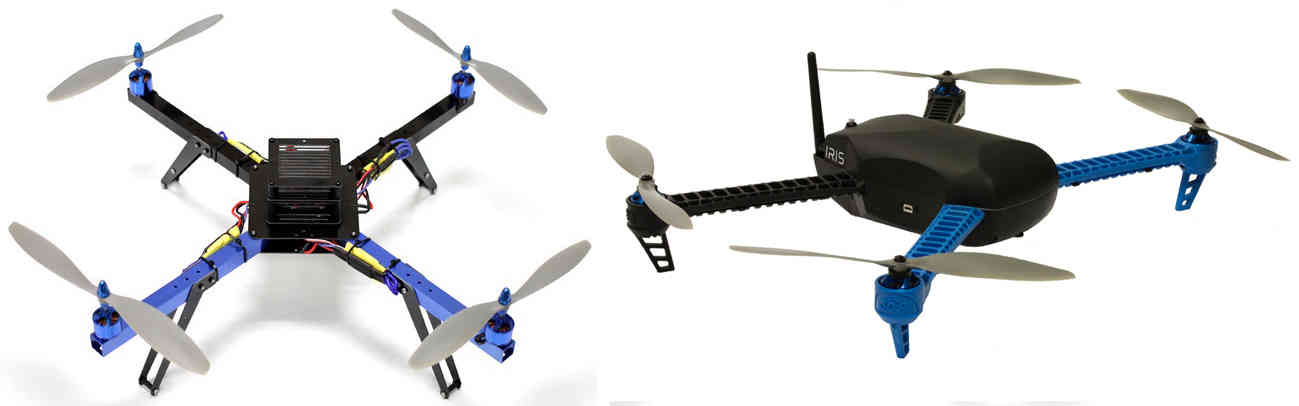
#. The innovative Iris QuadCopter is actually Ready To Fly and comes with the top of the line Pixhawk autopilot. However, these are no longer produced/sold by 3DR.
It is capable of fully autonomous flight and includes the RC transmitter, the battery and even telemetry, at $750.00 it is a real bargain.
The Iris structurally strong and resilient and it is set up to support a GoPro camera or even FPV (First Person View) when you are ready.
Almost Ready to Fly
If you need everything and want the most versatile copter possible you can’t beat the Iris above, it is simply a great deal.
If you already have a RC transmitter you can save some money and still build a really high quality autonomous QuadCopter.
Even if you are just starting there are a few really good choices.
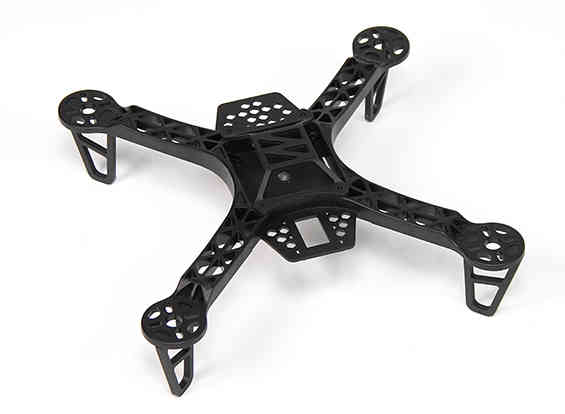
The DJI F450 Flamewheel QuadCopter ARF Kit may well be single the best choice at this time.
This kit comes with frame with built in power distribution board, the 4 motors and the 4 Electronic Speed Controls and 8 Propellers.
You need to add a Pixhawk Flight controller, A battery and your Radio Control Transmitter and Receiver.
The supplied equipment in the kit is all first rate and the real DJI Flamewheel frame is very stiff and sturdy (a good thing).
Cost: F450 ARF kit $180.00, Pixhawk with GPS/Compass $280.00 and a Battery $35.00 = ($495.00) plus a PPM-Sum receiver.
As an alternative, the smaller DJI F330 Flamewheel Quadcopter is also an excellent choice and can be better in smaller spaces.
The Wiki page on constructing the F330 is applicable to the F450 as well.
Most ARF kits that are cheaper than this are not nearly as sturdy and the components generally fail much more frequently.
You can buy the F450 ARF kit Here! This source has the F350 ARF kit also.
DO NOT get a clone kit that looks like it, the real DJI motors and ESCs are top quality and the frame is stiff and strong, the clones are not.
There are more expensive high quality ARF kits available but the FlameWheels will give great service and have very high performance.
If you want to keep initial cost to a bare minimum, start with a Simple Flight Controller then graduate to a Pixhawk when you are ready
The F450 can also serve as a competent Gopro and Gimbal carrying photo and video copter or as an FPV platform.
The DJI F550 ARF Hexacopter is a good choice for more advanced uses, but it is not ideal as a first MultiCopter.

Frame Kit
Once you get into building your own MultiCopter based on a frame kit you are getting into the big leagues, this is really not for beginners.
The exception is if you are carefully following a specific and highly detailed build.
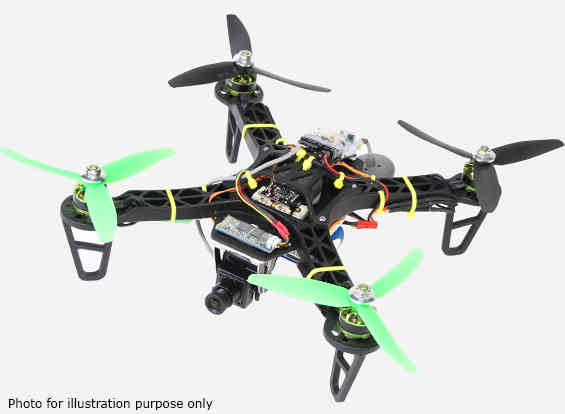
I am working on 2 Frame Kit based builds at the moment, a Flip 380 Sport QuadCopter and a Tarot 650 Carbon Fiber Quadcopter.
A little bit on the reasons for and methods used in each of the Builds.
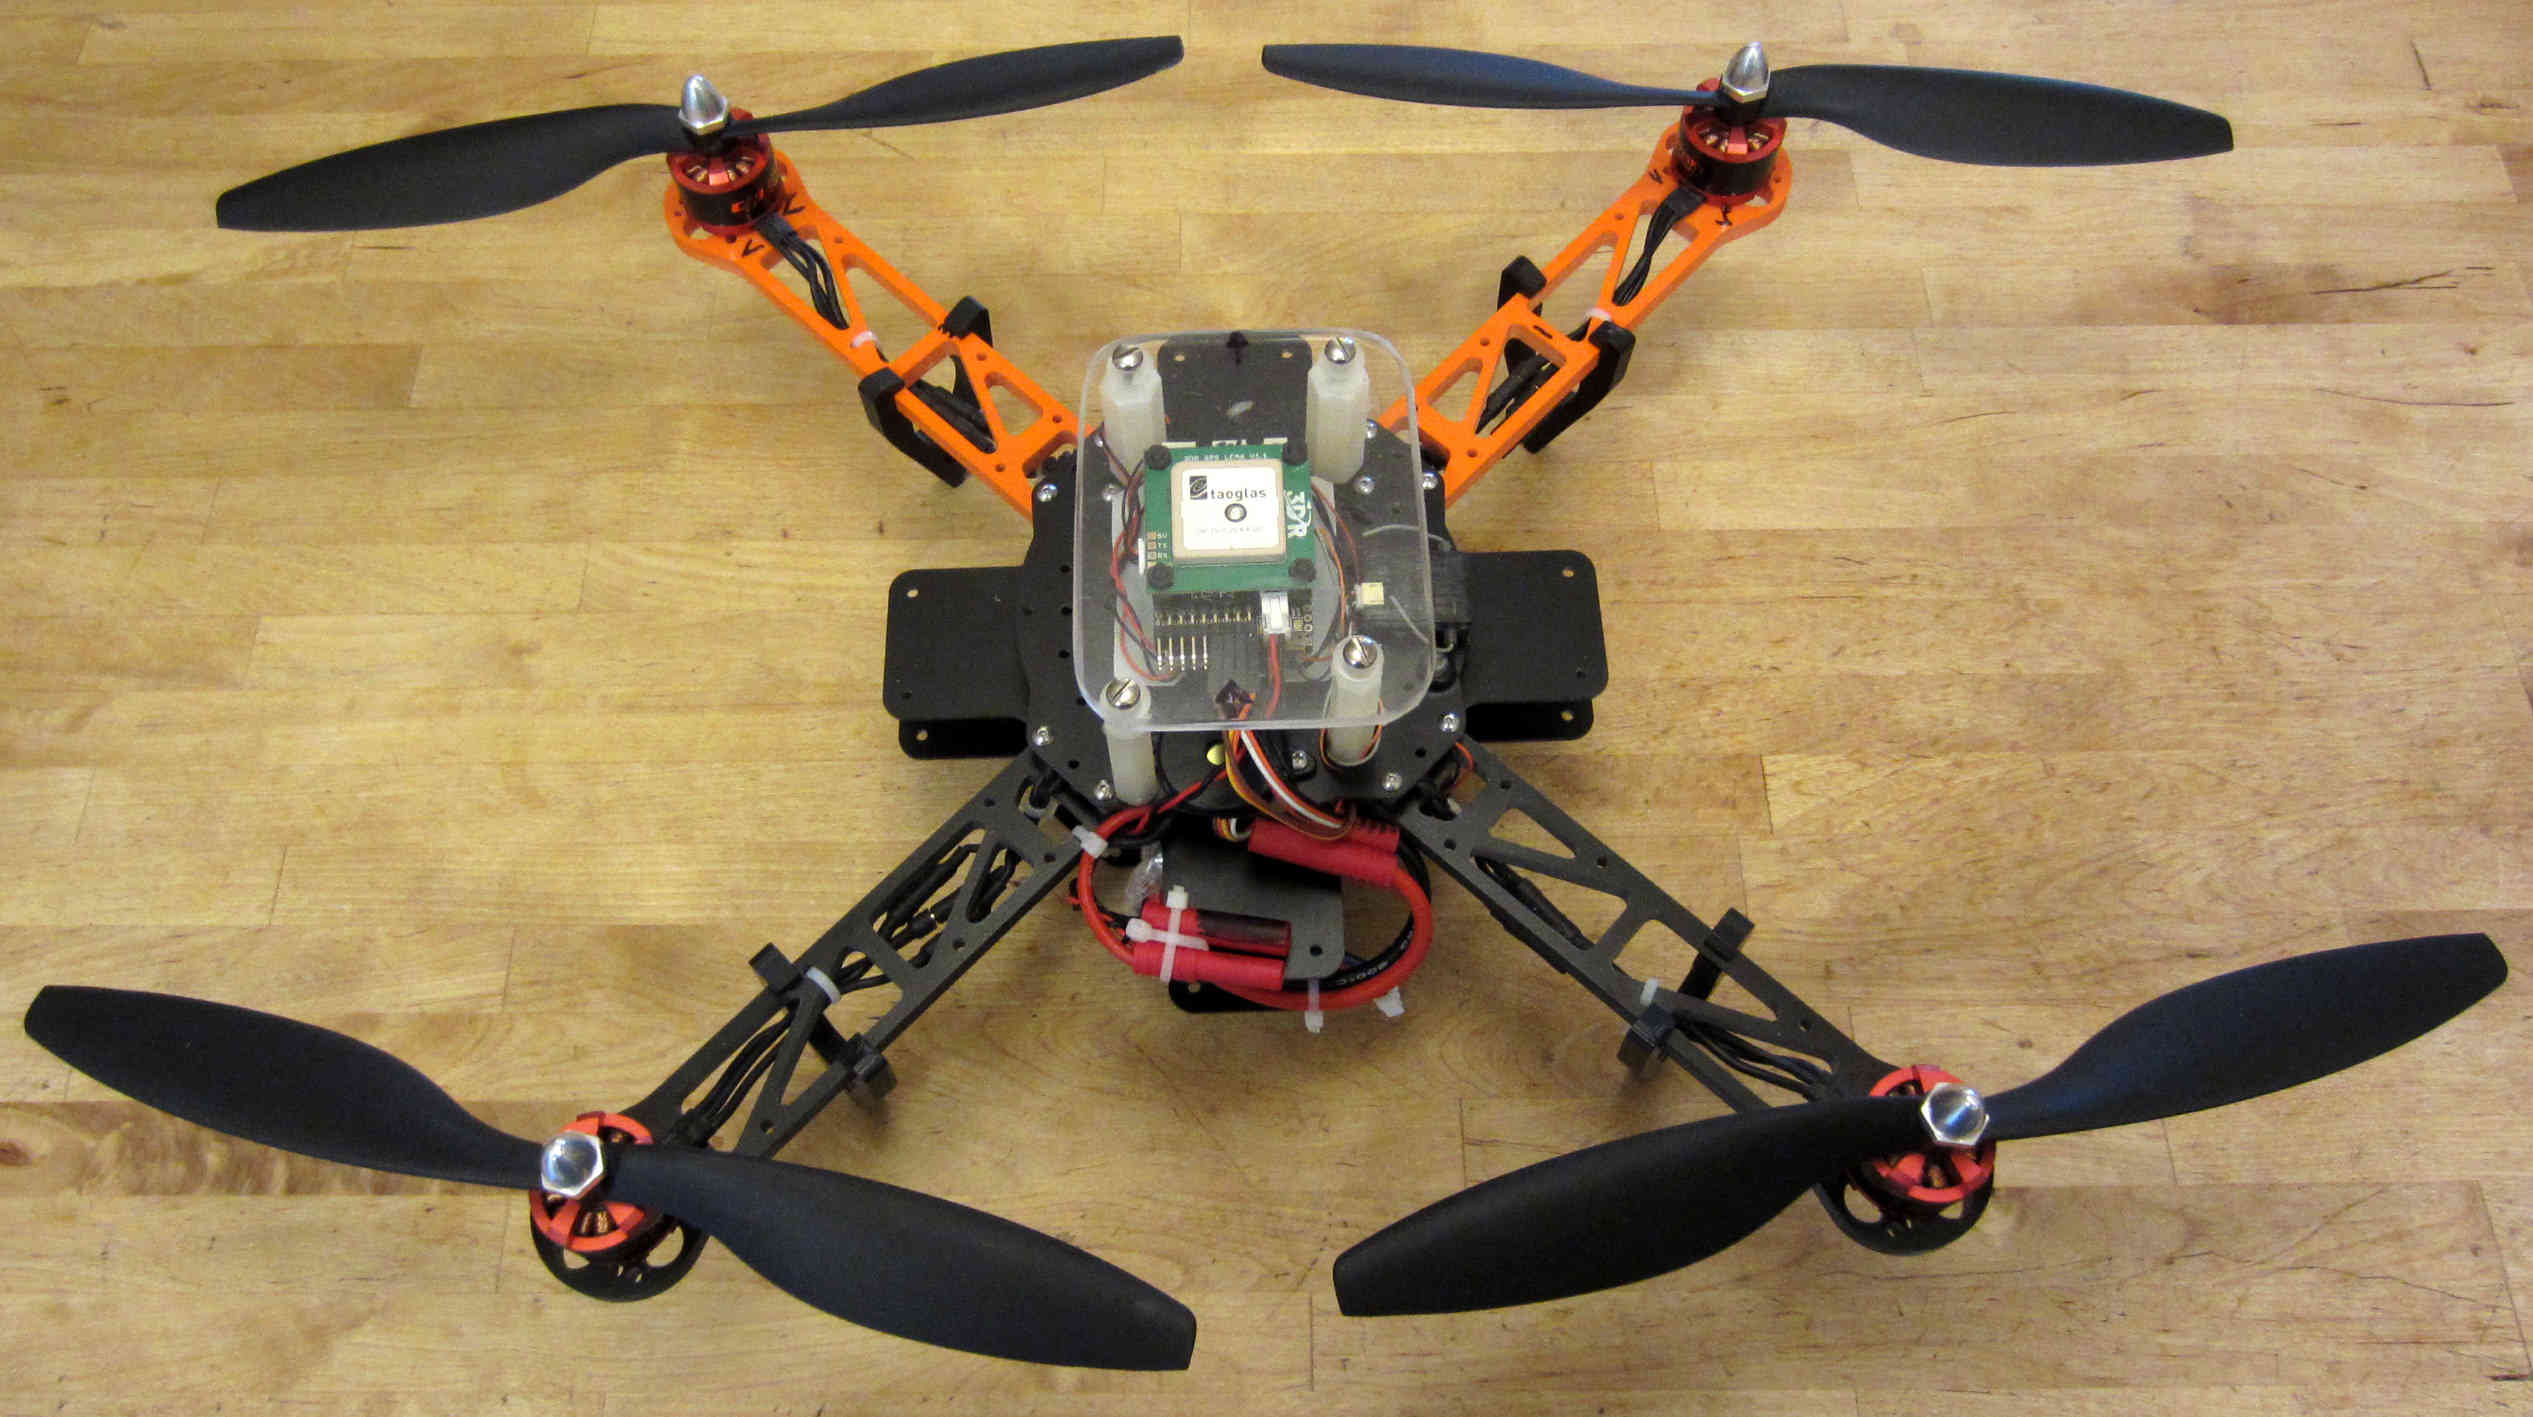
The Hoverthings Flip 380 Sport Frame is billed as the most indestructible frame ever.
It uses incredibly stiff and strong CNC machined 1/4” thick Fiberglass arms and G10 Fiberglass center plates.
It can incorporate the same motors and ESCs as used in the DJI Flamewheel and can use up to 10” propellers.
I purchased the Flip Sport Kit plus an extra pair of “tab” type center sections and extra 7/8” spacers.
The extra center plates mount below the stock plates on 7/8” spacers to accommodate the battery and flight gear.
I am using 4 of the stock DJI Flamewheel motors and a special 4 in 1 ESC placed between the center plates of the copter.
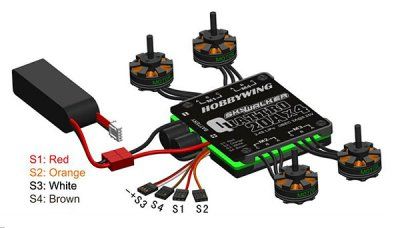
The 4 in 1 ESC produces much less RF and DC interference and is neater than 4 ESCs and a power distribution board.
I am using GemFan DJI hub compatible 10” carbon filled propellers because they are very tough and very efficient.
My goal is to build an even tougher and higher performance copter than the DJI F450 Flamewheel - inexpensively.
Although it’s a small copter the Flip is powerful and agile enough to use FPV video and/or a GoPro Camera and brushless gimbal.
Here is a link to the Hoverthings Flip Sport Quadcopter Wiki Build Page using a Pixhawk autopilot.
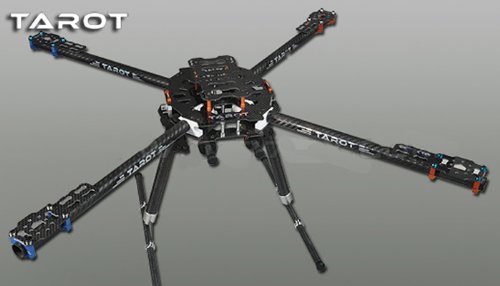
The Tarot 650 is a carbon fiber frame that is quite large for a QuadCopter and it can incorporate up to 17” propellers.
I am using 360kv slow speed, large diameter Pancake Motors designed to turn the more efficient large propellers at low speeds.
I will be using a variety of 14” to 17” propellers to explore performance and efficiency at various propeller diameters.
Although the Flip Sport build shown above could be appropriate for a first QuadCopter, this Tarot 650 build is definitely not.
This quad is big enough to serve as a heavy lift or long endurance copter or to carry a big video or still camera, but:
For lifting a 2KG payload with a quadcopter you need some serious motor and some serious prop.
Four Tigermotor MN4010 475 KV motors at $86.00 each, four 15 x 5 or 16 x 5 props and four high quality 30 amp ESCs.
It needs 10,000mah of 4 cell Lipo batteries (two 5000’s) to achieve approximately ~10 minutes of flight time at 4KG total weight.
It should be capable of lifting 4 KG total (including 2KG payload) and leave about 50% reserve thrust (minimum needed) (6kg total).
You will need 16” x 5 props to achieve the thrust and efficiency necessary to lift 4KG total with reasonable flight times.
That is why the bigger motors with the lower KV are required and they need to be high quality to withstand continuous high output.
It is very highly recommended that you do not attempt to construct one of these for your first build.
A really handy link for quickly calculating performance requirements for various multicopters and components: eCalc
Or Perhaps a really tiny little `250 sized $10.00 frame <http://www.hobbyking.com/hobbyking/store/__47075__HobbyKing_FPV250_Quad_Copter_A_Mini_Sized_FPV_Multi_Rotor_kit_.html>`__ with FPV capability you can fly indoors or out.
Scratch Built
Although this is often attempted by those who have never used a multicopter, it very seldom turns out well.
At the simplest level a functioning QuadCopter can be built out of sticks or dowels and plywood that will fly.
But it is very unlikely to fly well or to be very serviceable or to well tolerate less than perfect “landings”.
And this is no way to save money, RTF, Kits and ARF include high quality matched components and actually cost less.
Even if you are an experienced model builder, machinist or engineer, DO NOT START HERE!
Multicopters have their whole own set of flight dynamics and structural demands.
Until you have become experienced with them you stand virtually no chance of designing and making a worthwhile MultiCopter.
There is a really lovely QuadCopter design made by a newbie from bent sheet aluminum on our site right now.
Unfortunately sheet aluminum is soft, the copter is heavy and hard landings are common so a very bent copter is inevitable.
Even if you are very experienced, you will certainly need to make several copters before you achieve a worthwhile design.
I won’t say Experts only, but you really need to go through at least 3 or 4 commercial MultiCopters before you even think about doing this.
I have made over a dozen different CAD designs so far and have not yet built one, I will make one, but I’m not ready yet and I know it.
Brand Name Ready to Fly
A few words about the Brand Name Ready To Fly QuadCopters like the Parrot, the DJI Phantom and the Blade 350QX.
Within the scope of their capabilities these are generally well made and often a reasonable bargain for what they do.
But they are also not easily modified or improved on and are not easy to upgrade to a more powerful autopilot like the Pixhawk.
So although they are a moderately capable one stop solution, they can also be a bit of a costly dead end.
You can put together a Flamewheel ARF kit with a top end Pixhawk autopilot for about the same money and be way ahead.
Which Approach is Right for You
It is very important to match your approach to your capability level, if you overreach you can end up with a negative experience.
It is also much more important to take a robust and conservative approach than to try to do everything the first time out.
The simplest approach is to get a Ready to Fly system or an All Inclusive Kit.
However, a good Almost Ready To Fly kit plus some carefully chosen components can also result in an outstanding copter.
The ARF approach can often cost somewhat less and enable you to construct a copter that is specifically tailored to your needs.
The Frame Kit approach presumes that you have sufficient knowledge to specify appropriate components that will work together.
But it does let you put together a copter that is specifically optimized for your needs and desires.
Unless you find and scrupulously follow a comprehensive article detailing a specific “build” a Frame Kit should not be your first copter.
Clearly that goes double for Scratch Built. It isn’t actually all that hard to build a MultiCopter frame.
But the overall process and component matching to make it work well is really for the experienced MultiCopter operator / builder.
There are expensive, high end Multicopters, which are generally oriented to commercial photo or video use and outside our scope here.
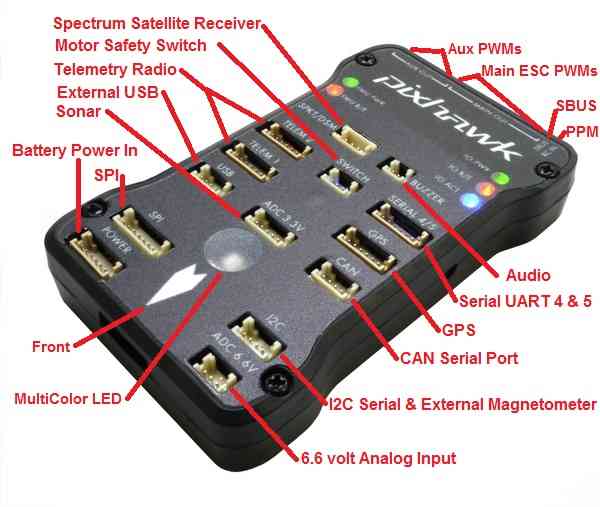
All of the Copters I have and will be putting together incorporate a Pixhawk autopilot
These are the best and most capable autopilots available and they have great DIYDrones community support.
Beware of clones and counterfeits, they often have small differences that end up making them completely unusable.
Don’t say I didn’t warn you: “Caveat Emptor” and “You get what you pay for”.