SITL on Windows using WSL
Before following these instructions please following Setting up the Build Environment using WSL for Windows 10 and 11. For Windows10 users the sections detailing installing XWindows or VcXsrv are necessary for installation.
Once the above have been completed, using SITL under Windows WSL is nearly the same as Setting up SITL on Linux
Running SITL
Open an Ubuntu terminal under WSL, or use the VSCode Terminal
Navigate to one of the vehicle directories (in this case Copter) and call
sim_vehicle.pyto start SITL.cd ~/ardupilot/ArduCopter ../Tools/autotest/sim_vehicle.py --map --console
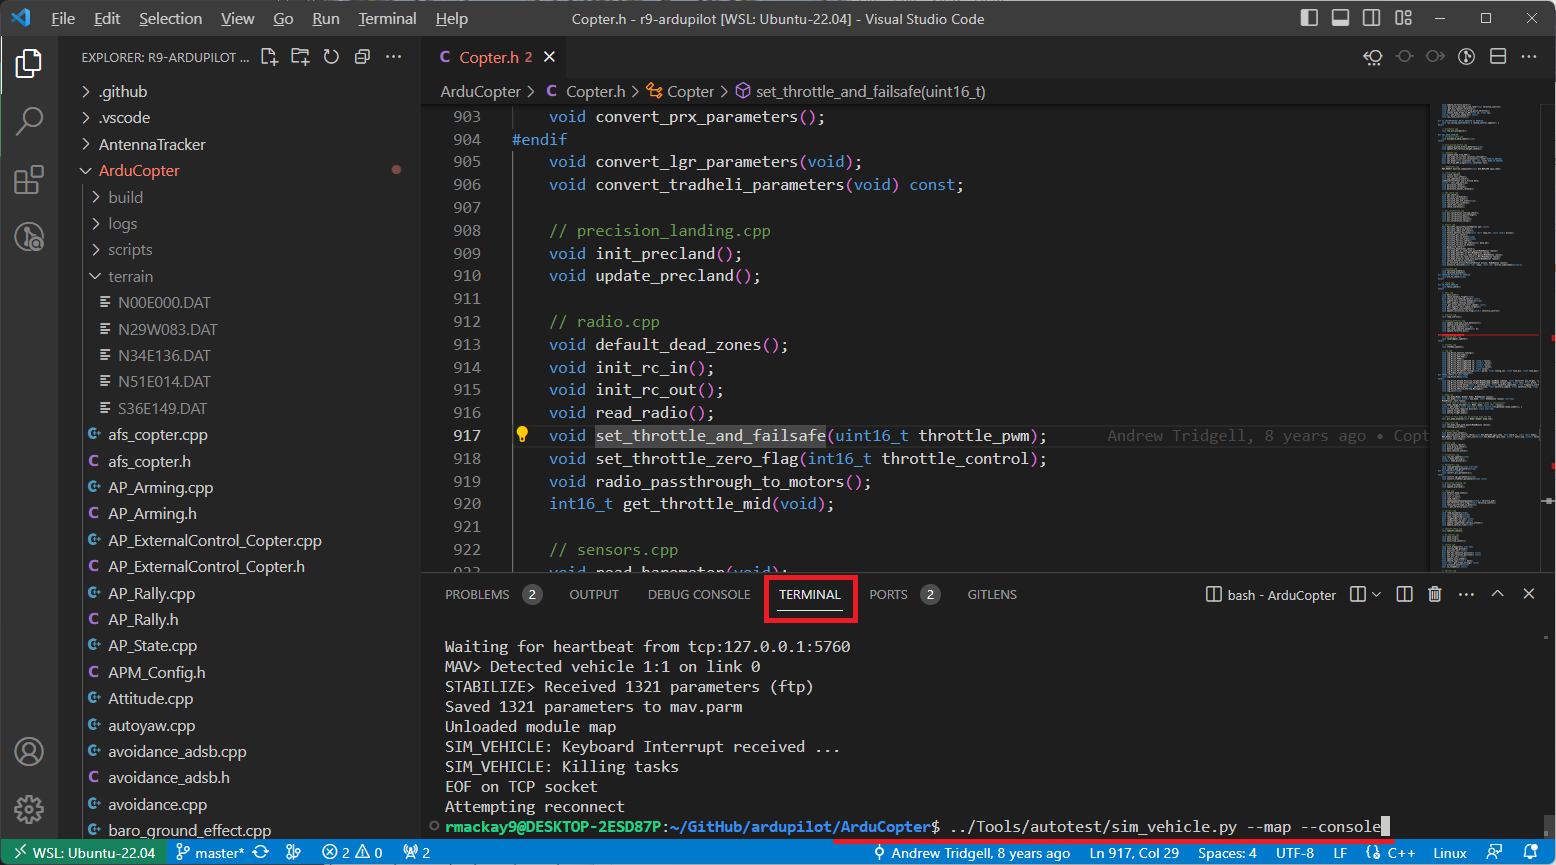
SITL and MAVProxy will start. MAVProxy displays three windows:
command prompt in which you enter commands to SITL
console which displays current status and messages
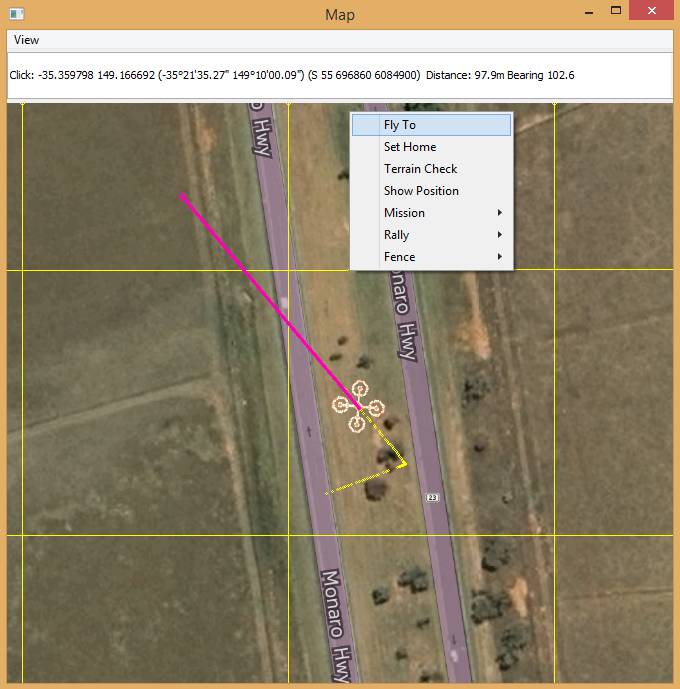
map that shows the current position of the vehicle and can be used (via right-click) to control vehicle movement and missions.
Tip
It is useful to arrange the windows as shown above, so you can observe the status and send commands at the same time.
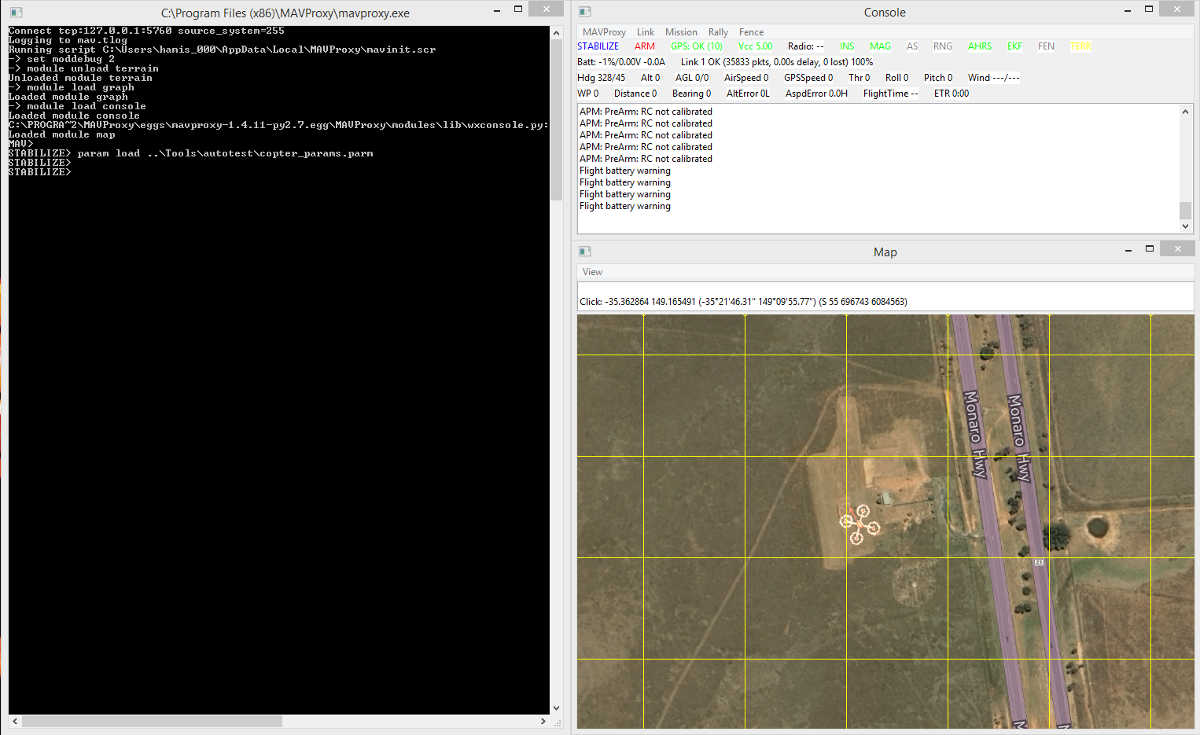
Send commands to SITL from the command prompt and observe the results on the map.
For example, change to GUIDED mode, arm the throttle, and then takeoff:
mode guided
arm throttle
takeoff 40
Watch the altitude increase on the console.
Note
Takeoff must start within 15 seconds of arming, or the motors will disarm.
Change to CIRCLE mode and set the radius to 2000cm
rc 3 1500
mode circle
param set circle_radius 2000
Watch the copter circle on the map.
When you’re ready to land you can set the mode to RTL (or LAND):
mode rtl
This is a very basic example. For links to more information on what you can do with SITL and MAVProxy see the section: Next Steps.
Connecting with another GCS
Mission Planner will often automatically connect to SITL if started (or re-started) after the MAVProxy console and map have appeared.
If the above does not work you can attach multiple additional ground control stations to SITL from MAVProxy. The simulated vehicle can then be controlled and viewed through any attached GCS.
First use the output command on the MAVProxy command prompt to
determine where MAVProxy is sending packets:
GUIDED> output
GUIDED> 2 outputs
0: 127.0.0.1:14550
1: 127.0.0.1:14551
This tells us that we can connect Mission Planner to either UDP port 14550 or 14551, as shown on the dialog below.
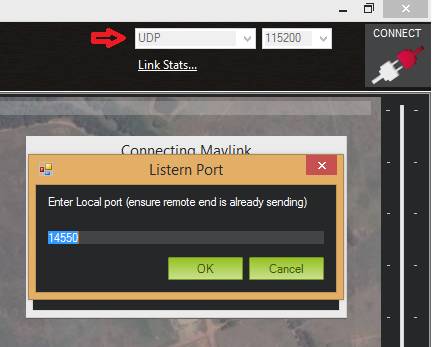
Mission Planner: Connecting to a UDPPort
Mission Planner can then be used to control the simulated vehicle in exactly the same way as though it were a real vehicle. We can reproduce the previous “takeoff-circle-land” example as shown below:
Next Steps
SITL and MAVProxy can do a whole lot more than shown here, including manually guiding the vehicle, and creating and running missions. To find out more:
Read the MAVProxy documentation.
See Using SITL for ArduPilot Testing for guidance on flying and testing with SITL.