Warning
ARCHIVED ARTICLE
Warning
ArduPilot no longer supports make. The following article should be referencing our new build system, waf and needs updating.
ARCHIVED:Editing/Building with Eclipse on Windows
This article shows how you can setup Eclipse for editing and building binaries for Pixhawk/STM32 boards. It is not possible to build on Windows for other boards.
Note
Ensure that you have Java (32-bit) installed before Eclipse can run or else you’ll get Java Error Code 13 due to 32/64-bit version mismatch. Java can be installed here.
Preconditions
Follow the instructions in Building for Pixhawk on Windows with Make to download the required source code (ardupilot, PX4Firmware and PX4NuttX) and toolchain.
The PX4 toolchain includes a preconfigured version of Eclipse that has been set up for ArduPilot development.
Starting Eclipse
Start Eclipse using the PX4 Eclipse link installed with the PX4 toolchain. The link can be accessed from either:
The Windows Start menu (Start | All Programs | PX4 Toolchain | PX4 Eclipse), or
You can directly run the file C:\Pixhawk_Toolchain\toolchain\msys\1.0\px4_eclipse.bat
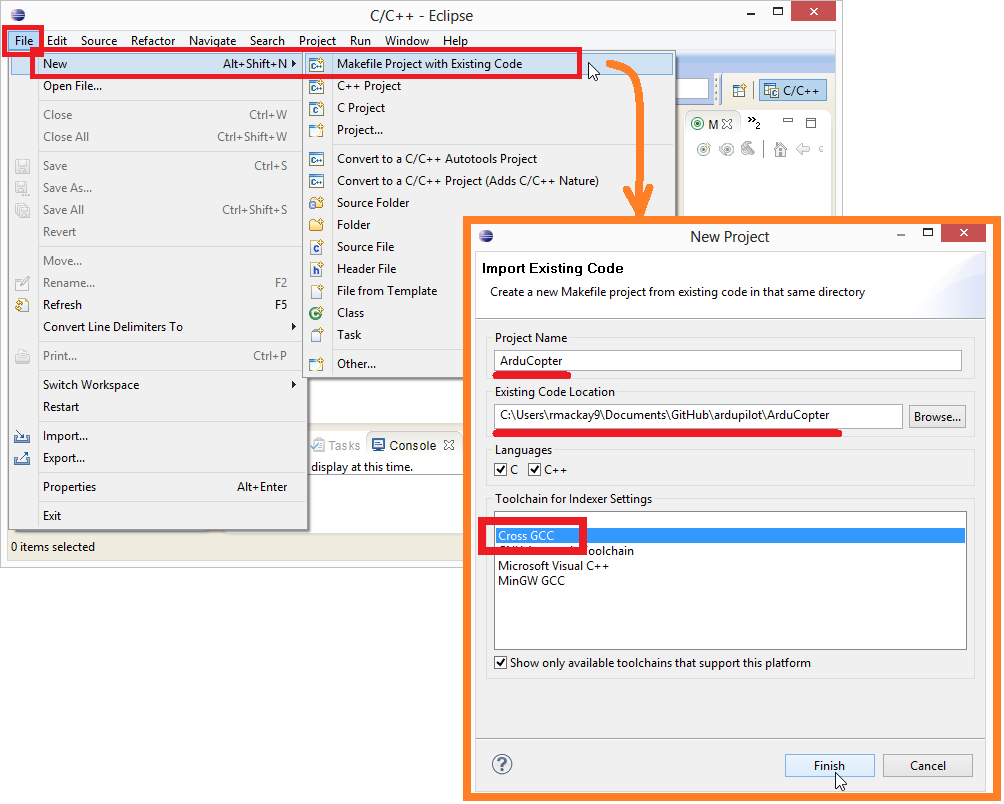
Creating the Project
The project can be created by doing the following:
Select File | New | Make Project with Existing Code
Fill in the Project Name and set the Existing Code Location to the Copter directory
Set the Toolchain to be Cross GCC” and press Finish
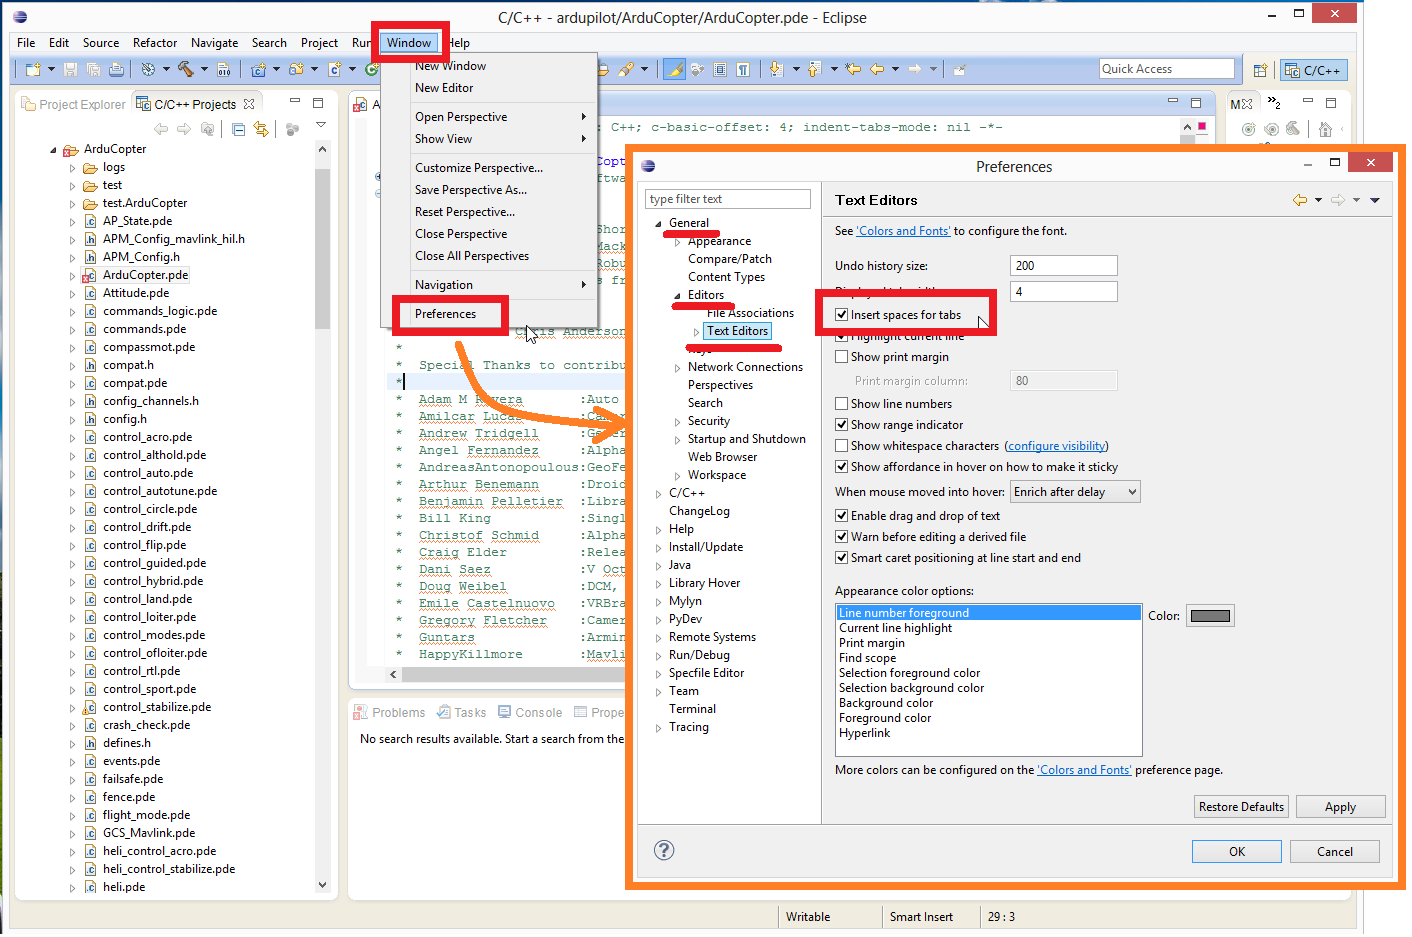
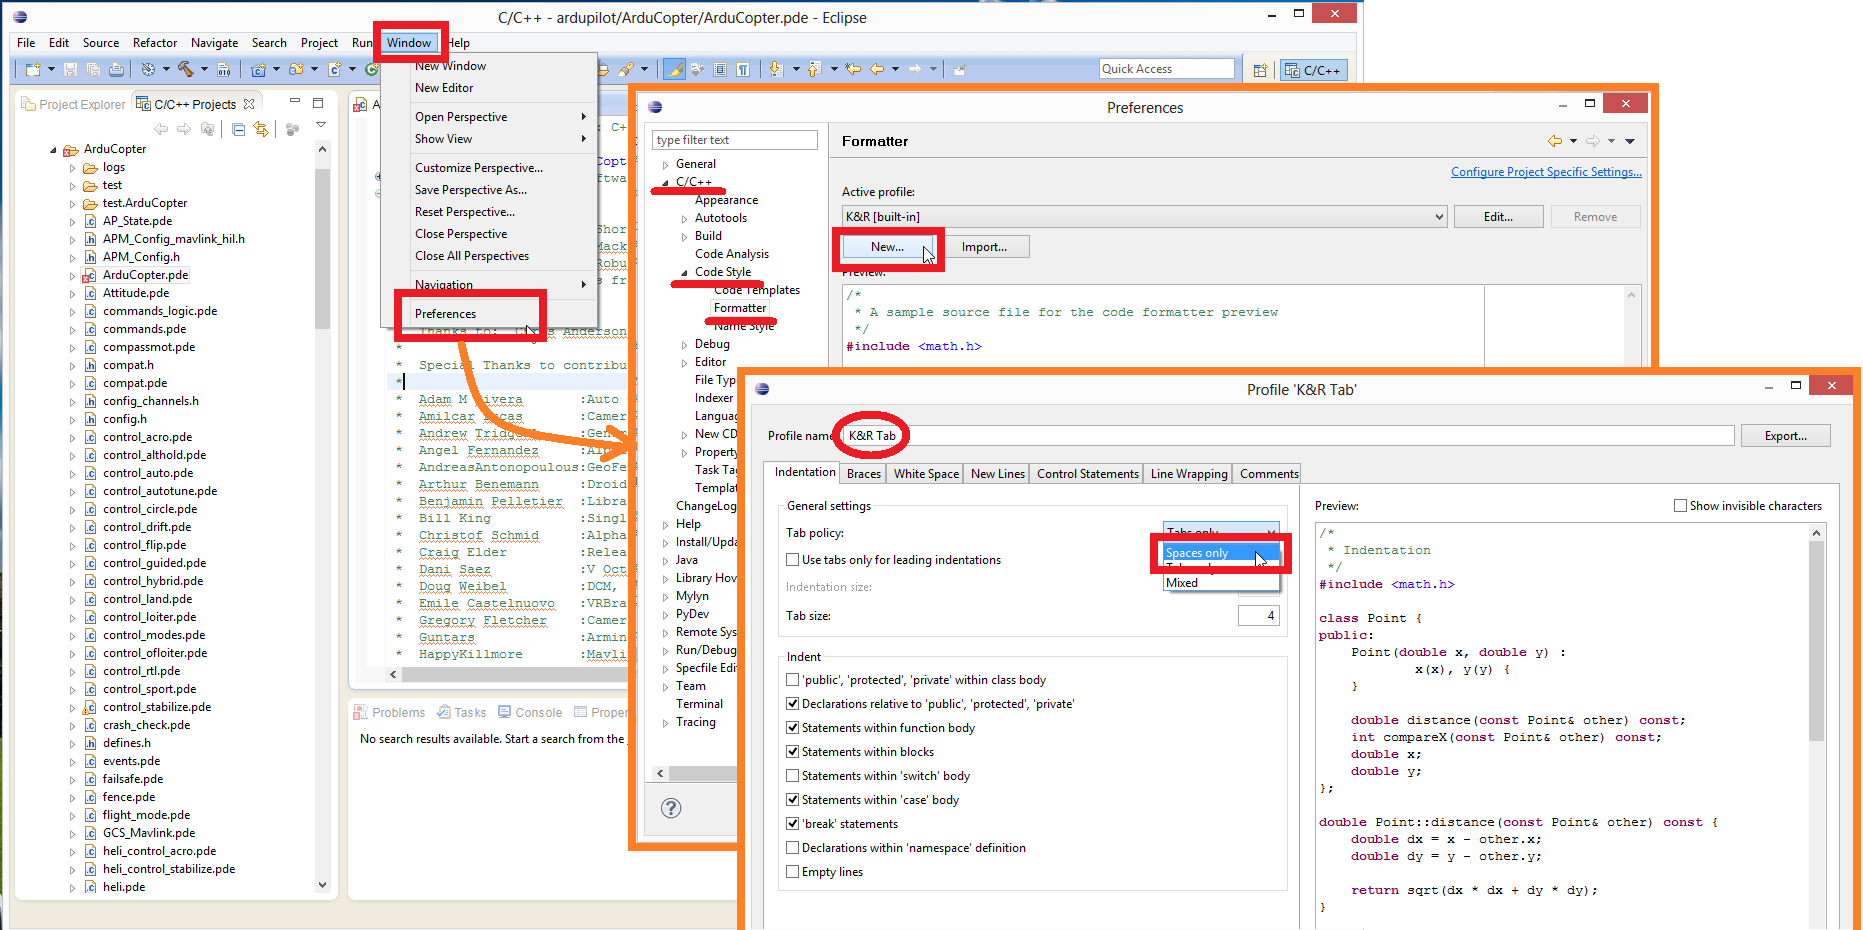
Use spaces instead of tabs
By default Copter, Plane and Rover use spaces in place of tabs. This can be set to the default in Eclipse by changing two settings:
Select Window | Preferences | General | Editors | Text Editors | Insert spaces for tabs.
Select Windows | Preferences | C/C++ | Code Style | Formatter and creating a new Profile (i.e. “K&R Tab”) which has the “Indentation” set to “Spaces only”
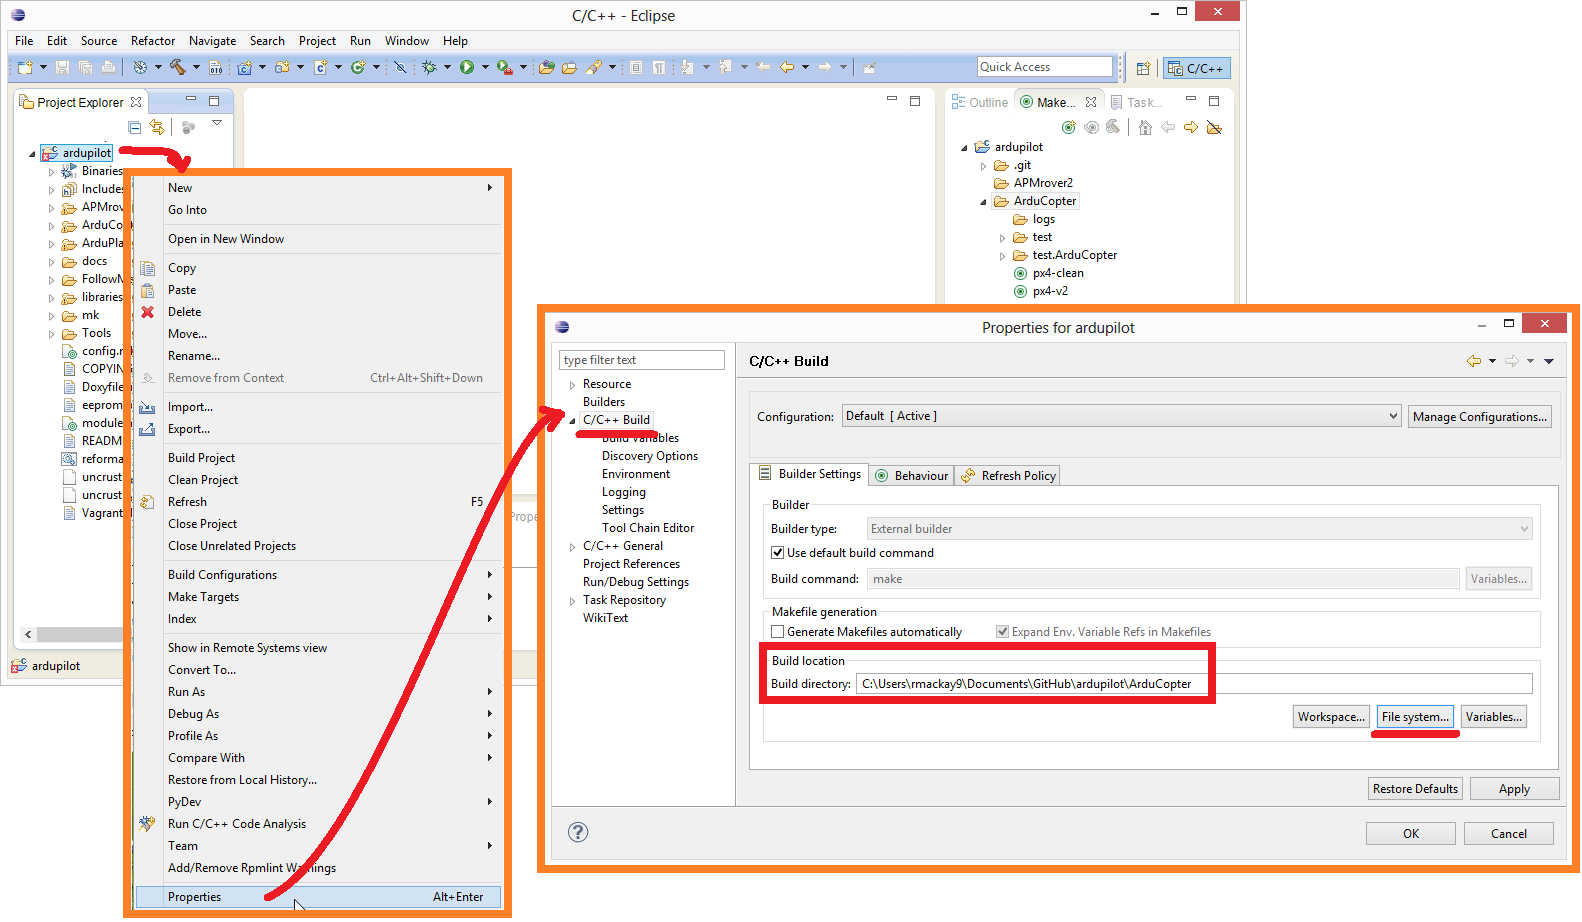
Specify build location
In the Project Explorer right-mouse-click on the ardupilot folder and select Properties. Then under C/C++ Build set the “Build location” to the Copter or Plane directory as shown below.
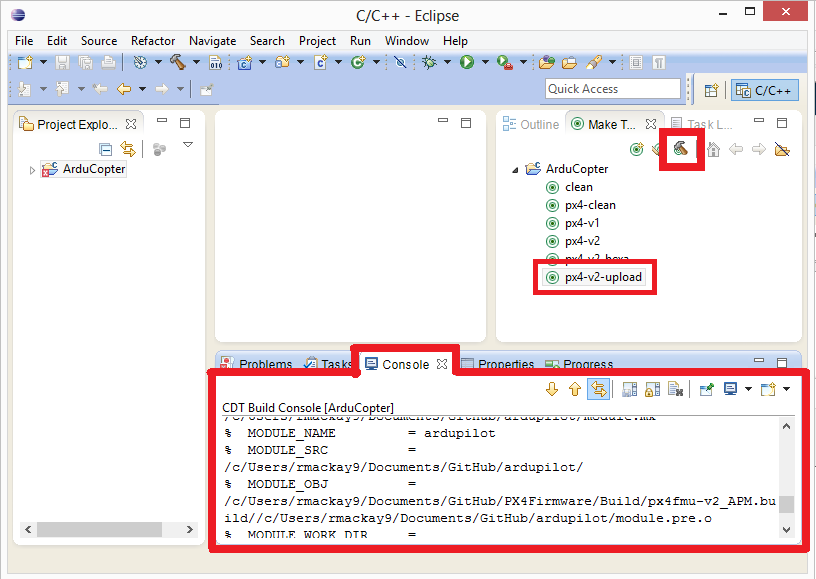
Specify make targets
In the Make window on the right create any of these make targets (the full list of possible targets can be found in px4_targets.mk):
|
Build both PX4 and PixHawk firmware for a quadcopter |
|
Build the Pixhawk firmware for a copter. in the new version you can specify the frame type (quad, hexa, octo) after flashing the pixhawk |
|
“clean” the ardupilot directory |
|
“clean” the PX4Firmware and PX4NuttX directories so the next build will completely rebuild them |
|
Build and upload the Pixhawk firmware for a quad (i.e. no need to do step #7 below) |
For example, the image below shows how you might define a px4-v2
make target.

Building from Eclipse
The make target can be built by pushing the green circle + hammer icon. The build progress will appear in the Console window.
The firmware will be created in the vehicle directory (e.g. ArduCopter) and have the file extension .px4.