ODroid Wifi Access Point for sharing files via Samba
Overview
This page will show you how to setup an Odroid with a Wifi AccessPoint so that the Odroid’s hard drive can be accessed and modified from another computer. This is primarily aimed at allowing access to images, videos and log files on the Odroid. The procedure makes use of hostapd, Samba and dhcp.
To accomplish this you will need:
Odroid U3 running Ubuntu 14.04 as described on this page.
A Wifi dongle capable of “master” mode (aka “AP” or access point). These exact instructions were performed with an $8 Buffalo Airstation 11n 11g/b USB2 wireless LAN terminal purchased in Japan.
All the instructions below can be implemented by connecting a keyboard, mouse and screen to the Odroid or using ssh (via Putty).
Install all the required packages
Becomes super user:
sudo -s
Install hostapd, samba and all the other required packages:
apt-get install hostapd samba samba-common python-glade2 system-config-samba isc-dhcp-server
Setting up the Access Point
After first ensuring the wifi dongle is plugged into the Odroid,
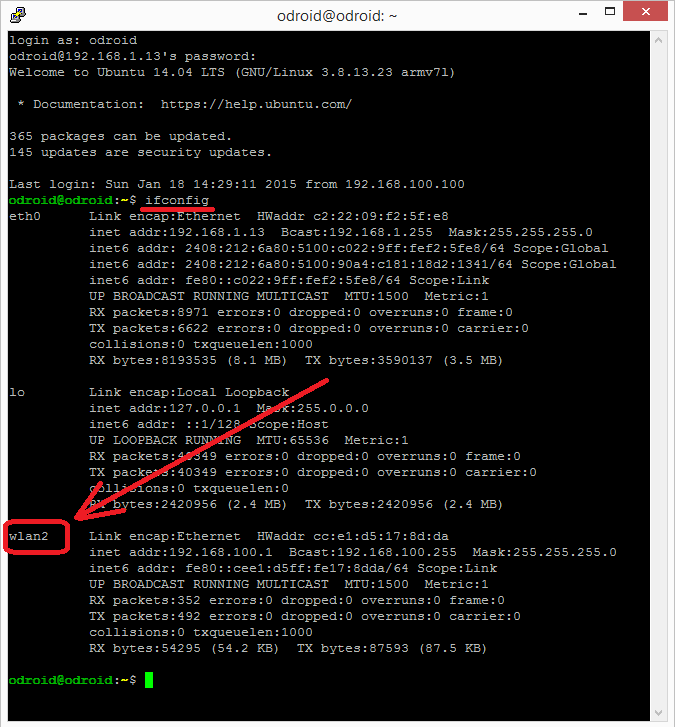
Find the name of your wifi dongle by typing ifconfig (normally it
will be “wlan0” or “wlan2“)
Check the wifi dongle supports “AP” mode:
iw list
A huge list of information will be displayed, you are looking for a section called “Supported interface modes:” followed by “* AP”. If you cannot find this then these instructions will not work and you should try with another dongle.
Supported interface modes:
* IBSS
* managed
* AP
Use your favourite editor (nano or vi perhaps) to edit the
/etc/network/interfaces file and add an entry for your wifi dongle.
Note you should replace “wlan2” if your dongle has a different name:
auto wlan2
iface wlan2 inet static
address 192.168.100.1
netmask 255.255.255.0
Edit the /etc/hostapd/hostapd.conf file and ensure it looks like
below
vi /etc/hostapd/hostapd.conf
interface=wlan2   <-- change "wlan2" to name of wifi dongle found above
driver=nl80211
ssid=MyDrone
hw_mode=g
channel=11
macaddr_acl=0
auth_algs=1
ignore_broadcast_ssid=0
wpa=2
wpa_passphrase=MyDrone12   <-- password for clients to access the wifi access point
wpa_key_mgmt=WPA-PSK
wpa_pairwise=TKIP
rsn_pairwise=CCMP
Try starting hostapd:
hostapd /etc/hostapd/hostapd.conf
If this fails try replacing the /usr/sbin/hostapd and hostapd_cli files with the version found in the downloads area.
You will also need to install the libnl-dev package:
apt-get install libnl-dev
To make the hostapd service run whenever the odroid is started edit the /etc/init.d/hostapd file and ensure the line below appears:
DAEMON_CONF=/etc/hostapd/hostapd.conf
Setting up Samba
Create directories you wish to share:
mkdir -p /mydrone
mkdir -p /mydrone/images
Edit the samba config file (if not present create a new file):
vi /etc/samba/smb.conf
[global]
workgroup = MyDroneGroup
server string = Drone Server
netbios name = mydrone
security = user
map to guest = bad user
dns proxy = no
#===== Share Definitions =====
[images]
path = /mydrone/images
browsable = yes
writable = yes
guest ok = yes
read only = no
The this config will create a “images” share with no restriction on clients adding or deleting files.
Setting up DHCP
Edit the /etc/dhcp/dhcpd.conf file and ensure it has all the lines listed below added/uncommented:
vi /etc/dhcp/dhcpd.conf
# option definitions common to all supported networks...
option domain-name "mydrone.local";
option domain-name-servers dns.mydrone.local
default-lease-time 600;
max-lease-time 7200;
authoritative;
log-facility local7;
subnet 192.168.100.0 netmask 255.255.255.0 {
range 192.168.100.100 192.168.100.200;    <-- clients will get IP addresses in this range
}
Add all possible client IP addresses to the /etc/hosts file:
vi /etc/hosts
127.0.0.1 localhost
192.168.100.1 odroid-pc odroid
192.168.100.100 client100
192.168.100.101 client101
192.168.100.102 client102
....
192.168.100.200 client200
Adding all the client IP address can be accomplished more quickly with the following command:
(for i in $(seq 100 200); do echo 192.168.100.$i client$i; done) >> /etc/hosts
Restart the Odroid and with any luck an AP will be created and you will be able to connect as shown below.
Connecting from a Windows PC
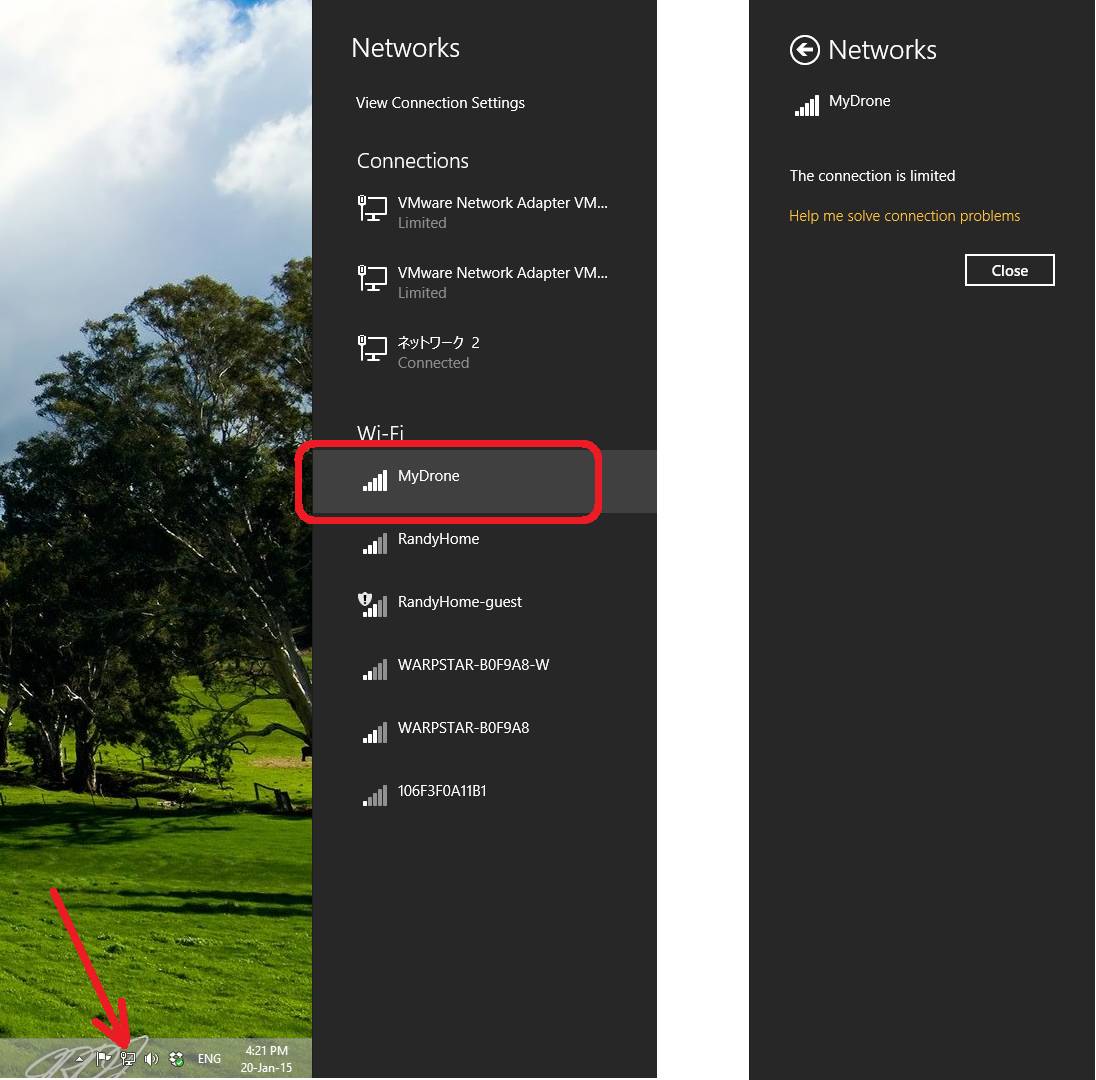
To connect from a Windows 8.1 machine click on the network icon near the clock and then click on “MyDrone”, “Connect” and after 30seconds or so it should connect with a message “The connection is limited” because the Odroid likely does not have access to the internet (this is ok).
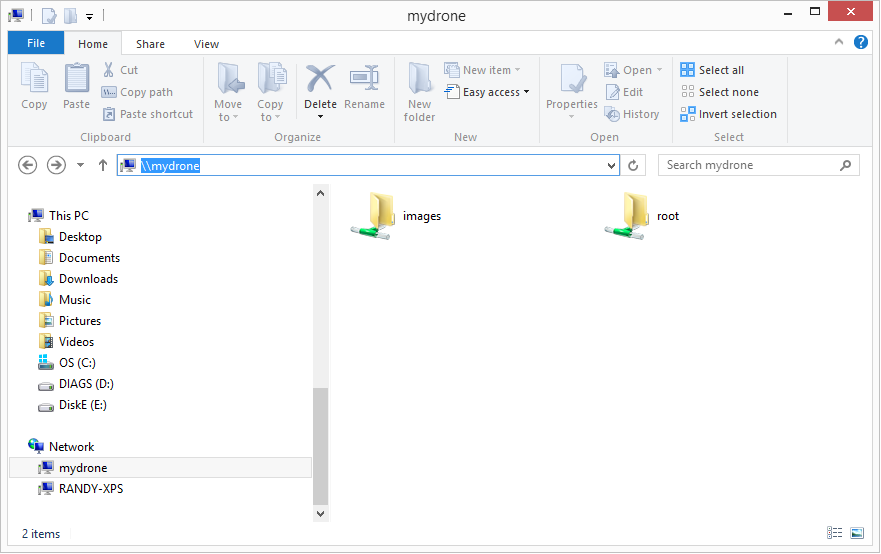
Open a File Explorer and type \\mydrone into the address bar and the contents of the Odroid images directory should appear.
References
These pages were referenced during the creation of this document.