Calibration: Radio Calibration
This article explains how to calibrate your autopilot to work with your RC transmitter and receiver. See Autopilot calibration for other calibration tasks.
1 Prerequisites
Before preforming setup, ensure that:
The vehicle is completely built to flight condition.
Autopilot is connected to APM Planner and connected to Mavlink.
RC transmitter and receiver are bound and powered.
Propellers are removed.
2 Prepare transmitter
Turn on the transmitter, and verify that it is in airplane mode (APM needs airplane mode regardless of the platform type being piloted) and all trims are centered.
For Mode 1 transmitters, the left stick will control pitch and yaw, the right stick will control throttle and roll. For Mode 2 transmitters, the left stick will control throttle and yaw; the right stick will control pitch and roll. For either type of transmitter, the transmitter’s three-position switch should be attached to channel 5 and will control flight modes.
3 Calibrate
Select Radio Calibration to teach your autopilot to work with your RC transmitter and receiver. Select Start Calibration to begin. Read the instructions in the following prompt and select OK.
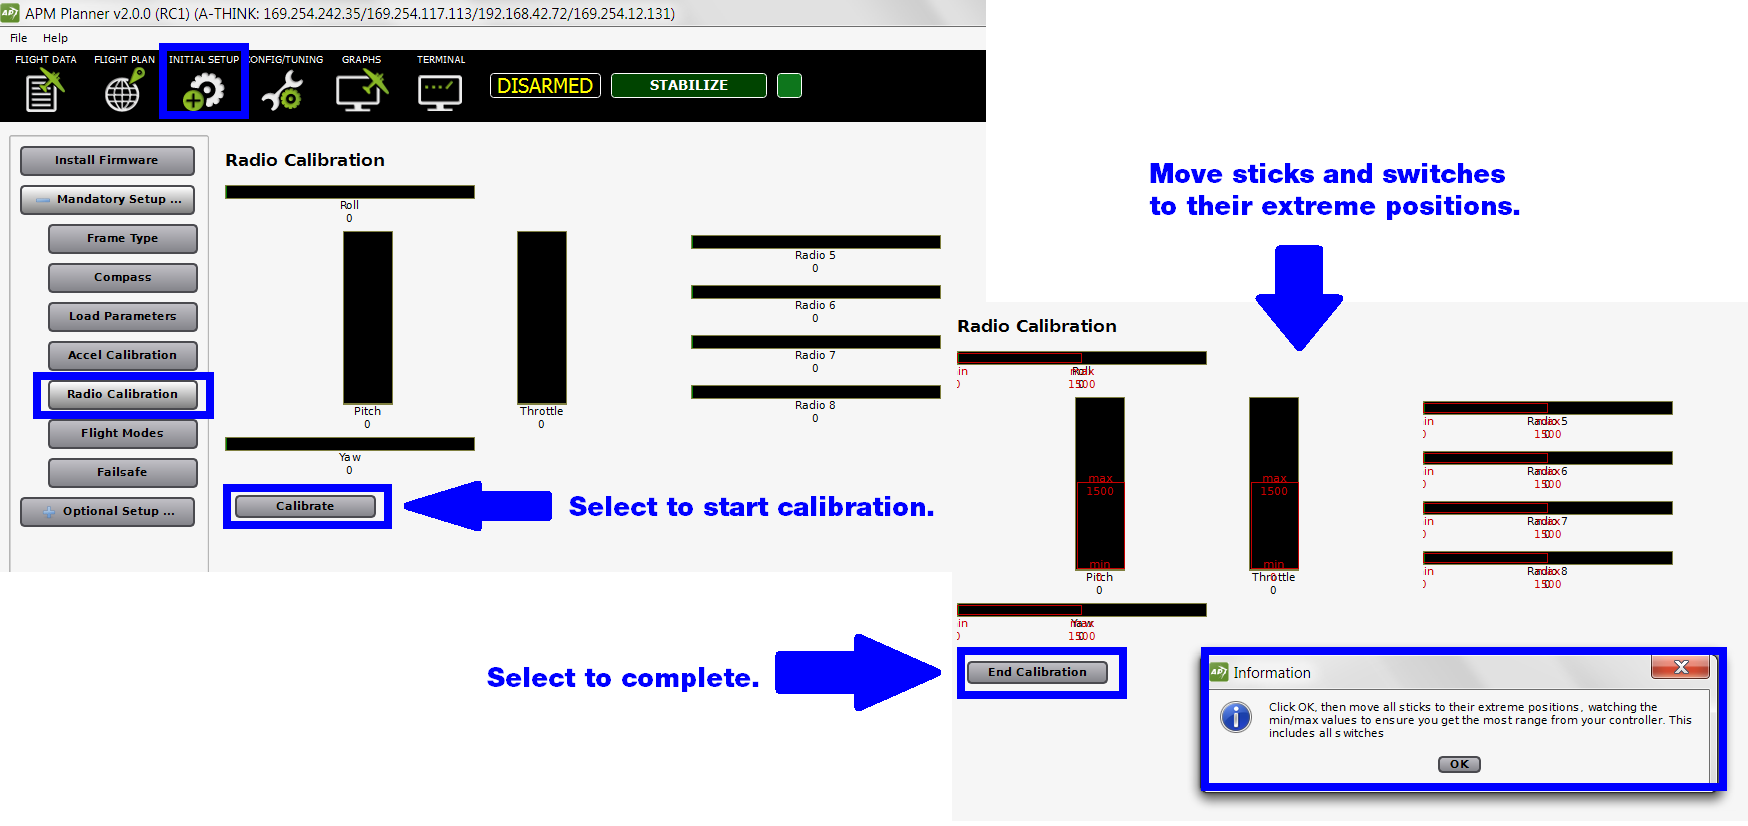
APM Planner2: Radio CalibrationScreen
Select Start Calibration to begin. Move both sticks in the largest circle possible so that they reach their complete range of motion. Move the Ch 5 and 6 toggle switches through their range of positions.
Your transmitter should cause the following control changes:
Channel 1: low = roll left, high = roll right.
Channel 2: low = pitch forward, high=pitch back.
Channel 3: low = throttle down (off), high = throttle up.
Channel 4: low = yaw left, high = yaw right.
Watch the red bars on the screen to ensure that the correct controls activate for each stick movement. If the red bars move in the opposite direction that you’re moving the sticks, you will need to reverse the channel on your transmitter. Select End Calibration when complete. Resulting normal values are around 1100 for minimums and 1900 for maximums.