Building for NAVIO2 on RPi3
Overview
These instructions clarify how to build ArduPilot for the Navio2 board on the Navio2’s RPi3 board itself using Waf build system. These instructions assume the RPi3 has already been setup according to the manufacturer’s (i.e. Emlid’s) instructions here.
Alternatively you can follow Emlid’s instructions on how to build from source found here.
Setup
Use an ssh terminal program such as Putty to log into the Navio2 board’s RPI3.
Note
On Raspbian Stretch, one of the Python requirements might be missing, so please install future by
pip install future
Get git
Git is a free and open source distributed version control system that is used to manage ArduPilot codebase. Git is available on all major OS platforms, and a variety of tools exist to make it easier to get started.
Git command line
Ubuntu
Linux/Ubuntu users can install with apt :
sudo apt-get update
sudo apt-get install git
sudo apt-get install gitk git-gui
Windows and other Systems
download and install from git-scm.com’s download page
Recommended GUI Tools
The git command line, gitk and git-gui tools are the basics that all users should have installed and are available from a few places.
A comprehensive list of GUI tools are listed here on git-scm.com but here are a few of the developer favourites:
GitHub Desktop for Windows and Mac is an easy to use tool with good GitHub integration but has fewer features than other clients.
Sourcetree for Windows and Mac OSX is a full featured tool with a nice interface with many features including allowing individual lines from a file to be included in a new commit (simpler tools only allow the entire file to be included)
GitKraken is a a full featured tool for Windows, Mac and Linux
Clone ArduPilot repository
“Cloning” is git’s term for making a local copy of a remote repository (i.e. one held on the GitHub servers).
Developers should clone the main ArduPilot repository (if they simply want to download and compile the latest code) or their own fork (if they want to make changes to the source code and potentially submit changes back).
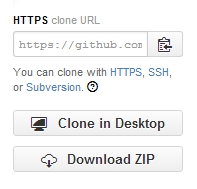
Instructions for commonly used tools are below but whichever tool is used, the URL for the source repo will be required. This can be found on the right side of the screen on each Github repository home page but in general the URL is:
https://github.com/ArduPilot/ardupilot.gitfor the main ardupilot repohttps://github.com/your-github-account/ardupilotfor your fork of the ardupilot repo
Cloning with the command line
open a terminal and navigate to the directory where you would like the clone to be stored
clone your fork:
git clone --recurse-submodules https://github.com/your-github-userid/ardupilot
cd ardupilot
Note
in case some firewalls do not allow ssh access which can cause the above submodule updates to fail, in this instance you can tell git to unilaterally use https through the following command:
git config --global url."https://".insteadOf git://
to use https protocols instead of the default git:// prefix.
Install some required packages
If you are on a debian based system (such as Ubuntu or Mint), we provide a script that will do it for you. From ardupilot directory :
Tools/environment_install/install-prereqs-ubuntu.sh -y
Reload the path (log-out and log-in to make permanent):
. ~/.profile
Now you should be able to build with waf as described in BUILD.md.
Note
At this point you have already installed the MAVProxy Ground Control Station (MAVProxy GCS) and are also ready to do Software In the Loop (SITL) simulations of the vehicle code. See SITL Simulator (Software in the Loop) and Setting up SITL on Linux. You are ready to not only build the code, but run your build in the ArduPilot SITL simulator.
Cleaning
If there have been updates to some git submodules you may need to do a full clean build. To do that use:
./waf clean
that will remove the build artifacts so you can do a build from scratch
Note
Waf should always be called from the ardupilot’s root directory.
To keep access to Waf convenient, use the following alias from the root ardupilot directory:
alias waf="$PWD/modules/waf/waf-light"
Configure
Choose the board to be used:
waf configure --board=navio2
Build
Now you can build arducopter. For copter use the following command:
waf --targets bin/arducopter
To build a helicopter, specify “arducopter-heli”. The following frame types are specified in the “Frame Type” item of the Mission Planner menu “INITIAL SETUP”.
Quad Hexa Octa Octa-Quad Y6 Heli Tri
In the end of compilation binary file with the name arducopter will be placed in ardupilot/build/navio2/bin/ directory.